Using Interact Passive
Setting up player character
To get started, create a new project based on Unreal Engine's Third Person Template.
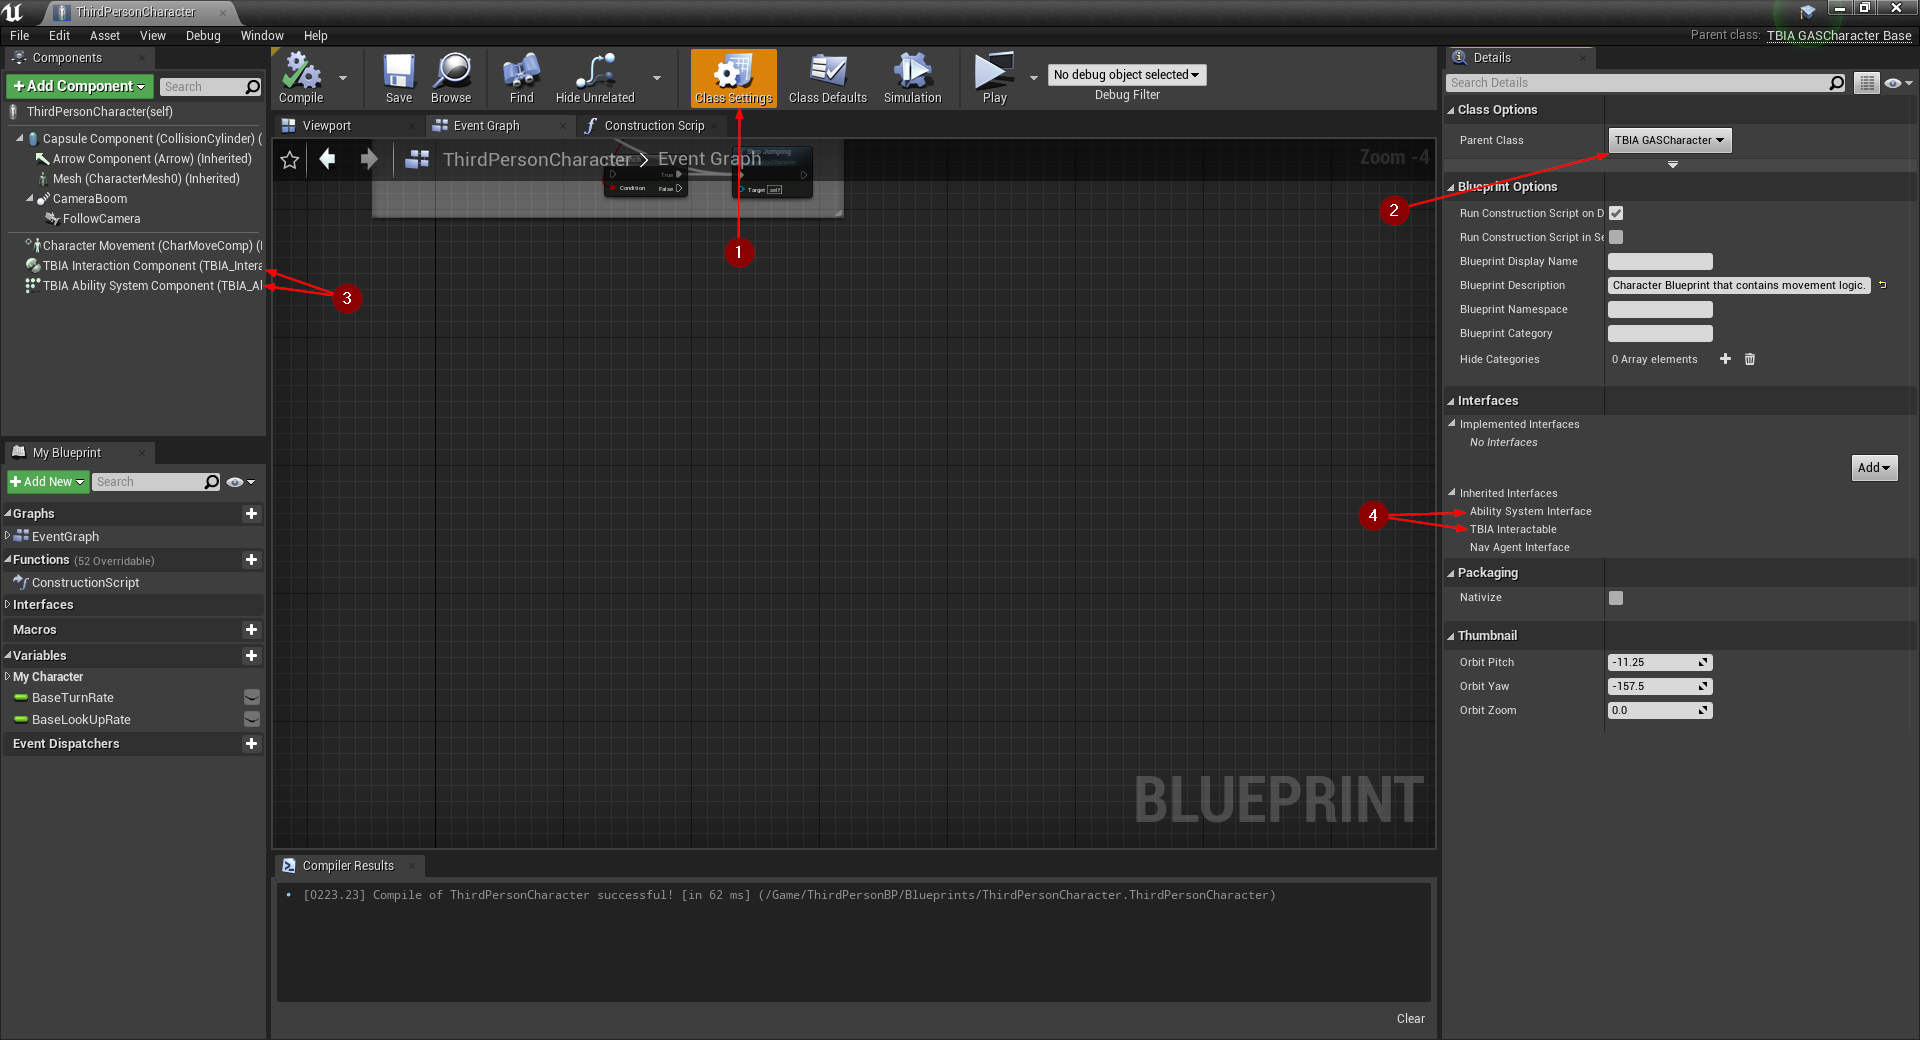
Open the ThirdPersonCharacter Blueprint and go to Class Settings 1.
Change the Parent Class 2 from Character to TBIA_GASCharacter.
After changing the Parent Class, two new components TBIA Interaction Component and
TBIA Ability System Component will appear 3.
Also note that your Character Blueprint now inherits two interfaces 4
Ability System Interface and TBIA Interactable that we will make use of in a moment.
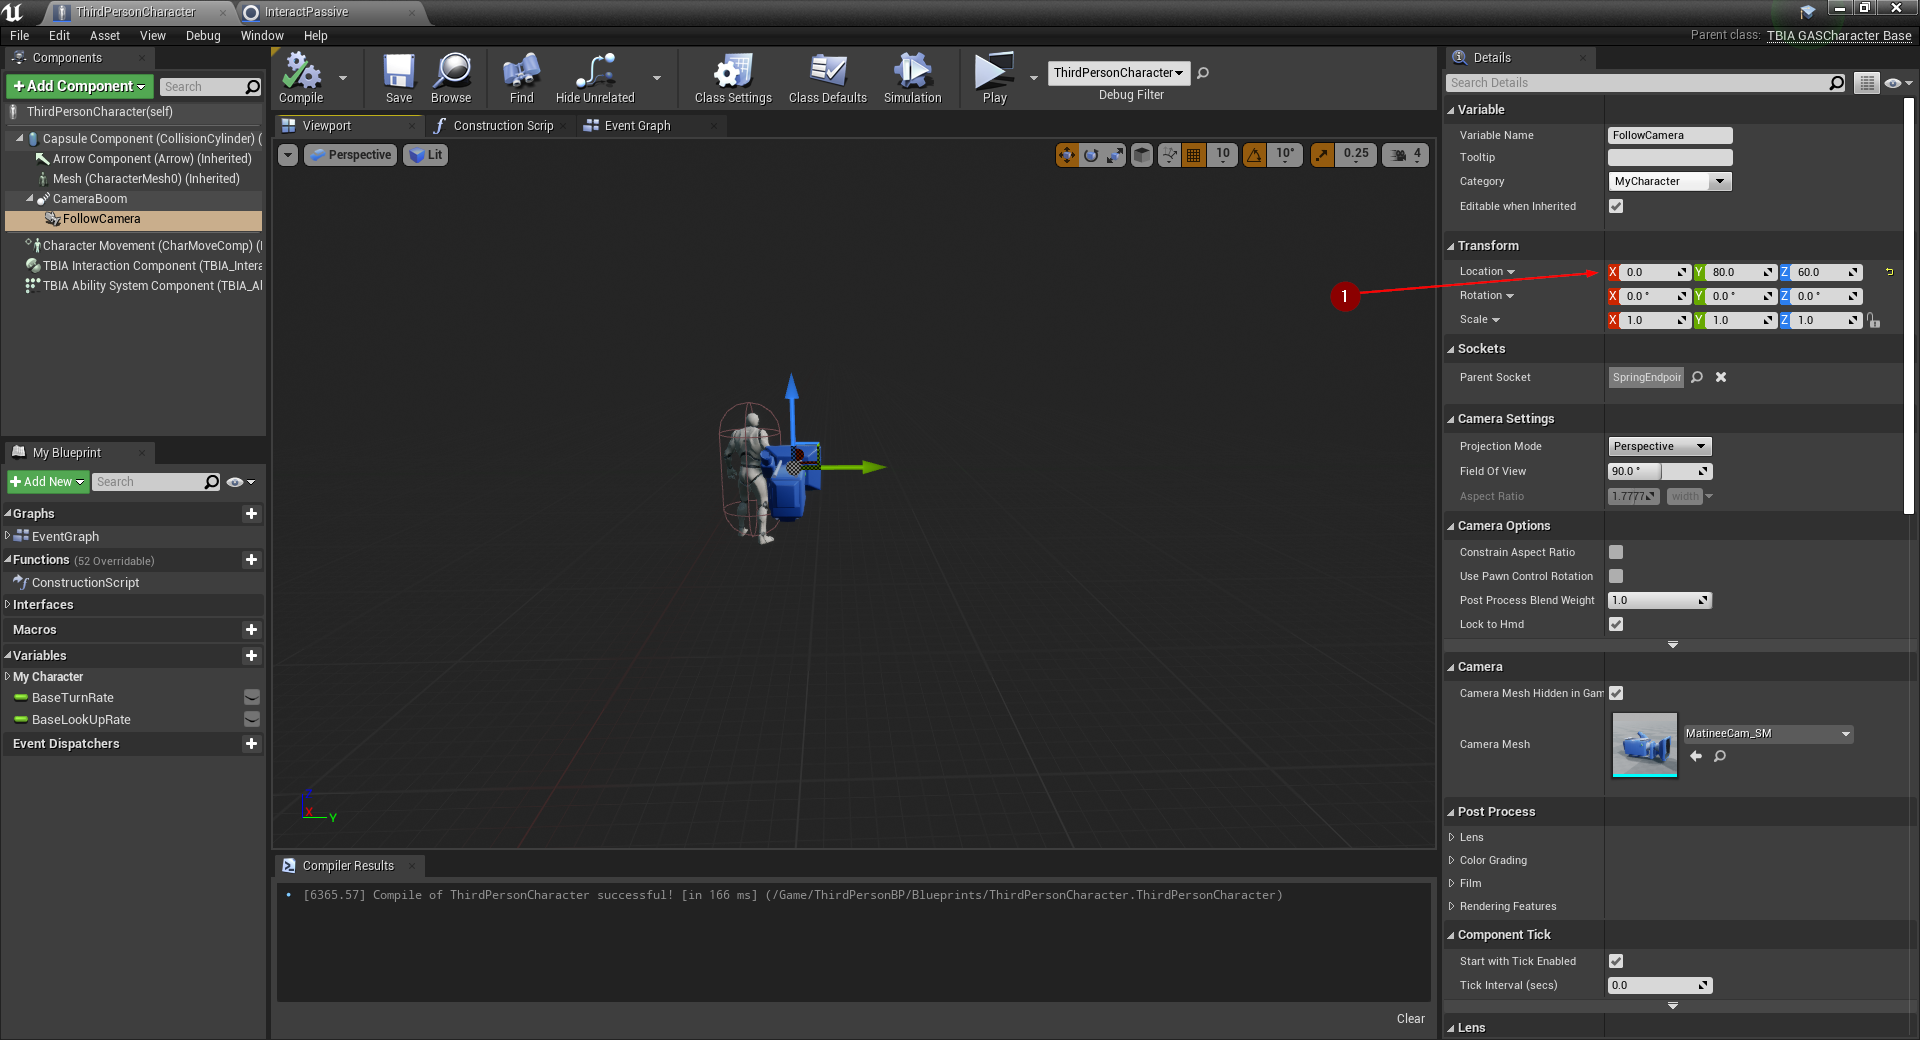
For a better third-person perspective move the camera's location a bit to the side, e.g.
(0.0, 80.0, 60.0) 1.
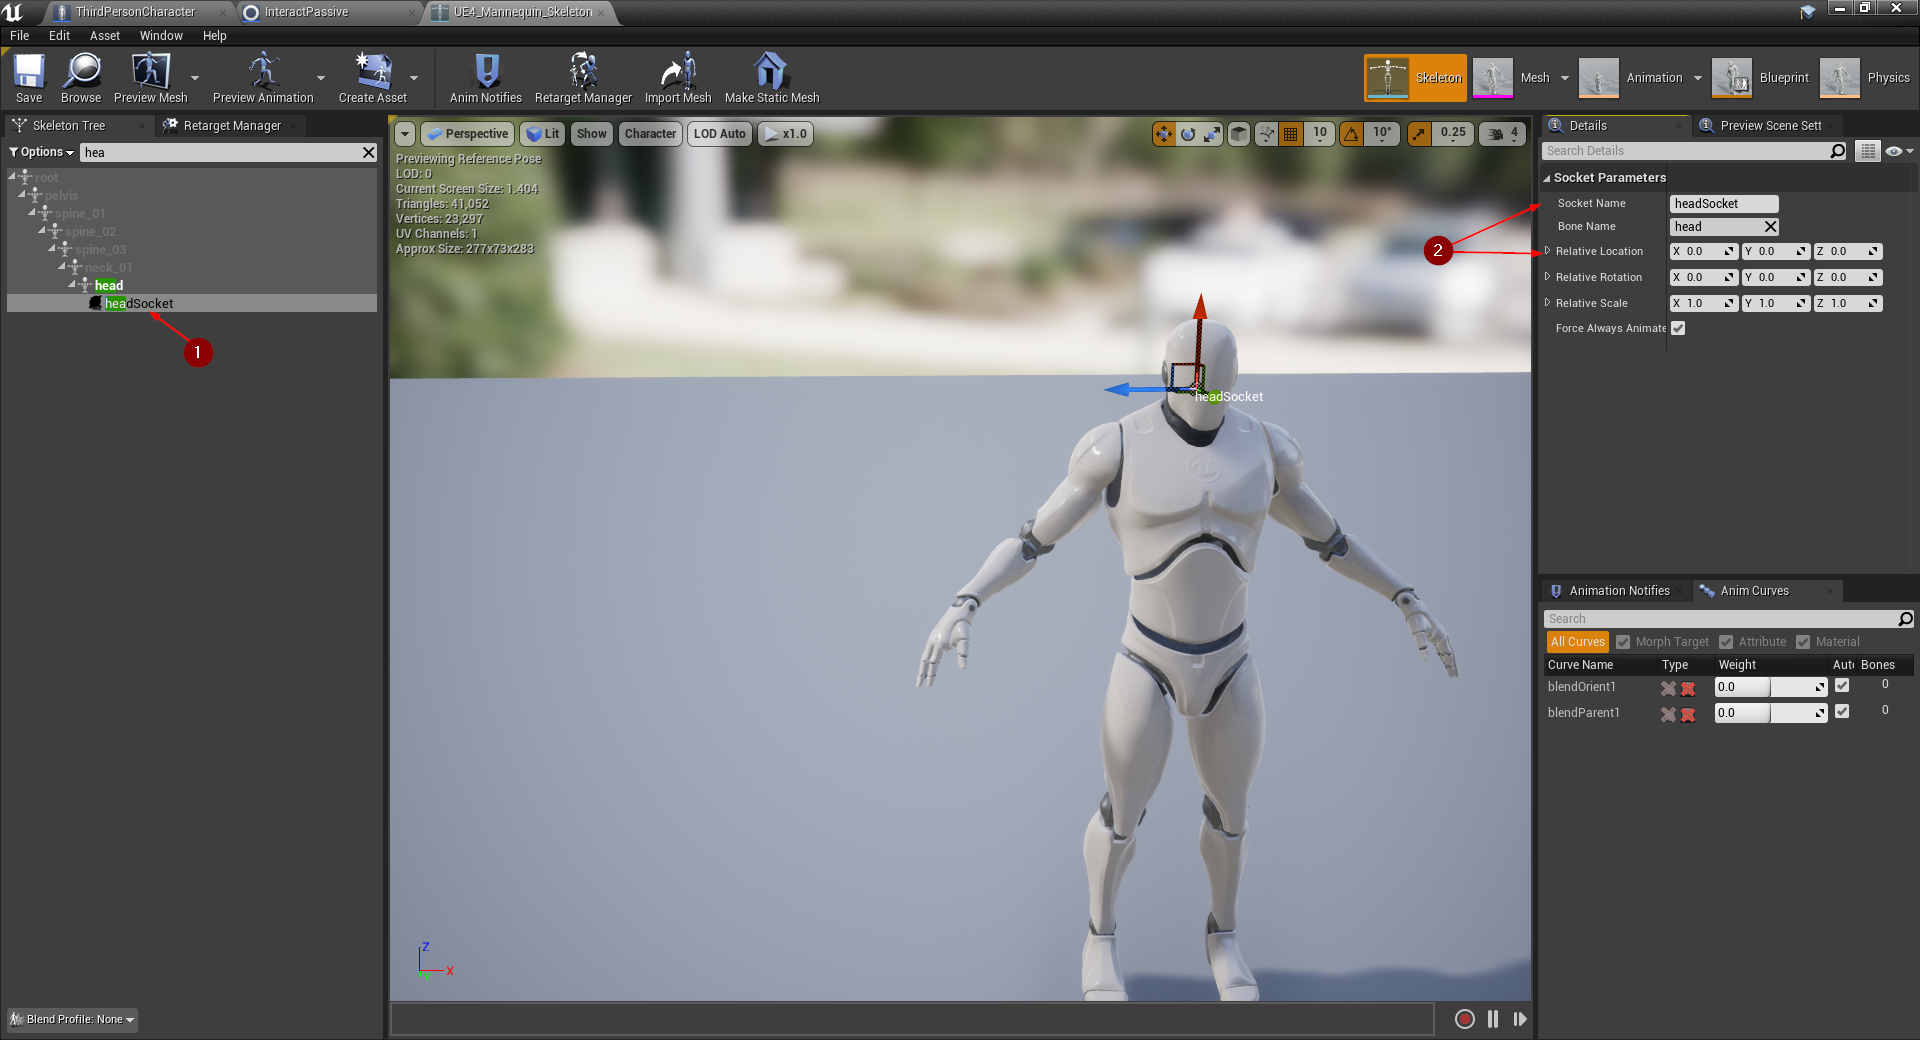
Next, create a socket on the head bone 1 and name it
headSocket 2. Keep the location at its default.
Create Interact Passive Ability
To create an Interact Passive ability, right-click in the Content Browser and
select TwistedBytes | Abilities | Interact Passive as shown in 1.
Name the newly created asset InteractPassive.

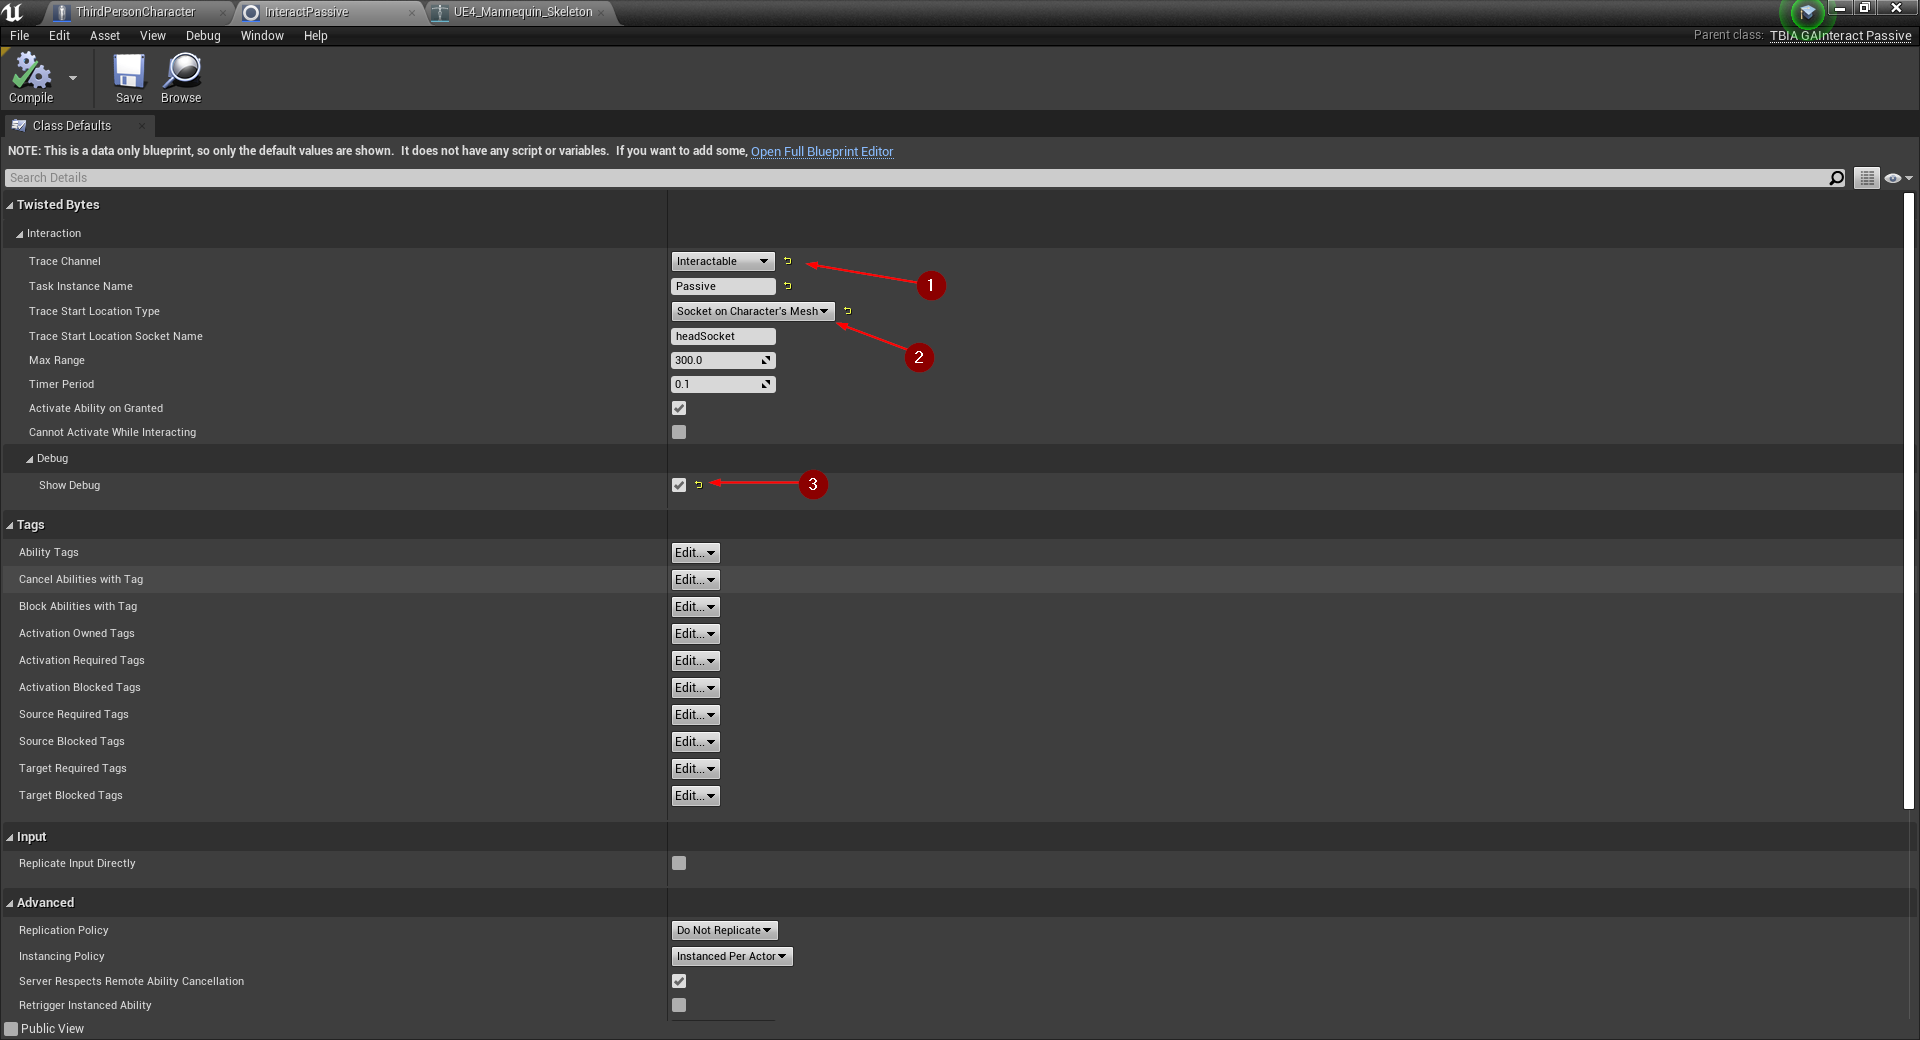
Open your newly created InteractPassive Blueprint and change the Trace Channel property to your
own Collision Channel, e.g. Interactable 1 (see Migration Guide).
Set Trace Start Location Type to Socket on Character's Mesh 2.
For easier debugging of our Interact Passive Ability we also want to enable Show Debug 3.
note
The max interaction range defaults to 3 meters. For this example, the default value will work just fine.
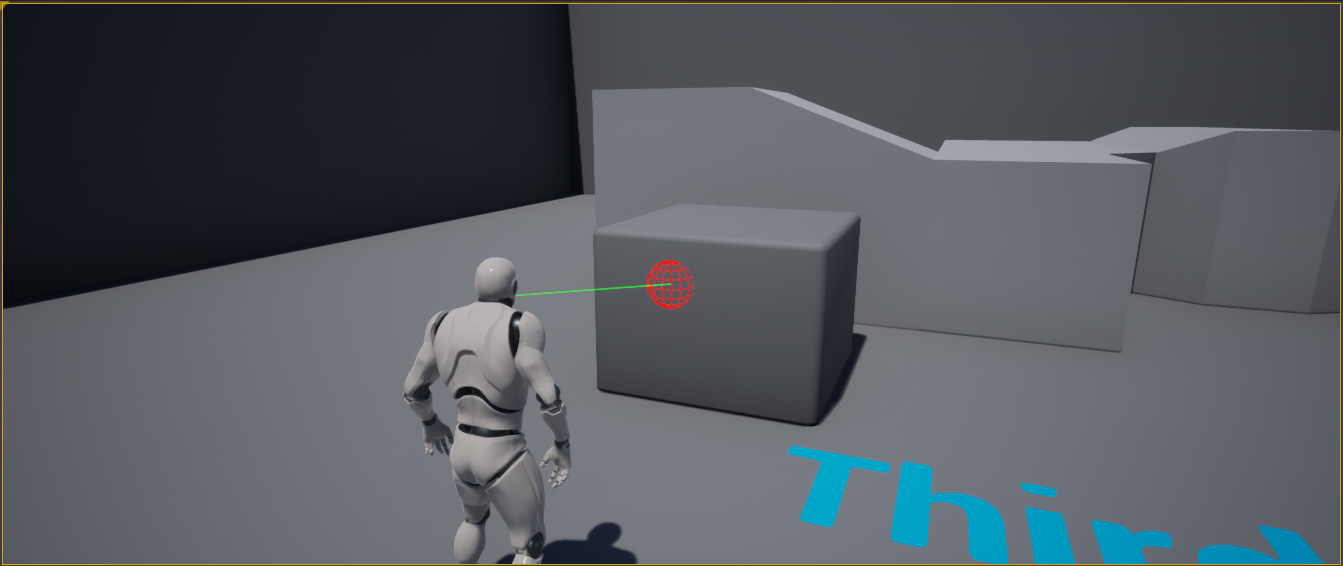
Press Play in the Unreal Editor. You should now see a debug line trace that starts from your character's head as shown in the image below which means your Interact Passive Ability is set up correctly.
Create your first interactable object
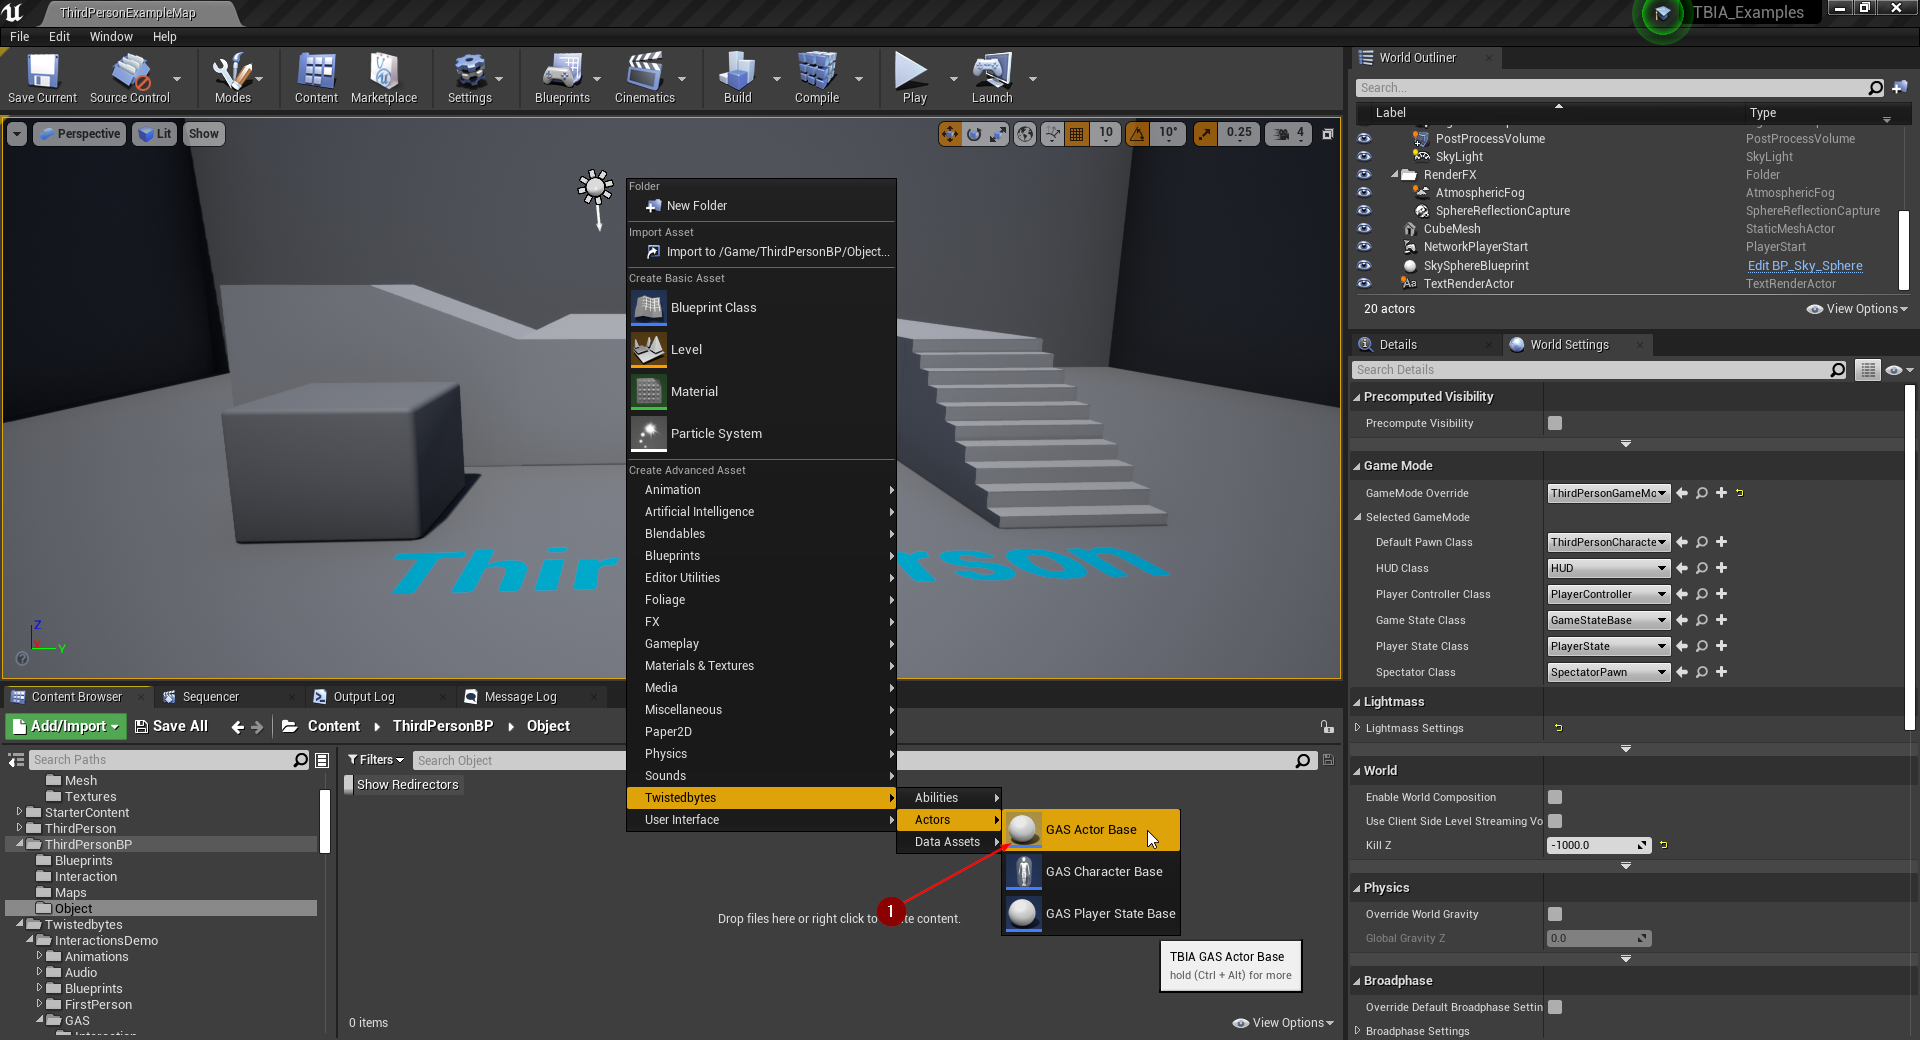
To create your first interactable object, right-click in the Content Browser and select
TwistedBytes | Actors | GAS Actor Base 1.
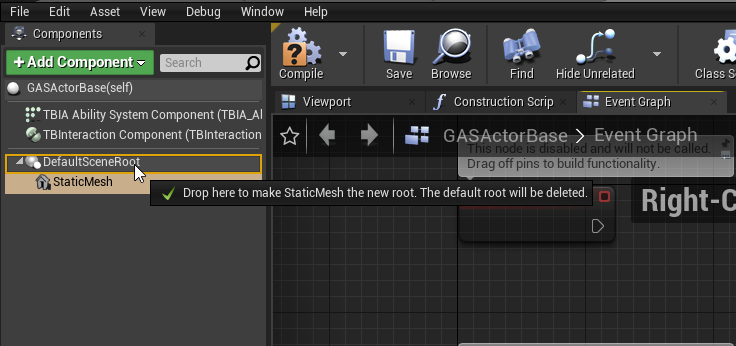
Open the newly created Actor Blueprint and add a Static Mesh Component. Make this component the default root
component by dragging and dropping it onto DefaultSceneRoot as shown in the image below.
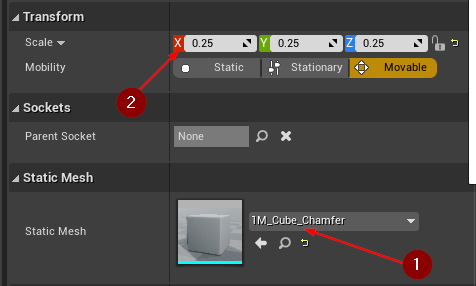
Select the StaticMesh in the Components tab. Then, in the Details tab, assign 1M_Cube_Chamfer to the
Static Mesh property 1 and lower its scale to 0.25 for all three axis 2.
info
Make sure to set the Object Response on the Interactable trace channel to blocked for the StaticMesh.
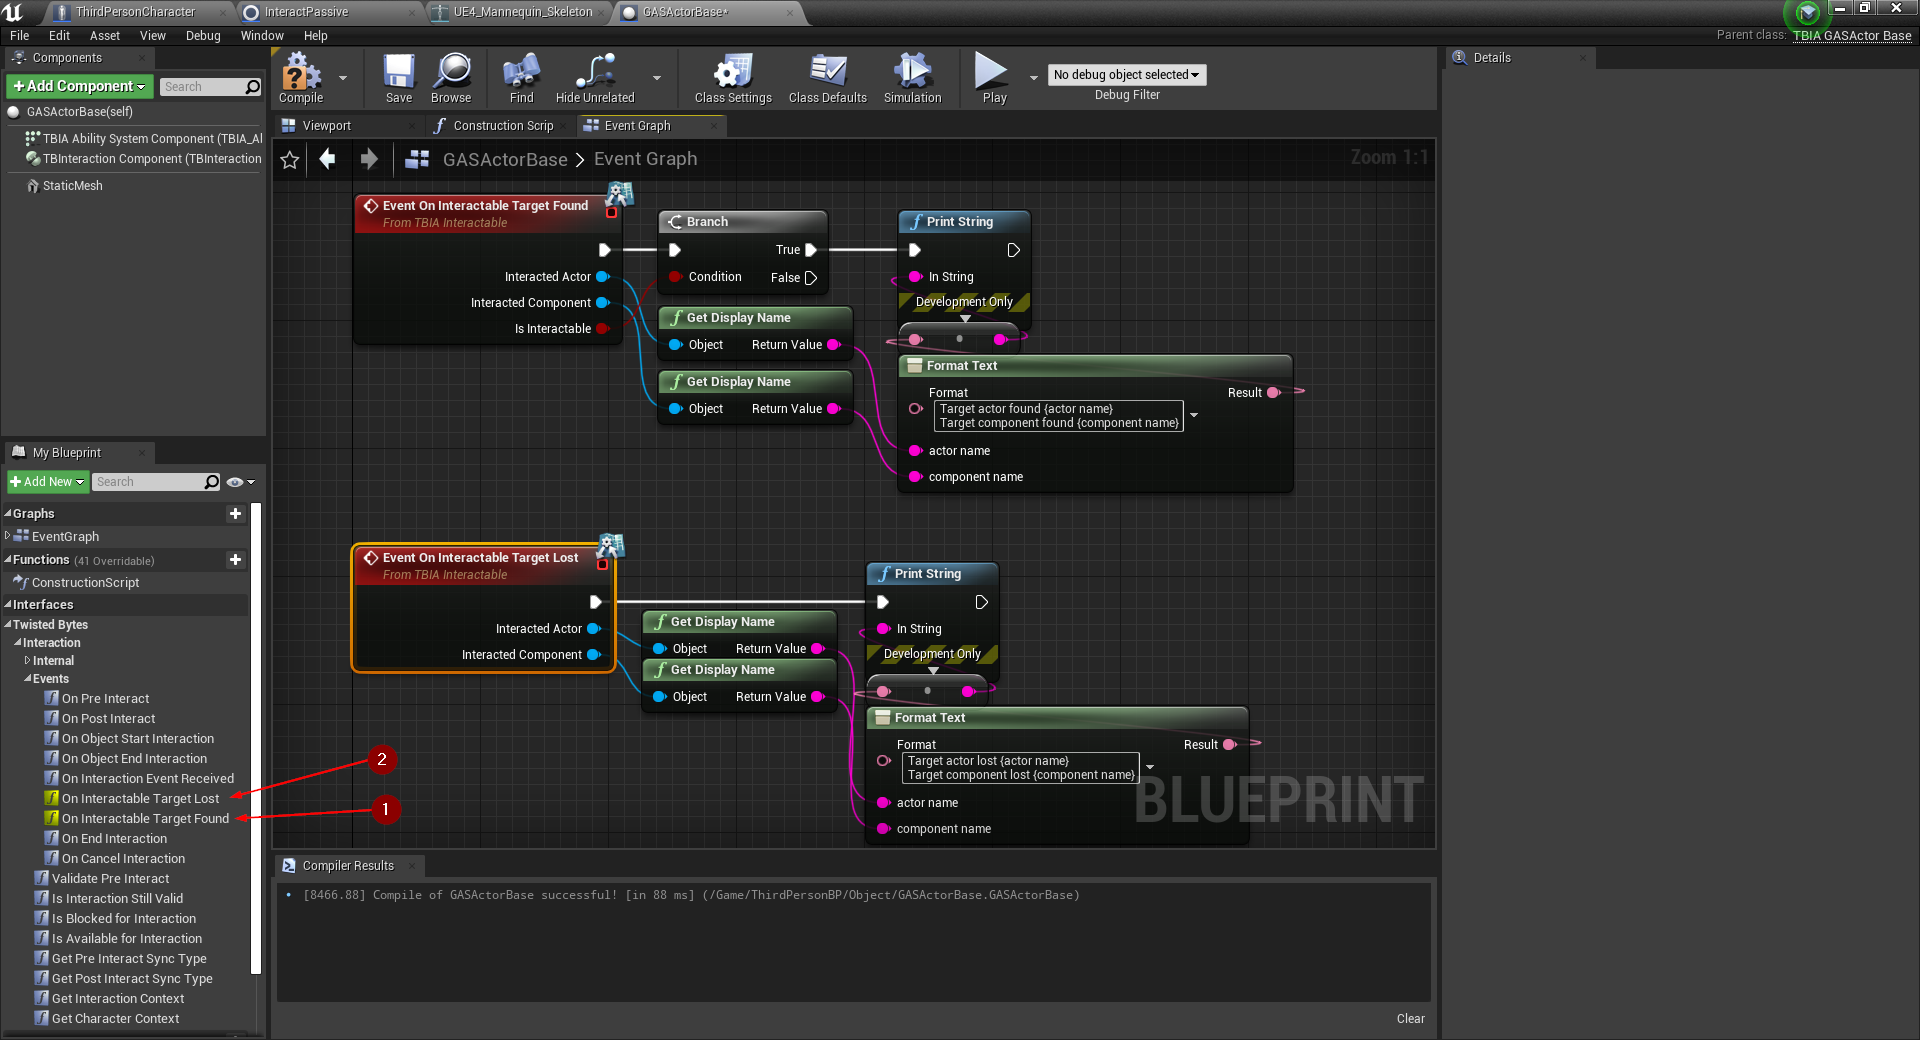
In the My Blueprint tab in the lower-left, expand the TwistedBytes interface functions and override
On Interactable Target Found 1 and On Interactable Target Lost 2.
Add Print String nodes to print some debug information about interactable actors as shown in the Event Graph in
the image below.
This concludes the initial set up of our interactable cube. Now, place one or more instances of it in the level and then let's test our implementation. Press Play in the Unreal Editor.
note
Remember that we did not modify the max range for interactions in our PassiveAbility Blueprint.
This means we can only interact within 3 meters between the player character and an interactable object.
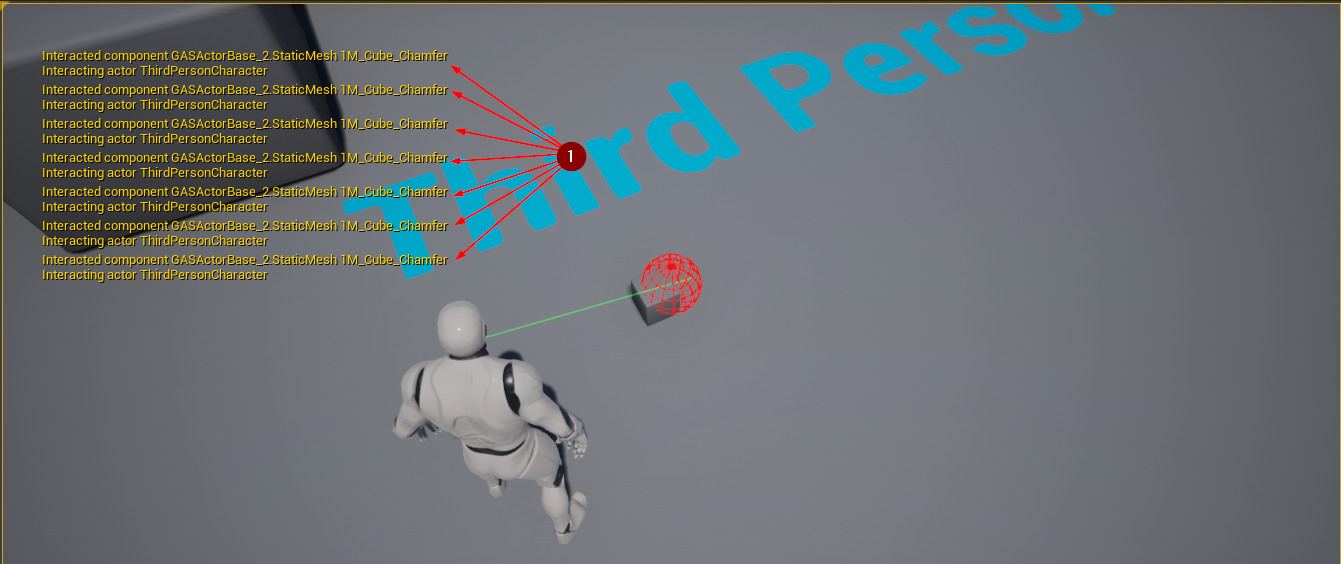
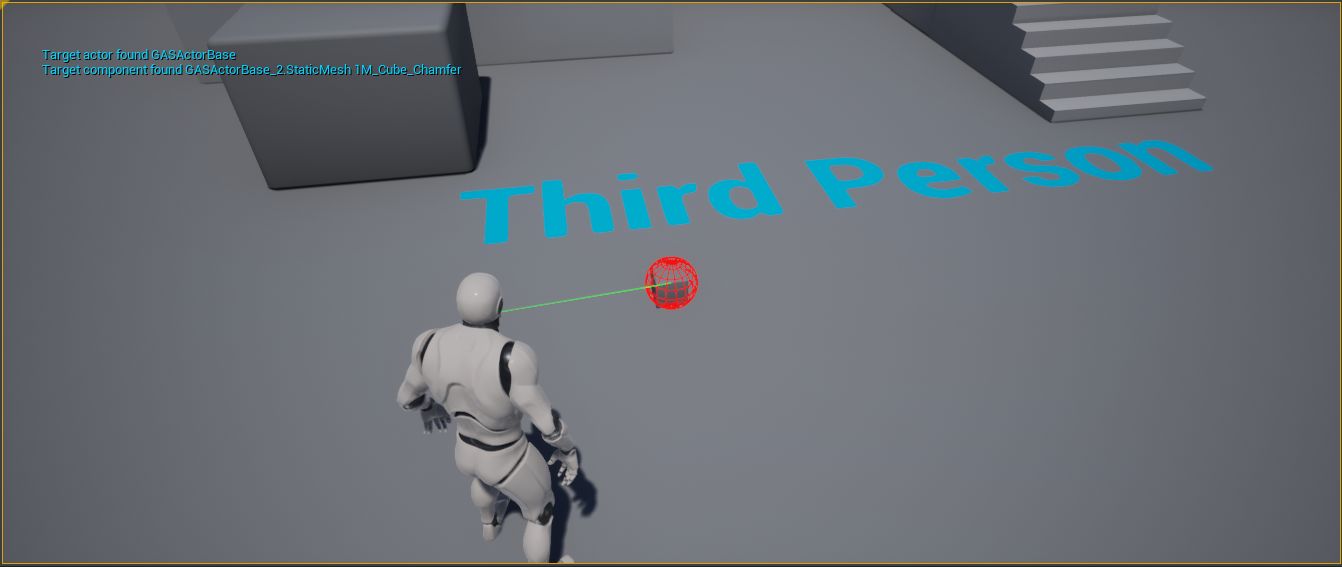
Walk up to an interactable cube so that the player character is in range for interactions. You should now see debug messages being printed whenever you look at the cube.
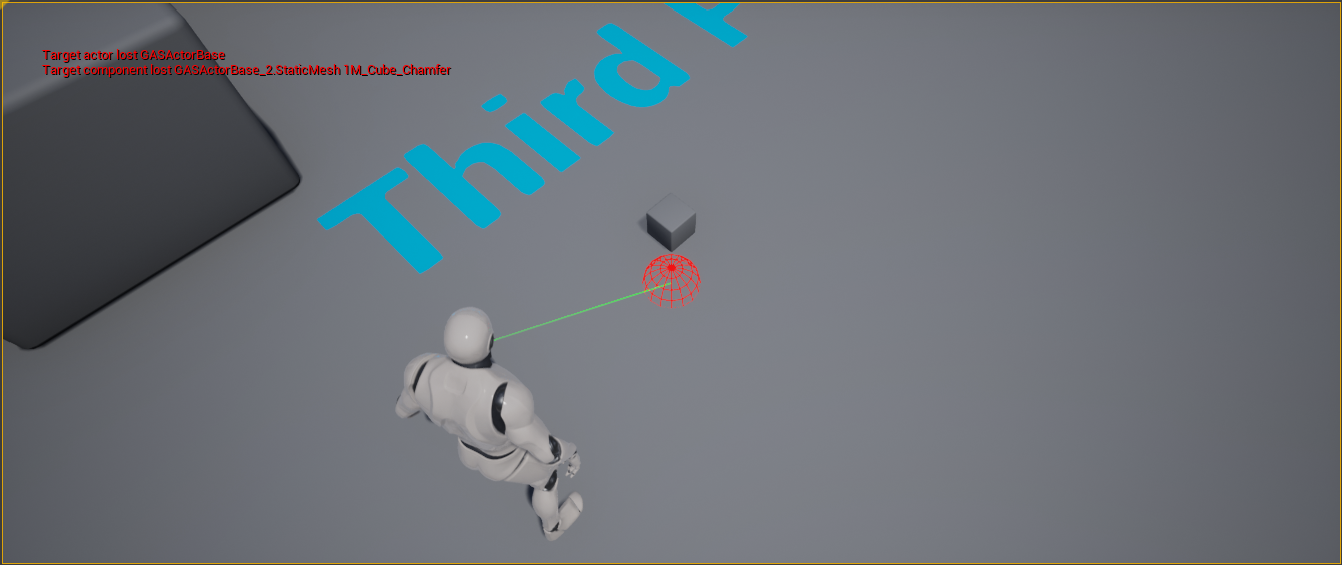
When you look away from the cube the On Interactable Target Lost event will be triggered. You should see
debug messages as shown in the image below.
Extending Passive Ability Functionality
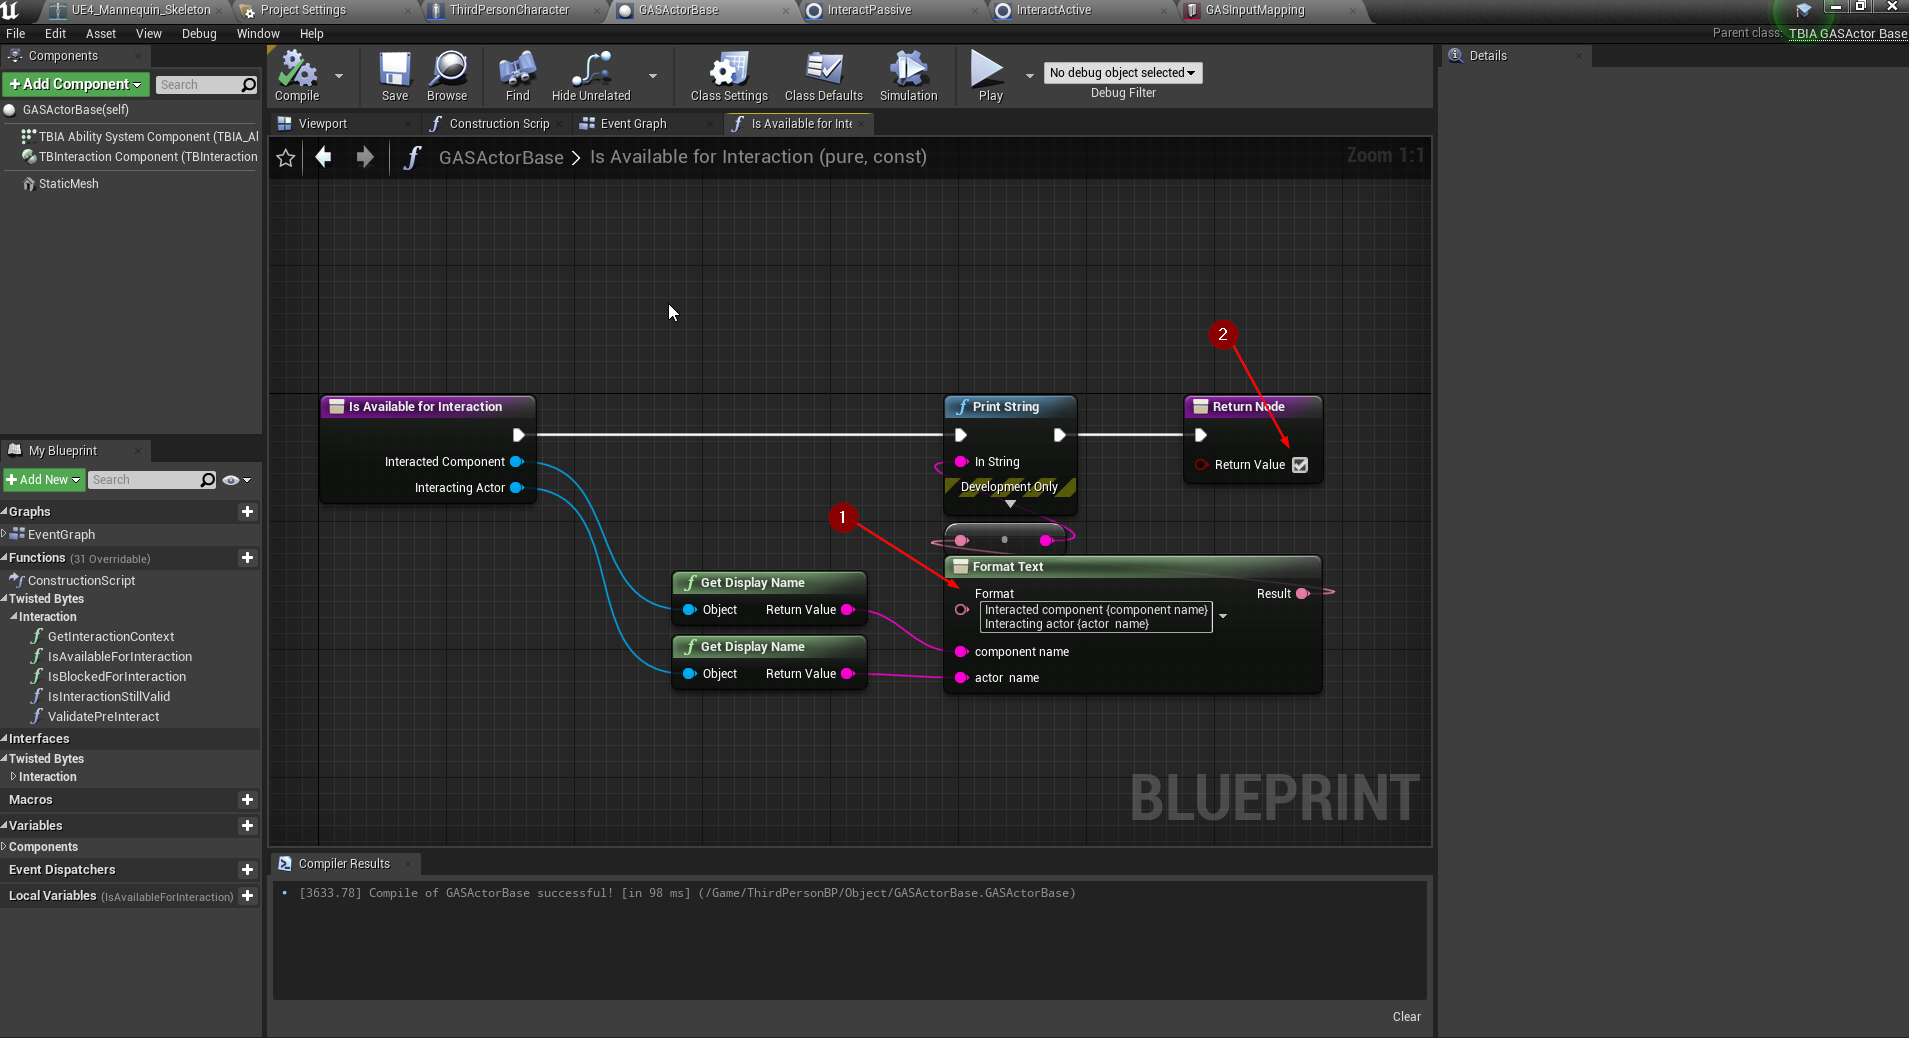
Open the Blueprint of our interactable test cube (GASActorBase) again. In the interface functions,
override Is Available for Interaction. Add a Print String node as shown in 1 and
set the Return Value to true 2.
Now press Play in the Unreal Editor and see what will happen when you try to interact with our test cube.
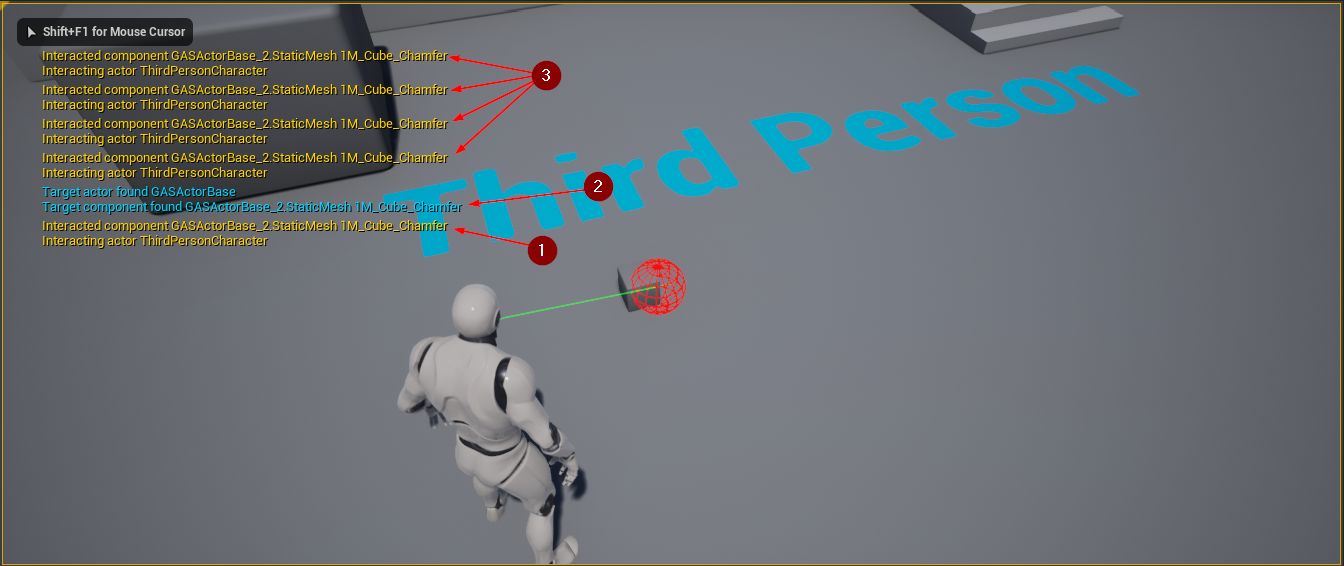
As you can see the Is Available for Interaction interface function 1 was called
before the On Interactable Target Found event was fired 2. This is because the
Interact Passive ability periodically executes a line trace to check for potential interactable objects
in view and range.
If an interactable actor (i.e. an actor implementing the TBIA_Interactable interface) has been found,
the passive ability will first call Is Available for Interaction 3 to determine whether this
interactable actor is currently available for interactions or not. Only if the interactable is indeed available,
the On Interactable Target Found event will be fired in order to notify all potential interactors.
Let's set the return value of Is Available For Interaction to `false 1 and then
press Play again.
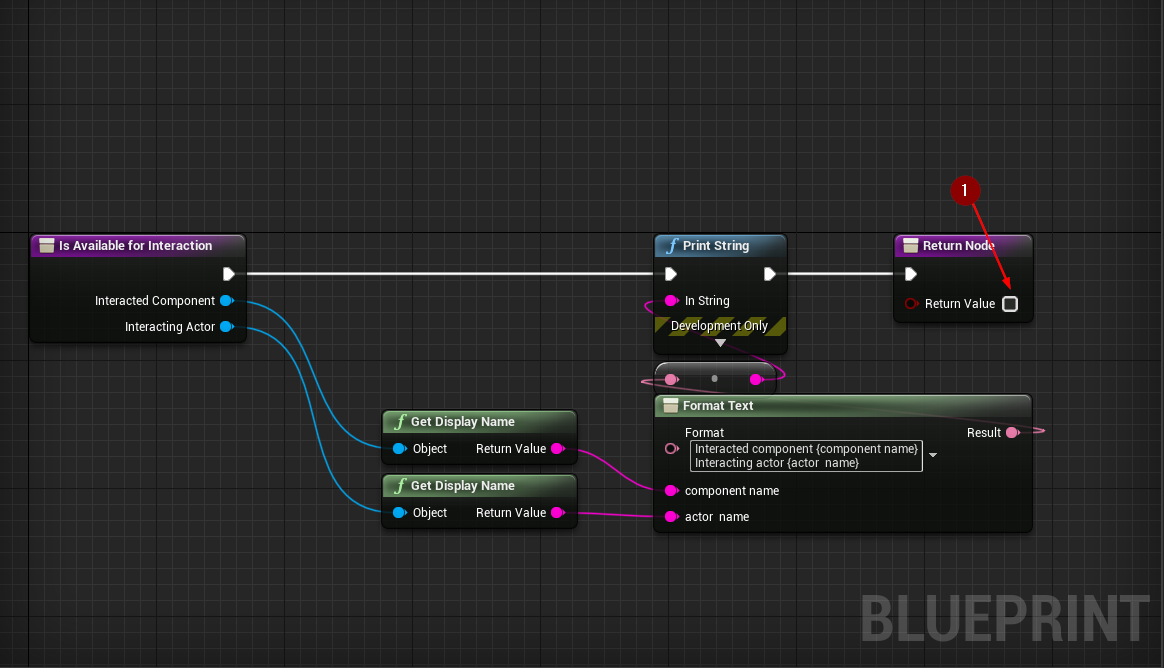
The debug messages show that only the Is Available For Interaction interface function is now being
called 1 and that the On Interactable Target Found event is not triggered at all.
This is because our implementation for the test cube now always answers "No, I'm not available at the moment" whenever our passive ability asks for the cube's current availability status.