Migration Guide
Demo Project Migration
After you have checked out the TBIA_Demo project you might want to use its example setup as a base for your own project.
This migration guide will help you with the process of correctly transferring all necessary files as well as making important changes to your own project.
Content Folder Migration
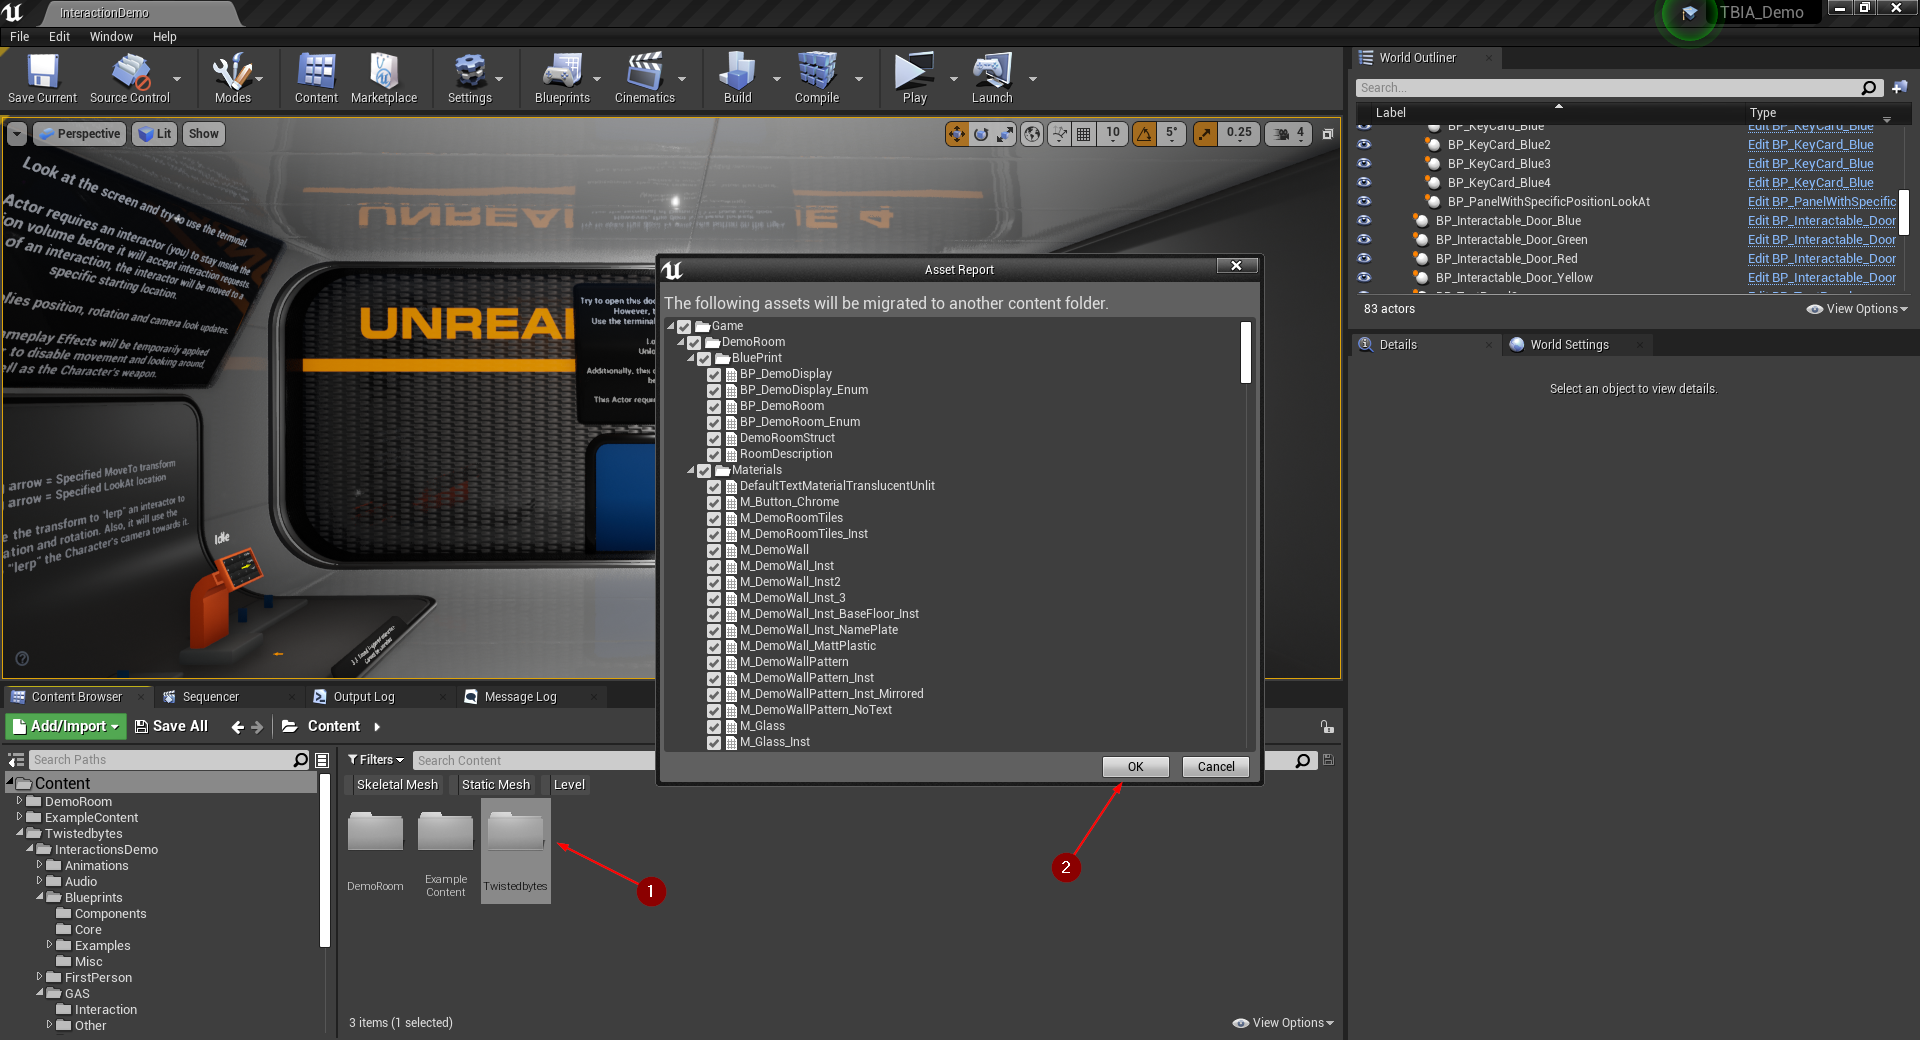
Open the TBIA_Demo project and select the folder TwistedBytes 1 in the Content Browser. Right-click this folder and
select Migrate.... Then, select all assets in the Asset Report window and confirm by clicking on the OK button 2.
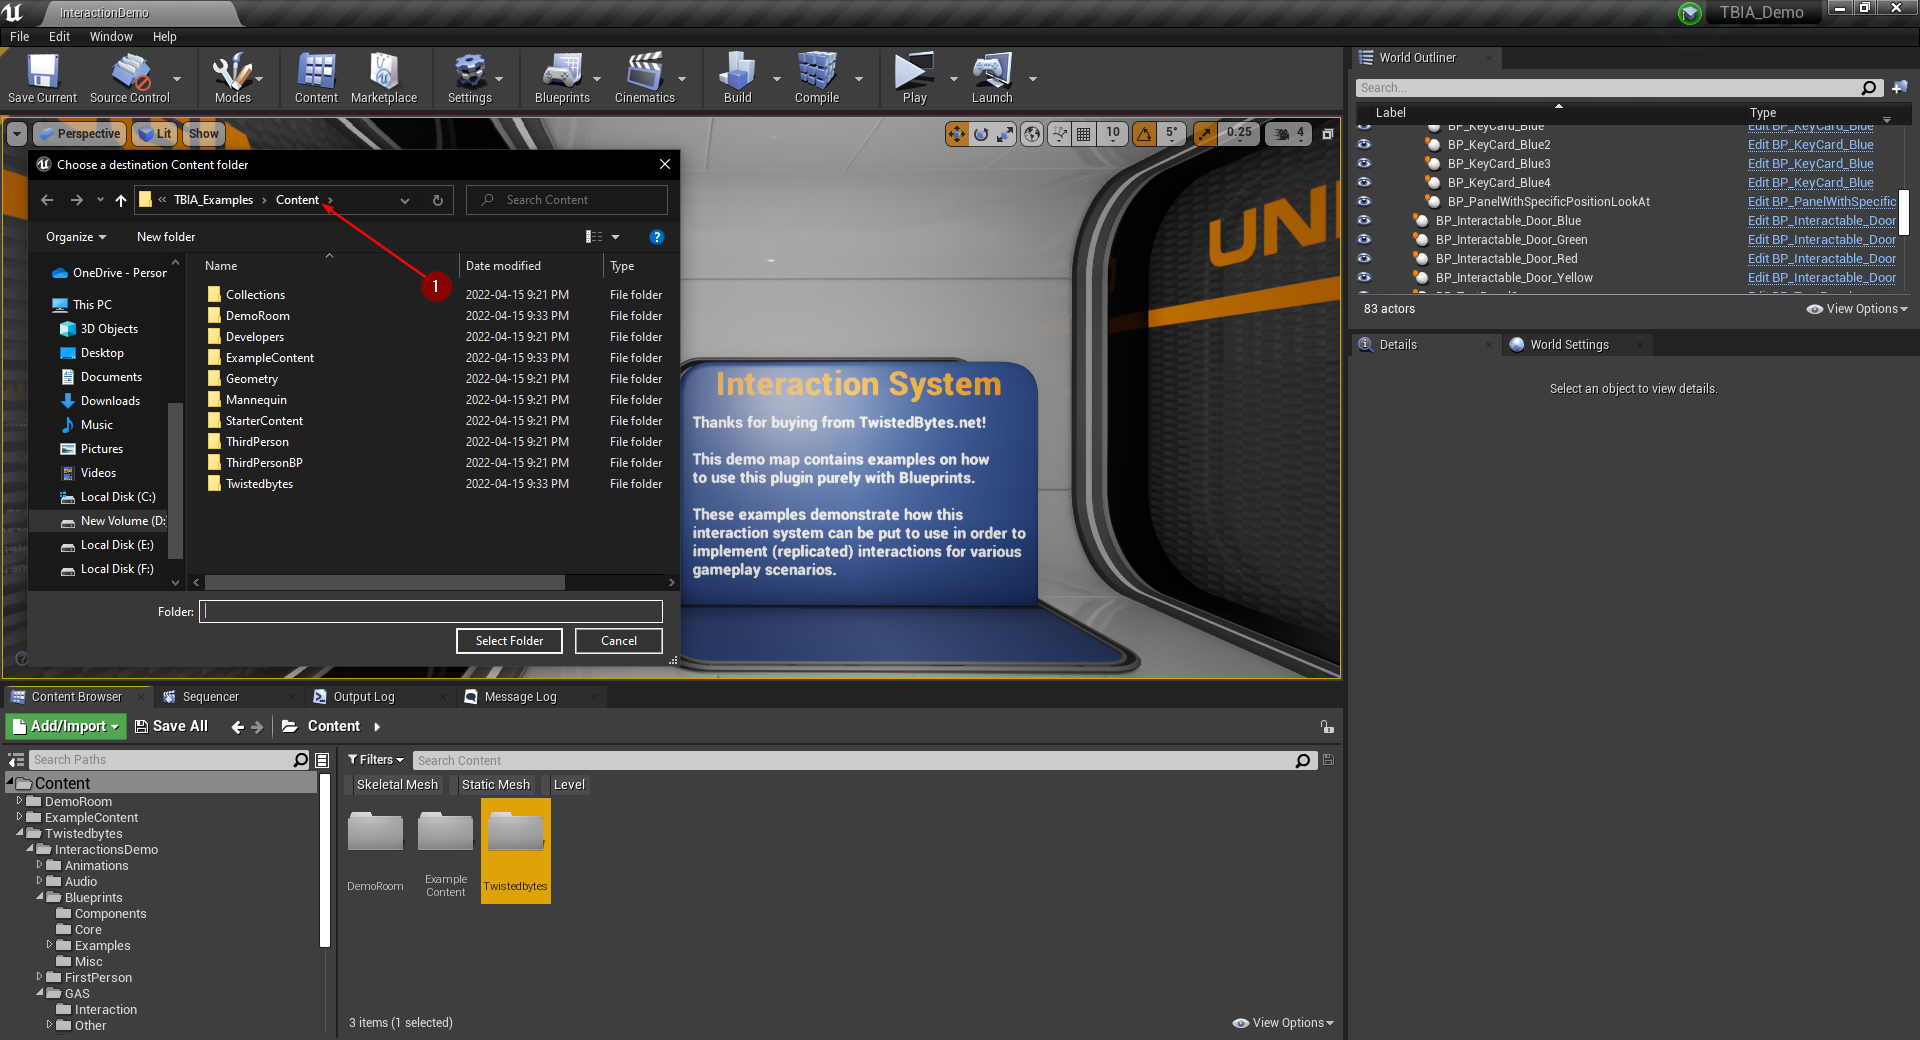
A new window will pop up where you need to specify the Content 1 folder of the project you want to migrate the TwistedBytes demo files to.
Add Gameplay Tags
In the demo project we also set up some Gameplay Tags, so that we can demonstrate to you how to implement certain gameplay mechanics using our plugin. So, it is totally up to you if you want to follow the rest of the instructions in this subsection.
Add these tags in project settings by writing them as shown in 1 and 2.
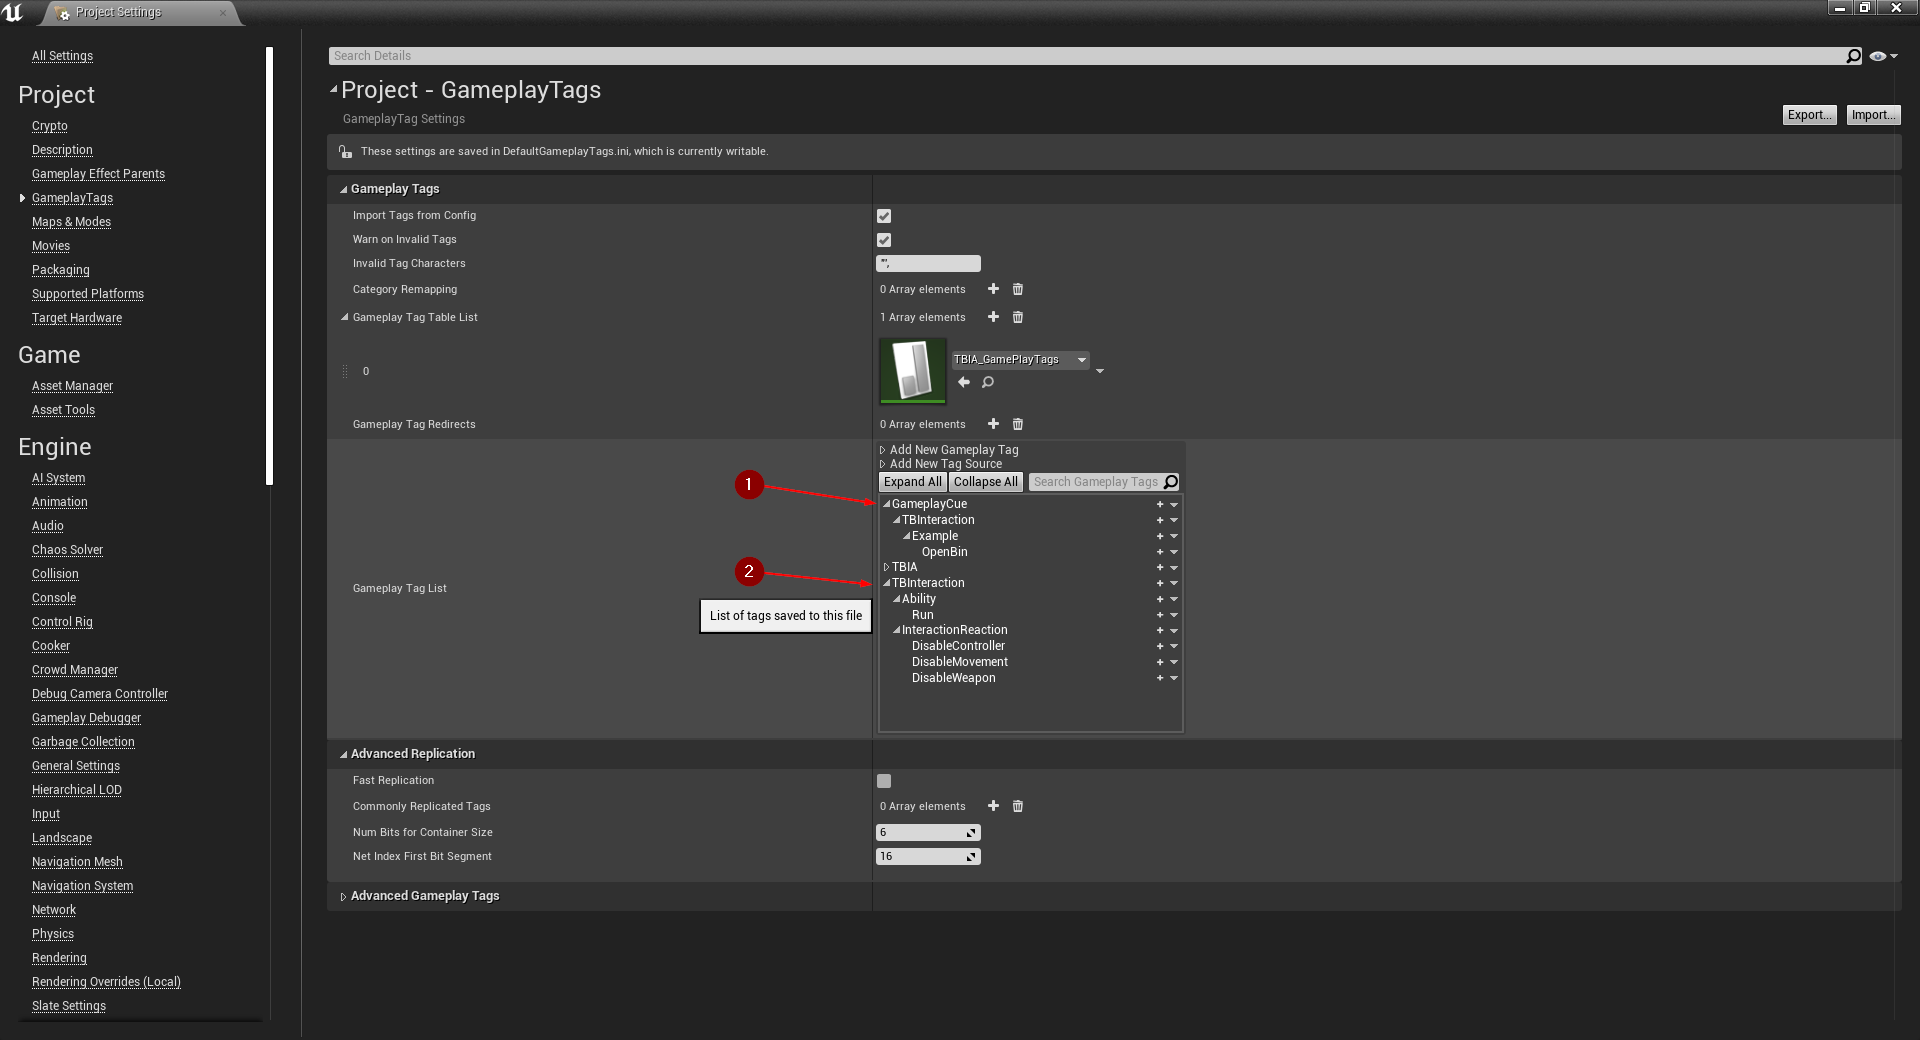
Alternatively, you can save yourself some typing work and just copy these tags from the demo project.
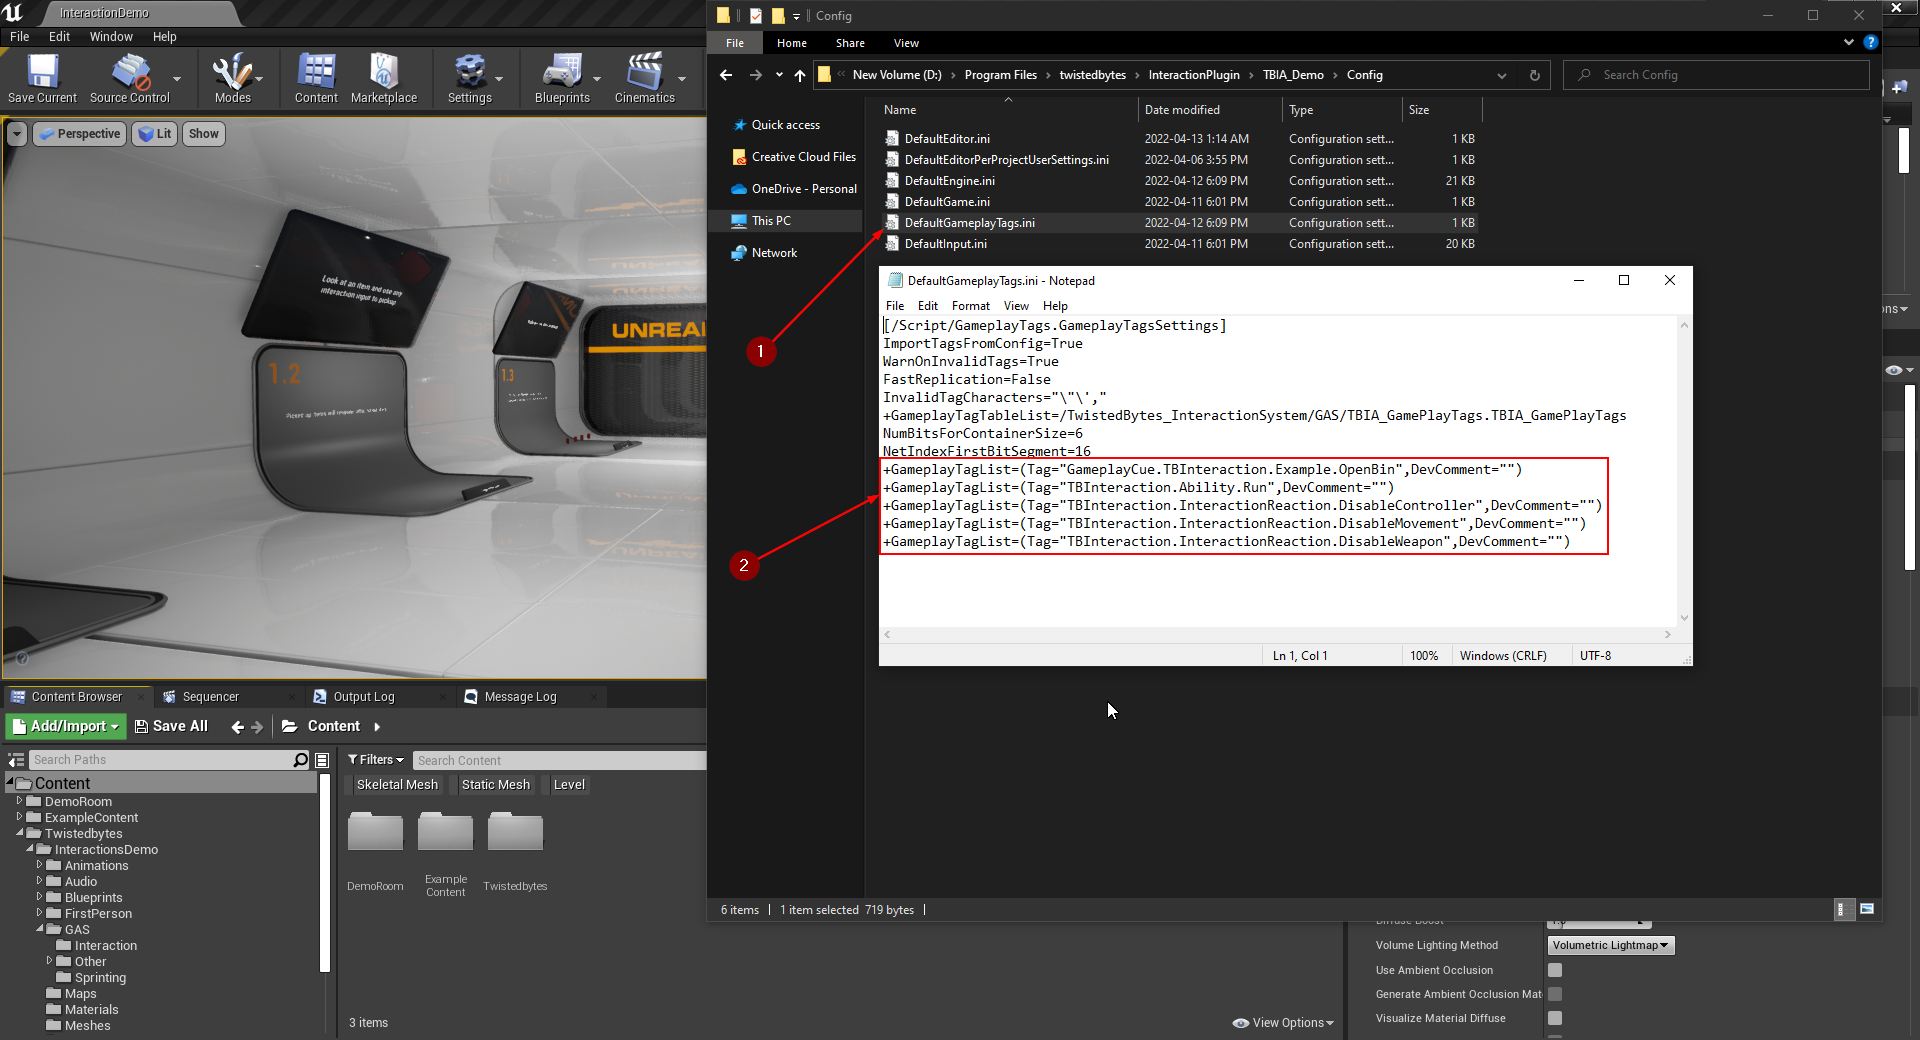
Use your file manager of choice (e.g. Explorer) and navigate to <TBIA_Demo Project Root Folder>/Config/.
Open the file DefaultGameplayTag.ini 1 in a text editor and copy all lines starting with +GameplayTagList= as shown in 2
to your project's DefaultGameplayTag.ini.
note
You will need to restart the Unreal Editor after modifying DefaultGameplayTag.ini before your newly added Gameplay Tags will become available in your project.
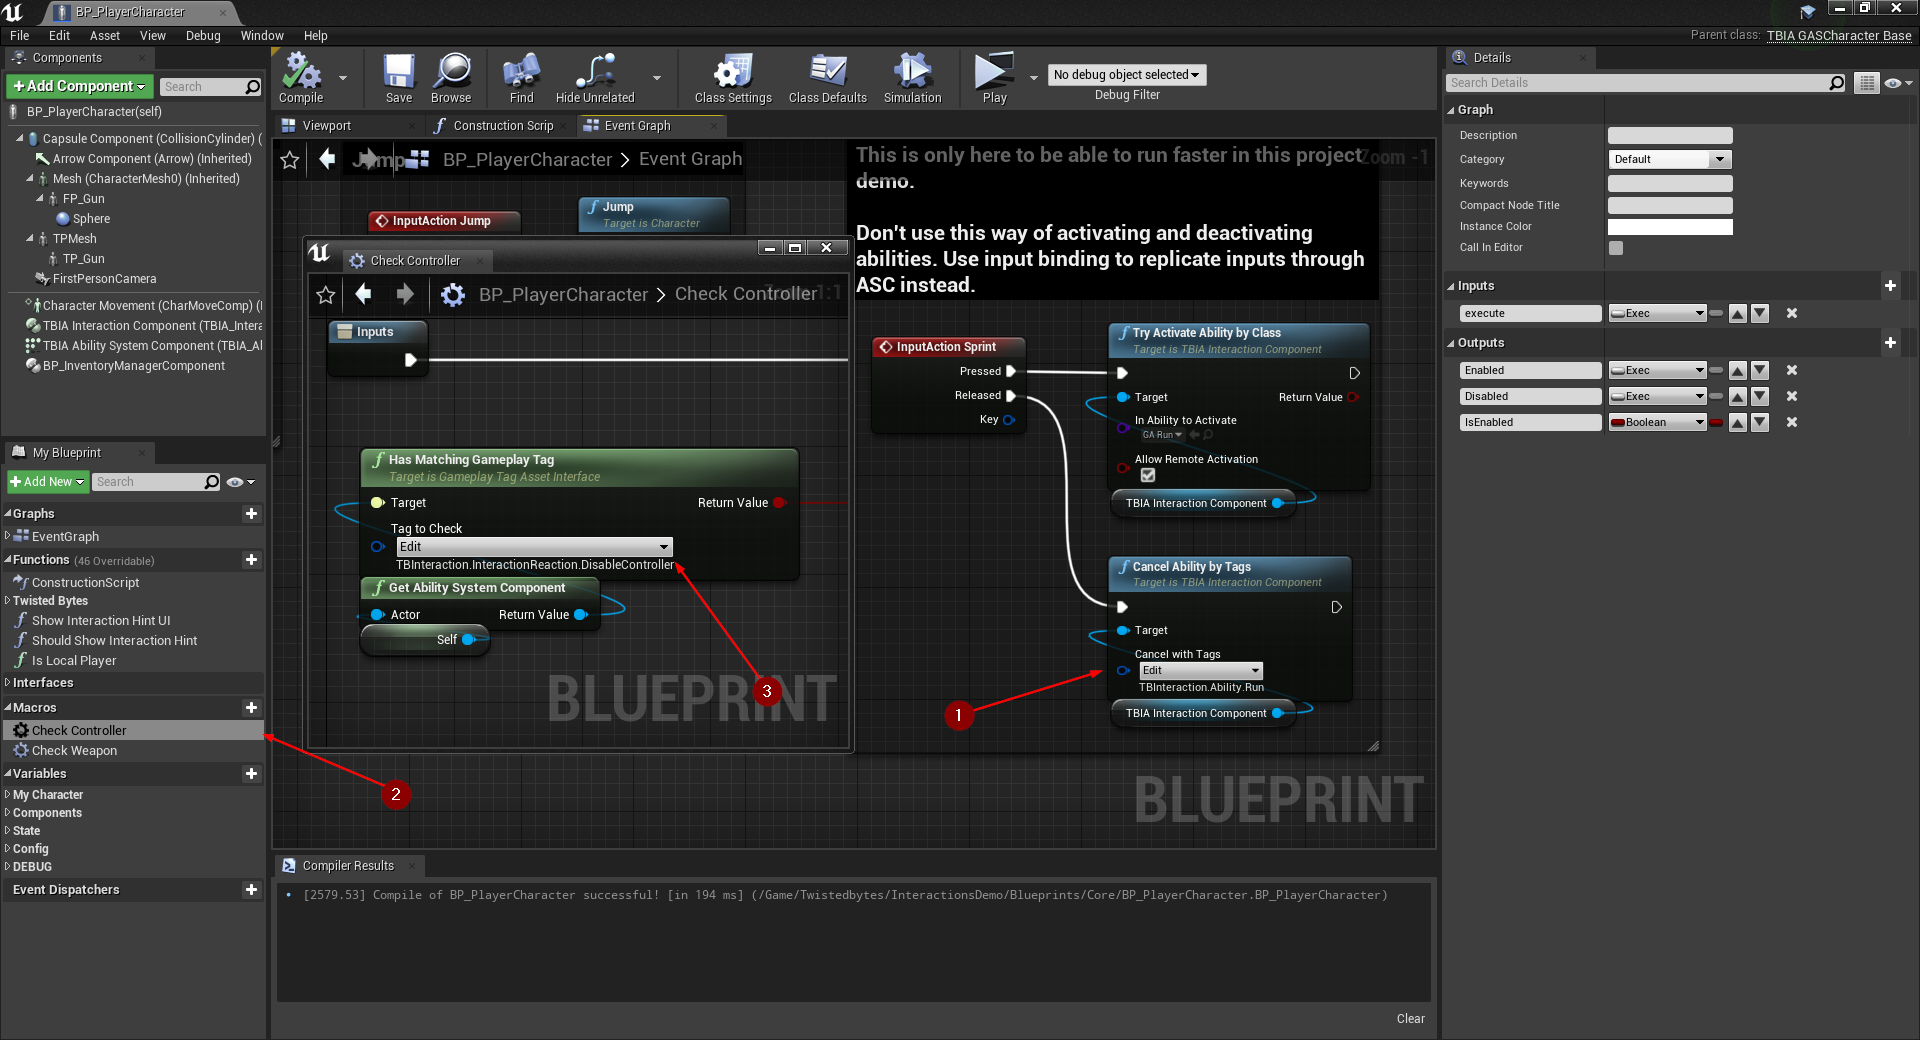
After adding these tags, open the Blueprint BP_PlayerCharacter that is located in InteractionsDemo/Blueprints/Core/. Since Gameplay Tags are not migrated
by Unreal Editor, any tags that are not found in the target project will be removed in all Blueprint nodes.
Reassign the tag as shown below in 1. Next, open the macro Check Controller at 2 and reassign the Gameplay Tag as
shown in 3.
Collision Settings
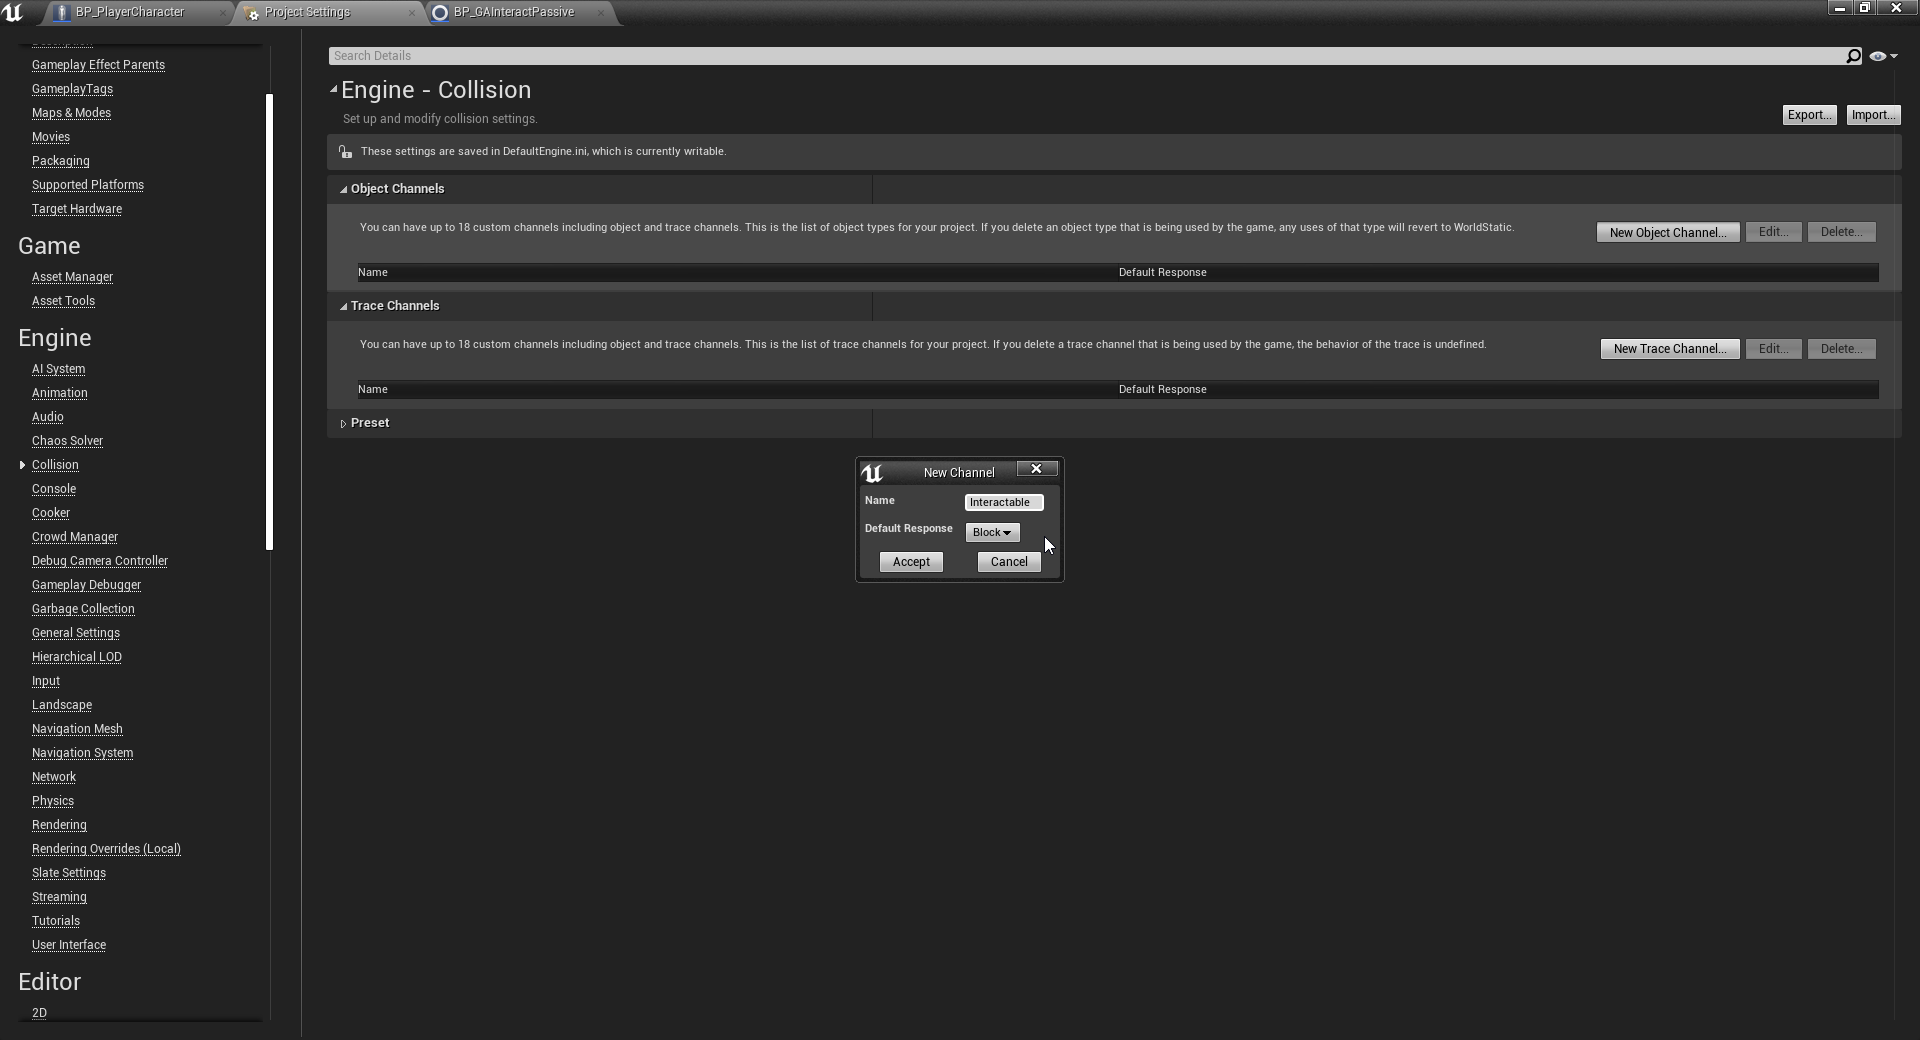
The demo project uses a custom Object Collision Channel that needs to be set up in the project settings.
Go to Edit | Project Settings ... and select Collision under the Engine section.
Add a new Object Collision Channel, name it Interactable and set the Default Response to Block.
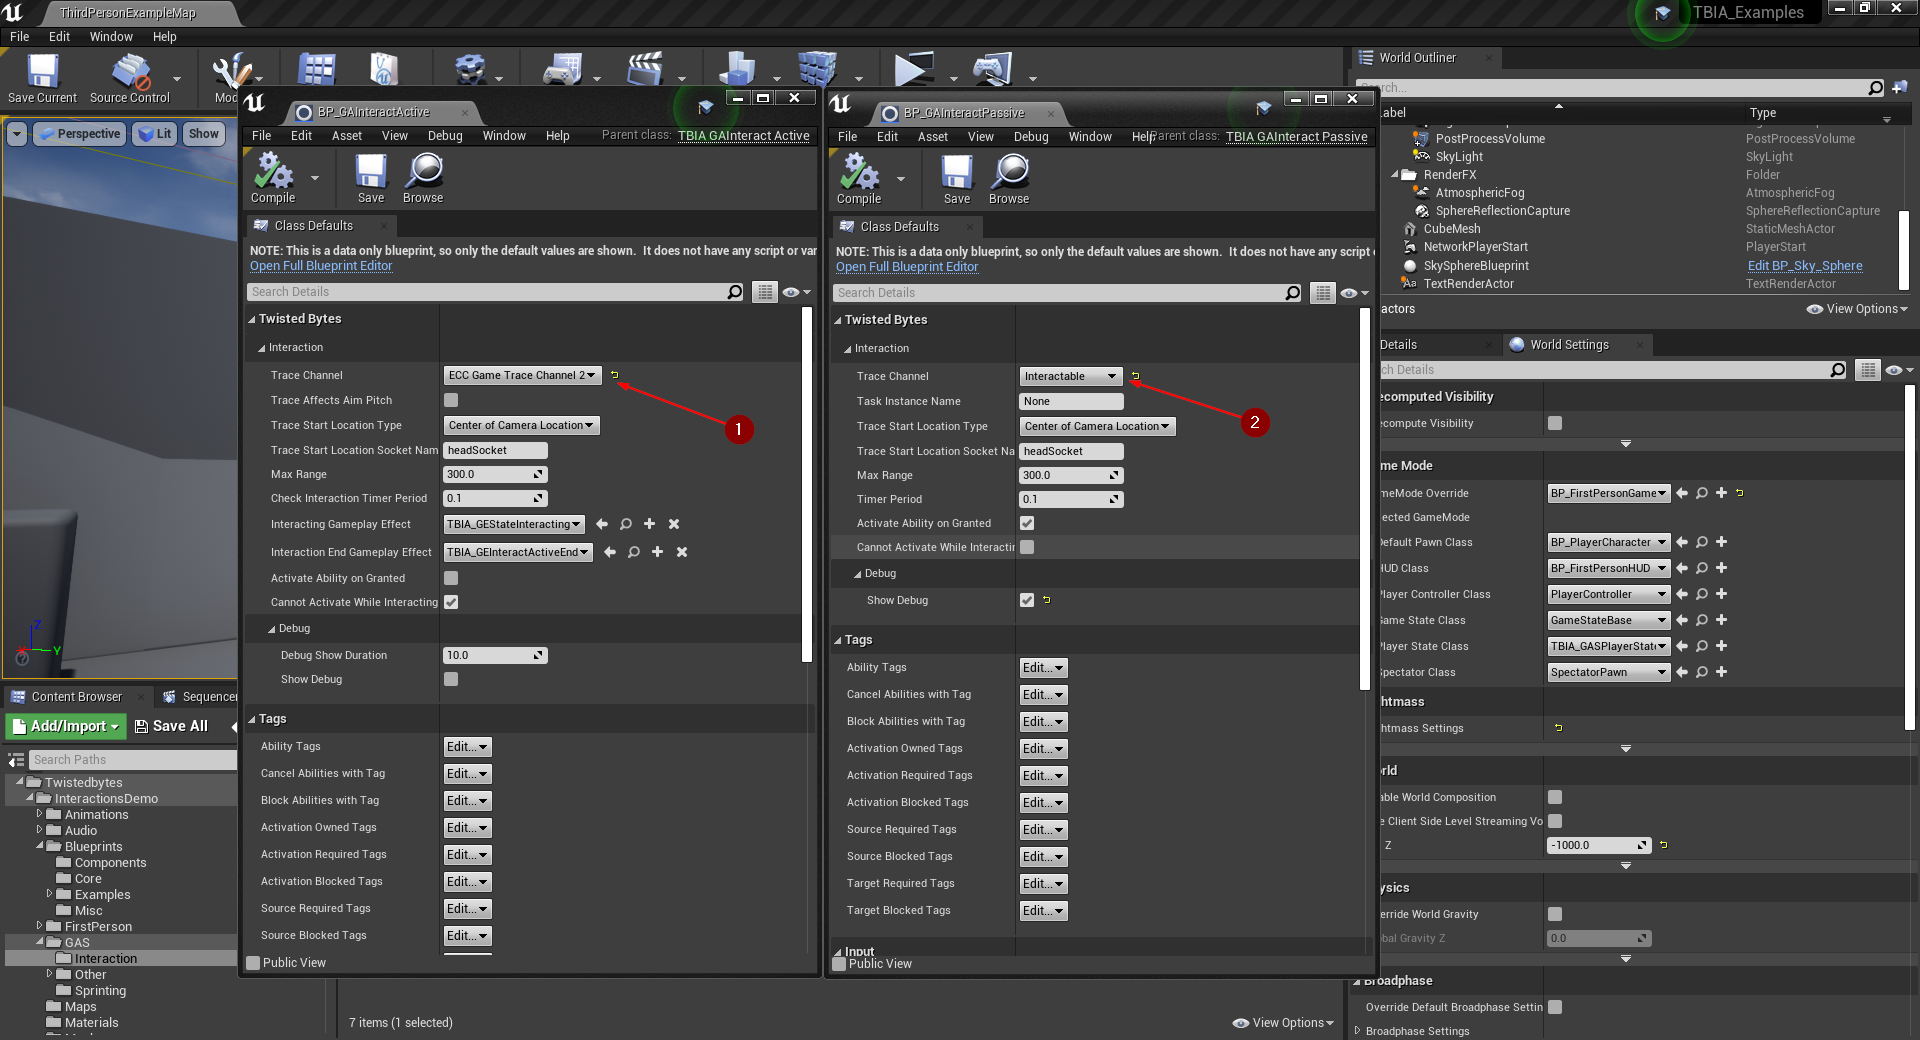
After adding the new Object Collision Channel, navigate to BP_GAInteractPassive and BP_GAInteractActive. The value of the Trace Channel
property will be ECC Game Trace Channel 2 as shown in 1.
Change the value to the new Interactable channel as shown in 2 in both Blueprints.
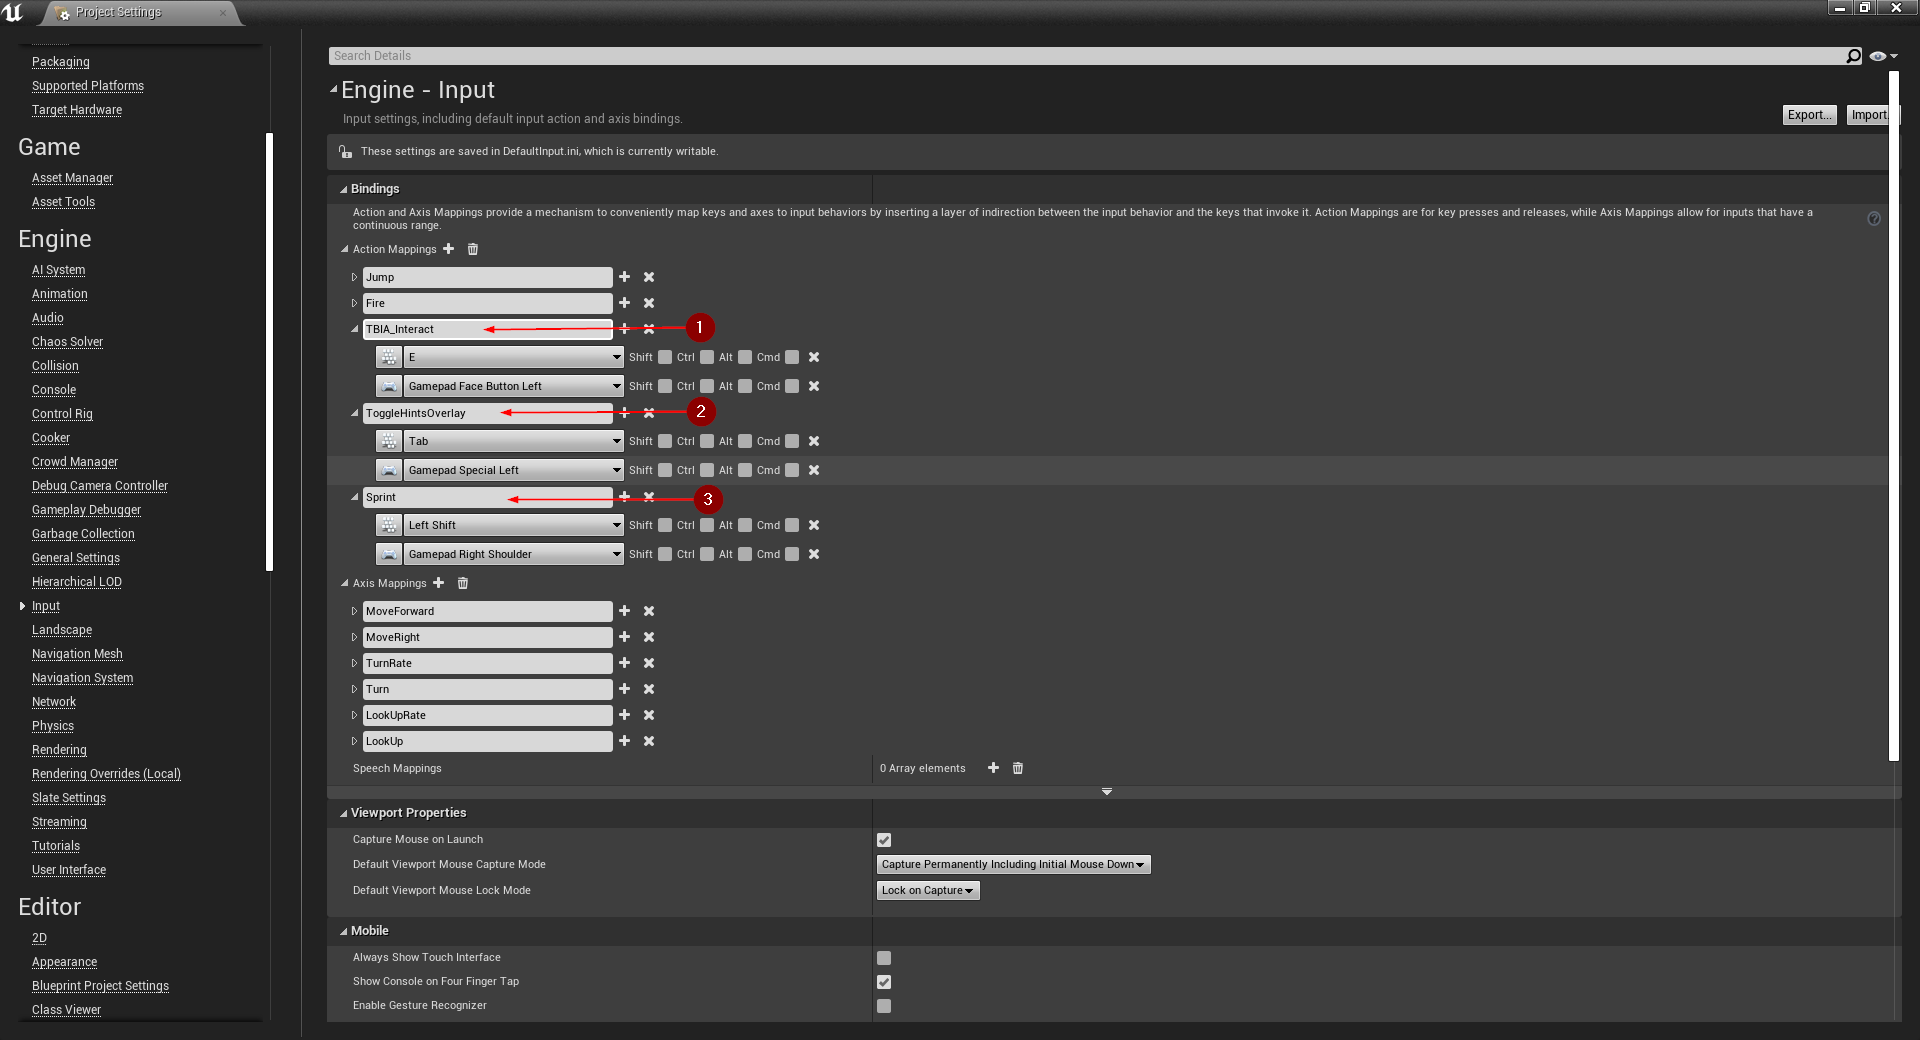
Input Settings
Go to Edit | Project Settings ... and select Input under the Engine section.
Add three Action Mappings with the exact same names as shown in 1, 2, and 3.
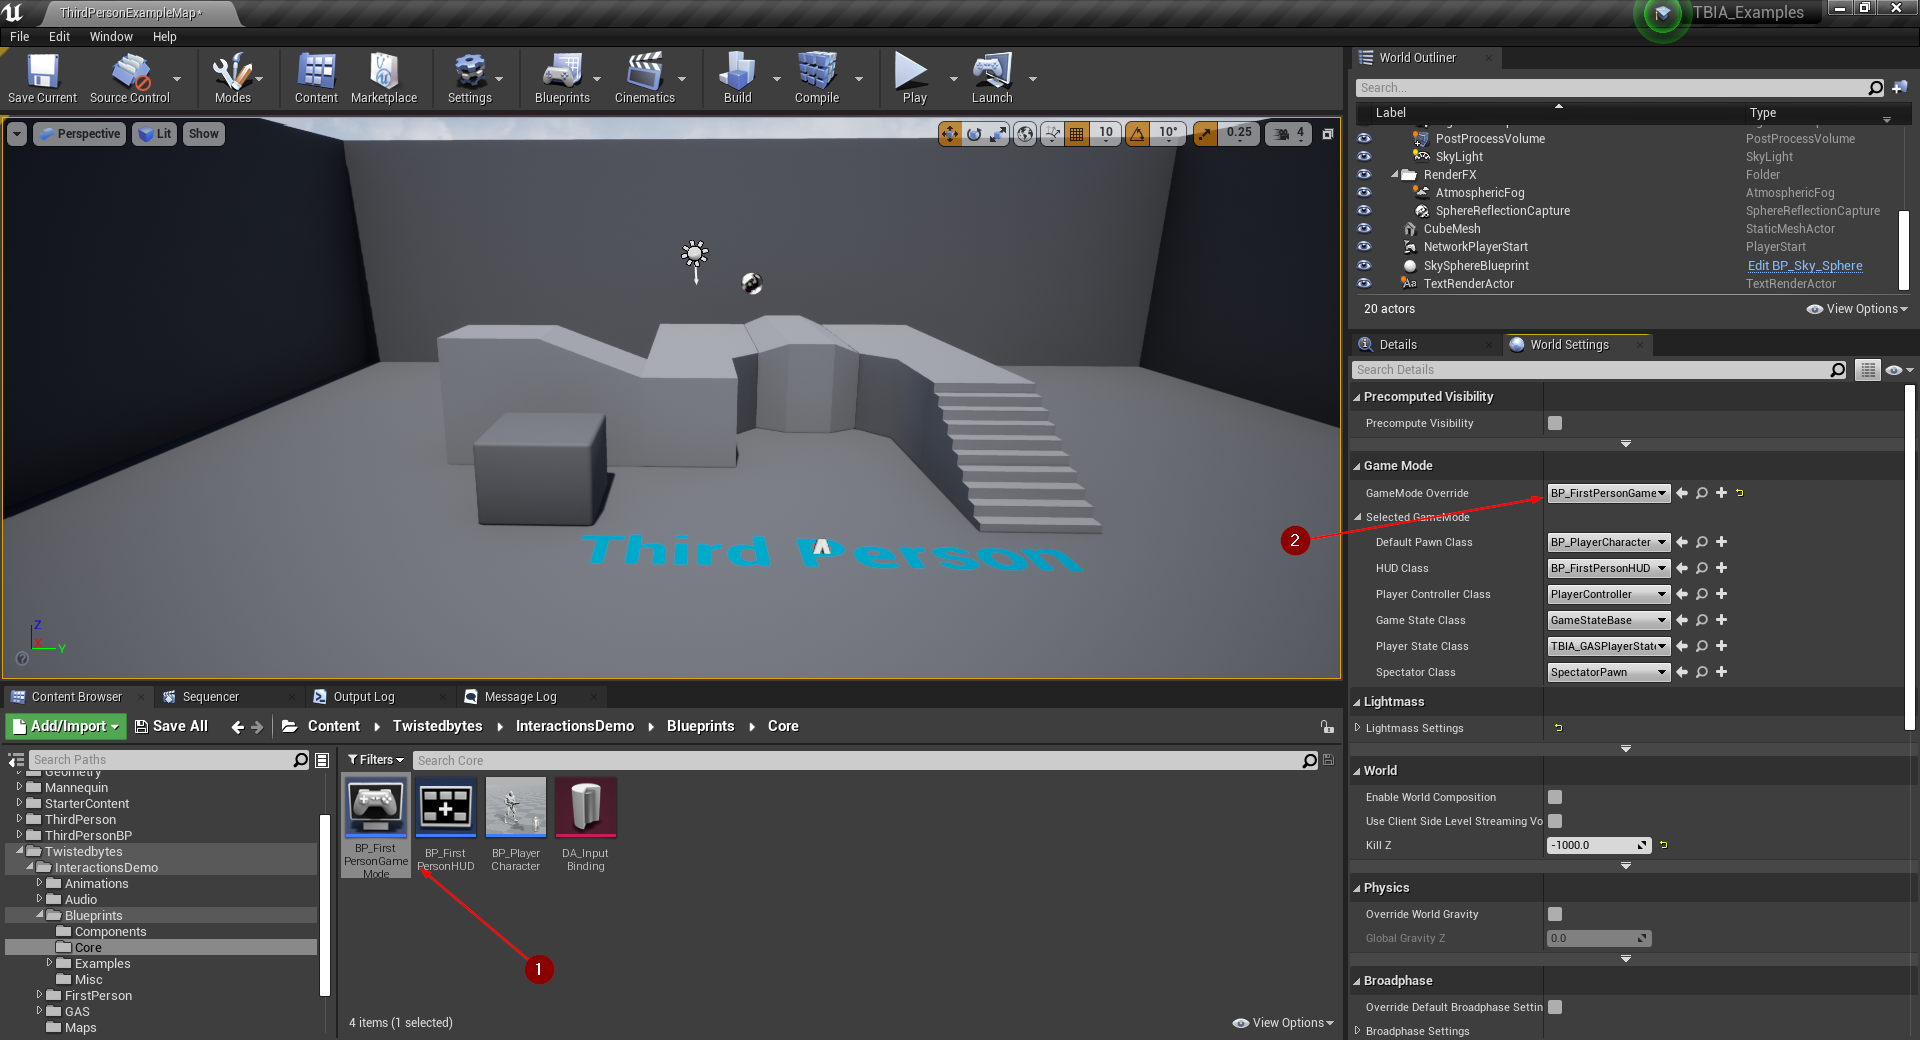
Setting GameMode
Navigate to the folder shown in the image below and select BP_FirstPersonGameMode 1.
In the World Settings tab, assign the GameMode Override property with the selected Game Mode asset as shown in 2.
note
In case you cannot find the World Settings tab in Unreal Editor, go to Window | World Settings to open it.
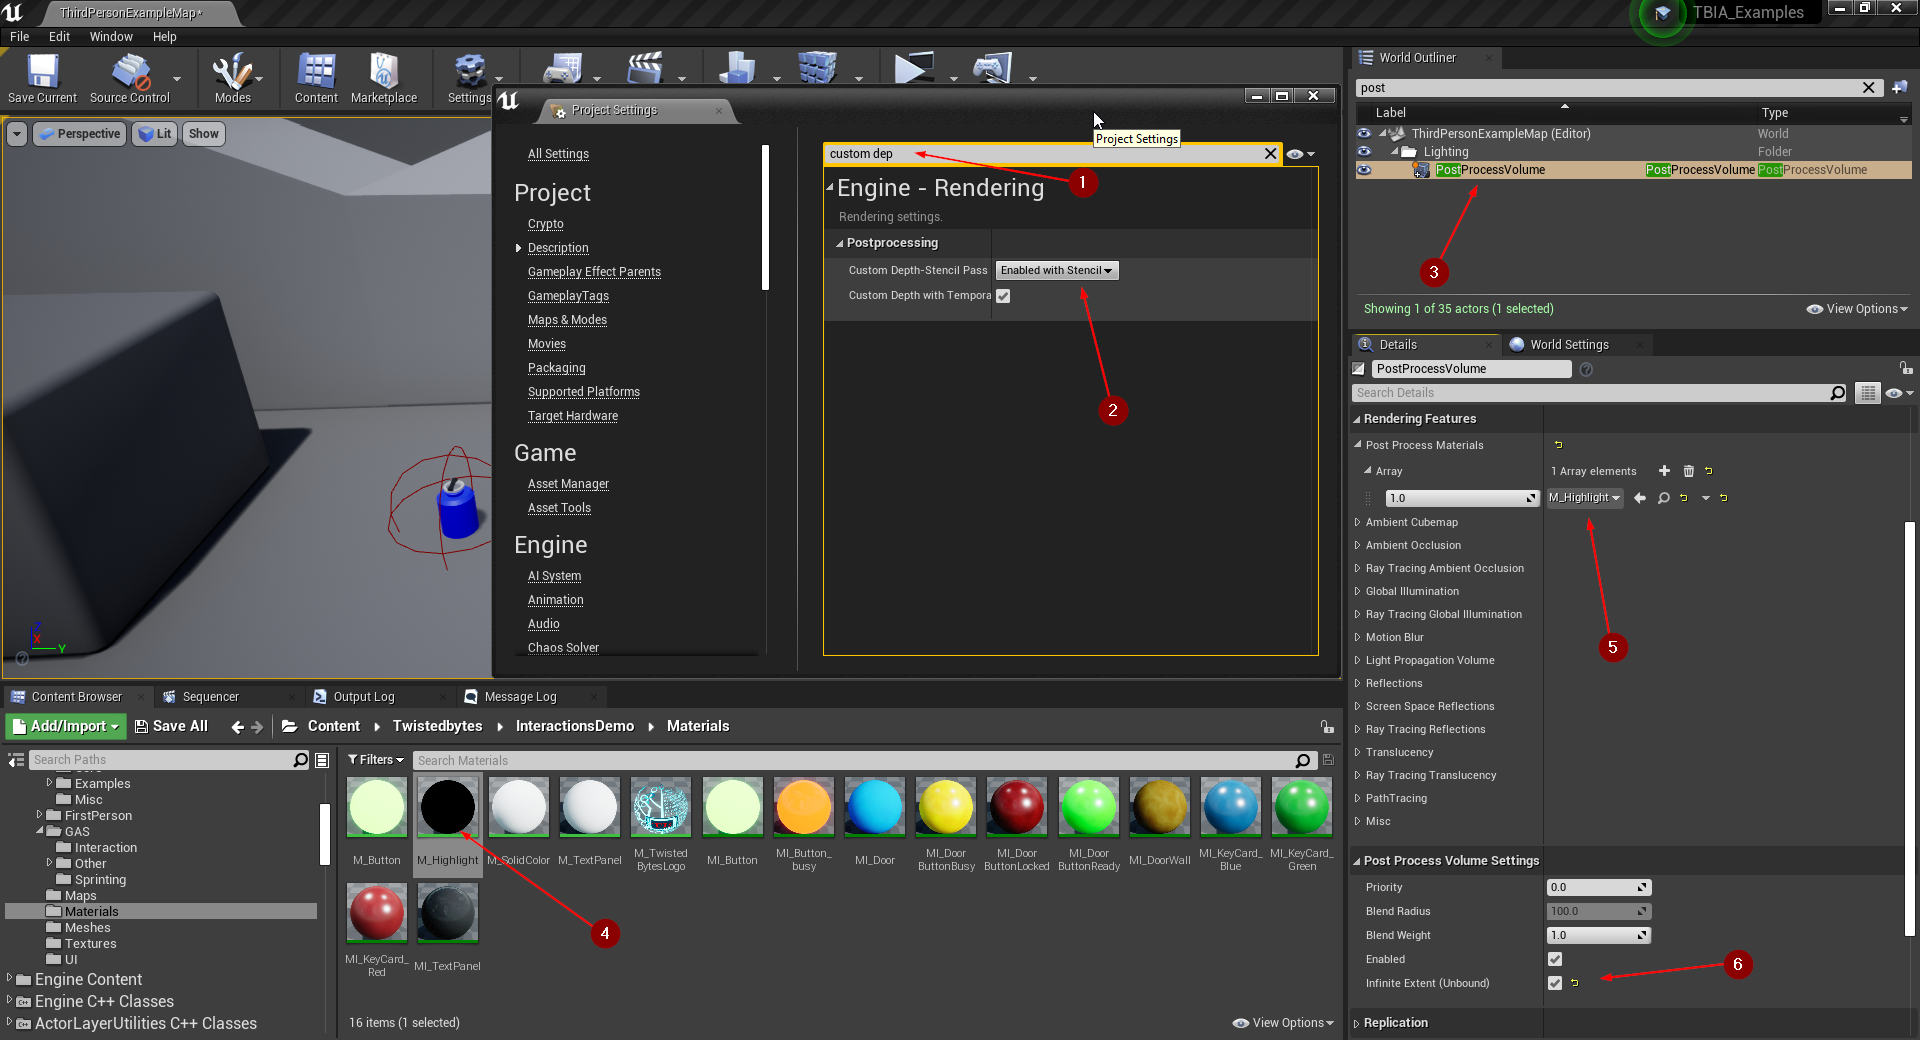
PostProcess Material
The demo project uses a custom PostProcess Material so that objects focused by a player can be highlighted.
In order to make the highlighting feature work, change Custom Depth-Stencil Pass to Enabled with Stencil in your project settings.
The easiest way to find it is by searching for Custom Depth in the Project Settings search field 1.
Then, select your PostProcessVolume in the World Outliner tab 3 and add our custom PostProcess Material M_Highlight
at 4 to the Post Process Materials array as shown in 5. Also make sure that
Infinite Extent (Unbound) 6 is enabled in your PostProcessVolume.