Using Enhanced Input
Only available for Unreal Engine: 4.27 5.0+
The Enhanced Input plugin provides a new and more flexible input framework. It implements features like chorded actions, contextual input, radial dead zones, etc. Its core design is a data-driven configuration approach and therefore this page will guide you through the creation and the setup process of all those required data assets.
note
To learn more about the Enhanced Input plugin, please check out the official documentation page here.
Regular Implementation
In order to use the Enhanced Input plugin together with the TwistedBytes Interaction Plugin, you simply need to follow the instructions of this subsection.
At the end, you will be able to trigger interactions using the Enhanced Input system. Input events will then be passed to the TwistedBytes Interaction Plugin which in turn will activate/cancel the corresponding Gameplay Abilities.
Enabling Enhanced Input in your Project
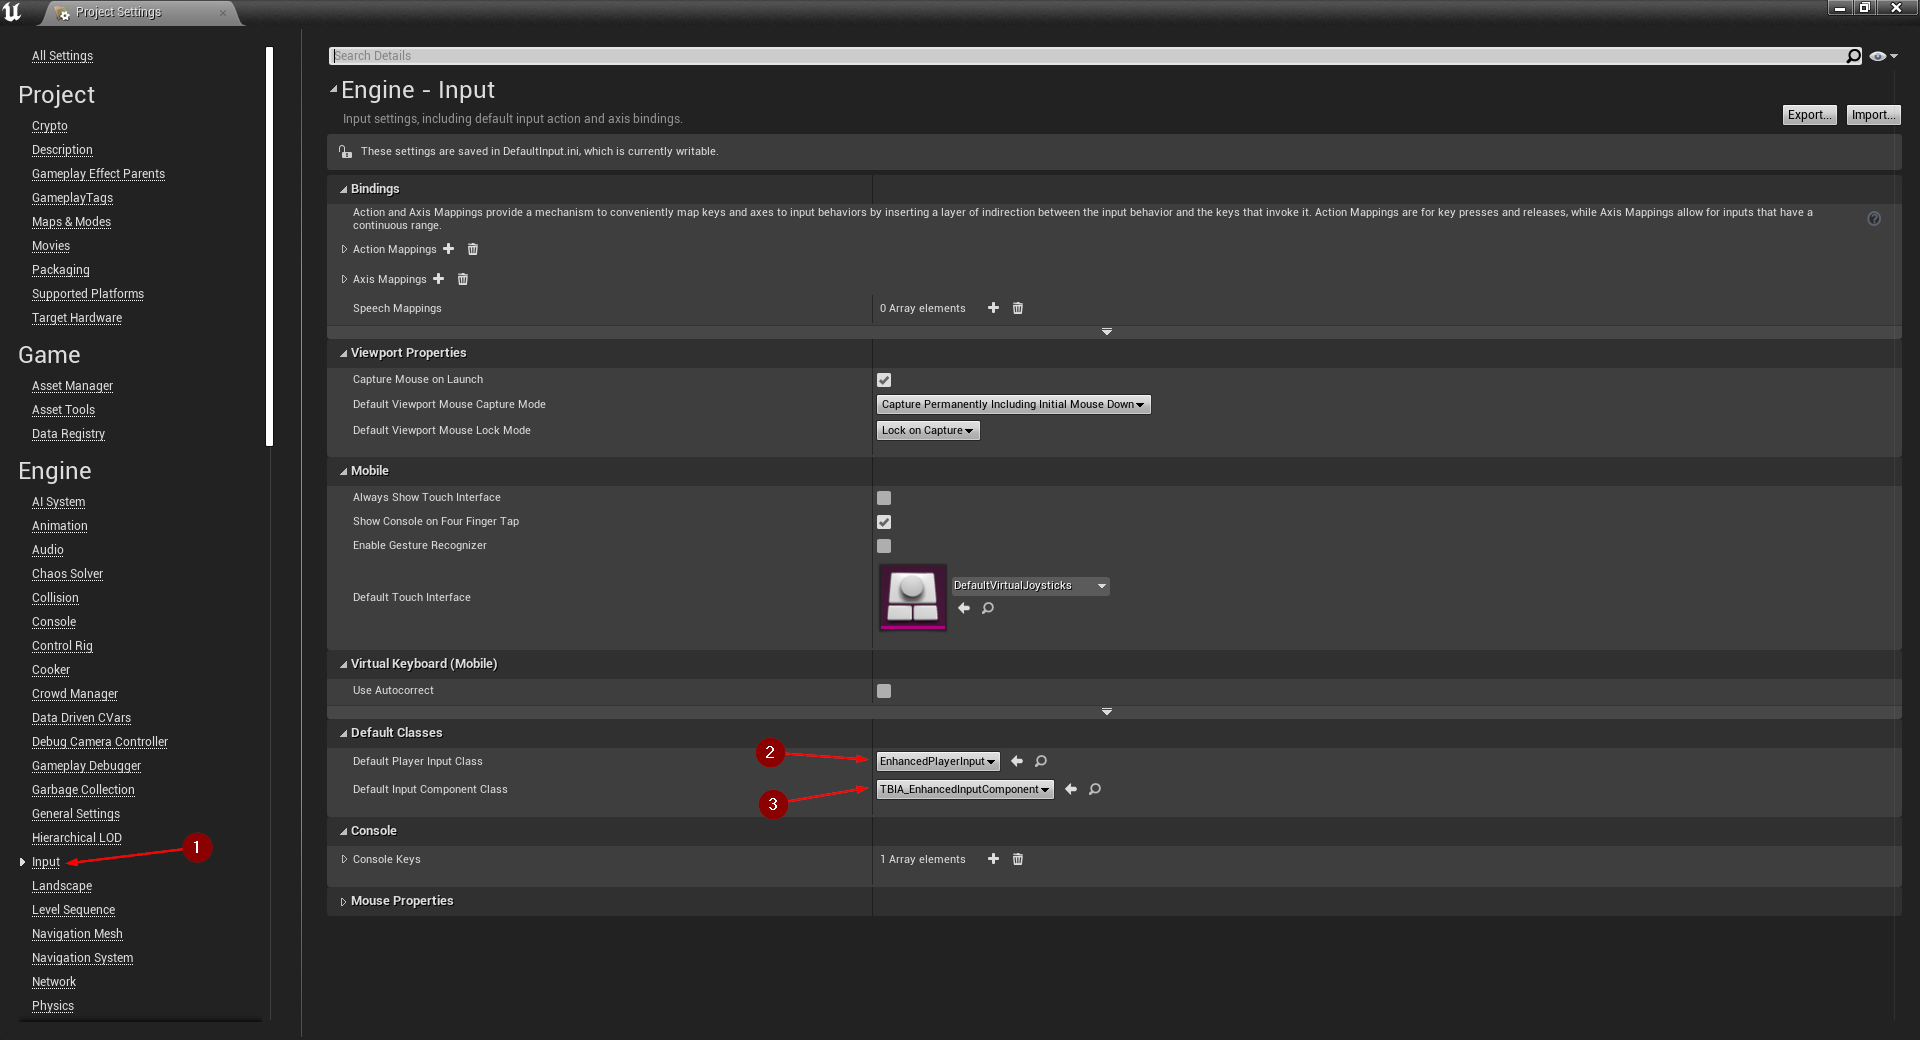
In order to enable Enhanced Input you need to change two input-related default classes in your project settings.
Go to Project Settings | Engine | Input 1 and select the following classes from the corresponding dropdown menu:
- Default Player Input Class:
EnhancedPlayerInput2 - Default Input Component Class:
TBIA_EnhancedInputComponent3
Creating Enhanced Input data assets
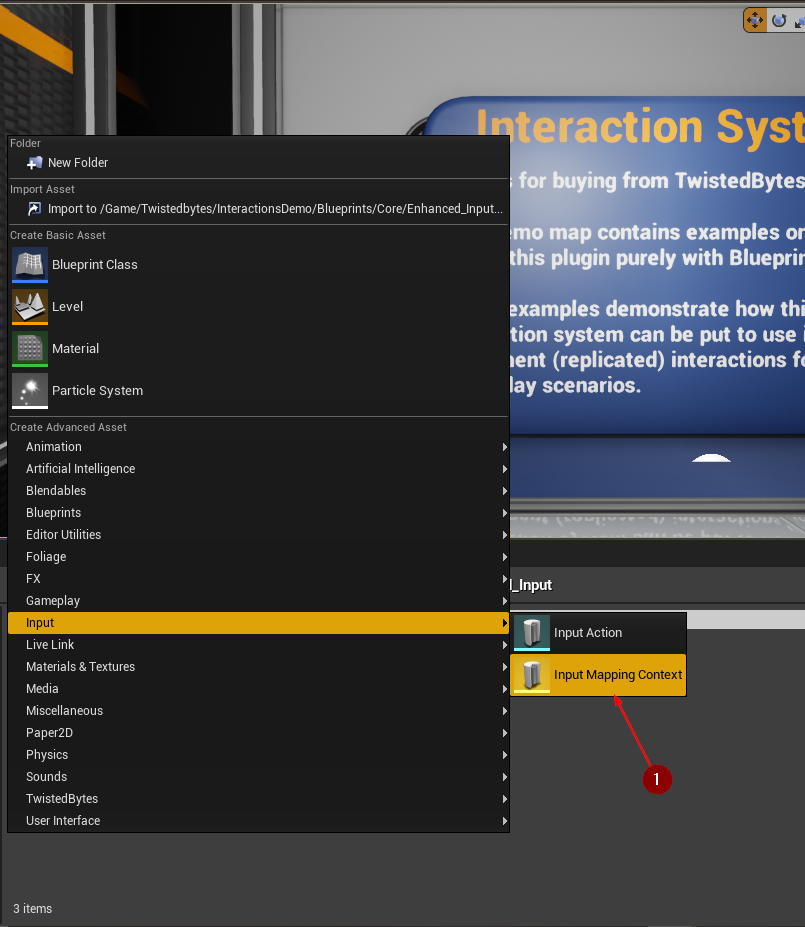
Next, we need to create two new data assets; a so-called Input Mapping Context and at least one Input Action. You can think of the Input Mapping Context as "glue" that allows you to bind physical inputs (i.e. keyboard keys, mouse/gamepad buttons) to specific Input Action data assets that should be triggered whenever a physical input is pressed or released.
To create an Input Mapping Context, right-click in the Content Browser and
select Input | Input Mapping Context 1.
Name this newly created asset InputMappingContext.
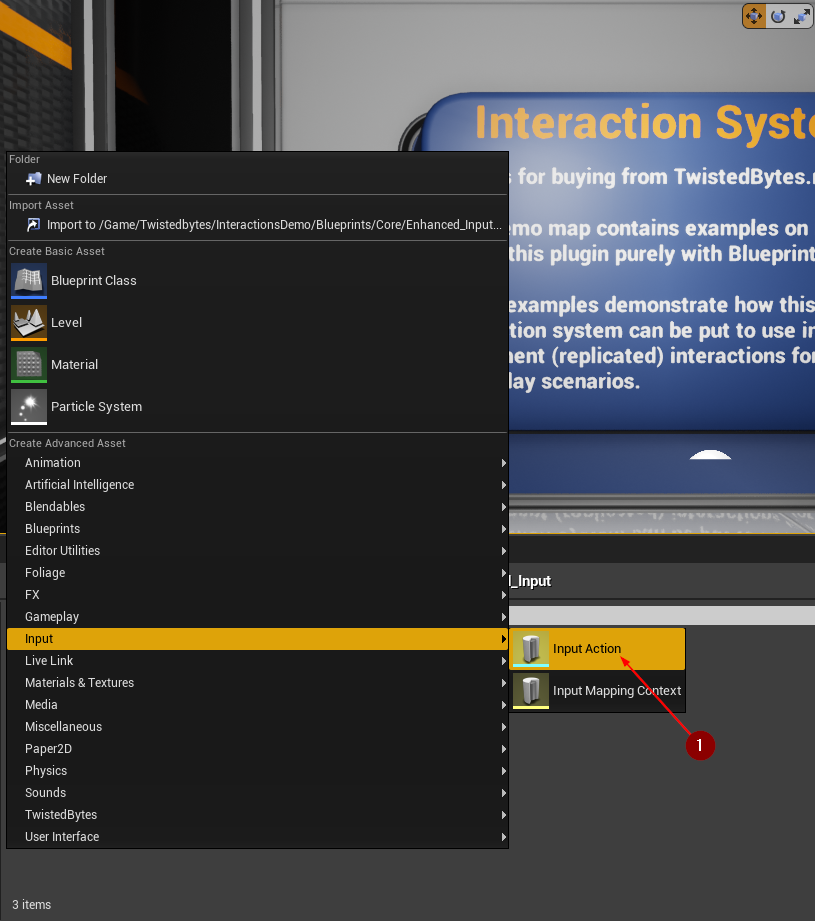
Then, to also create a new Input Action, right-click in the Content Browser and
select Input | Input Action 1.
Name this newly created asset IA_InteractActive so that it reflects the
intended purpose in its asset name accordingly.
Setup Enhanced Input data assets
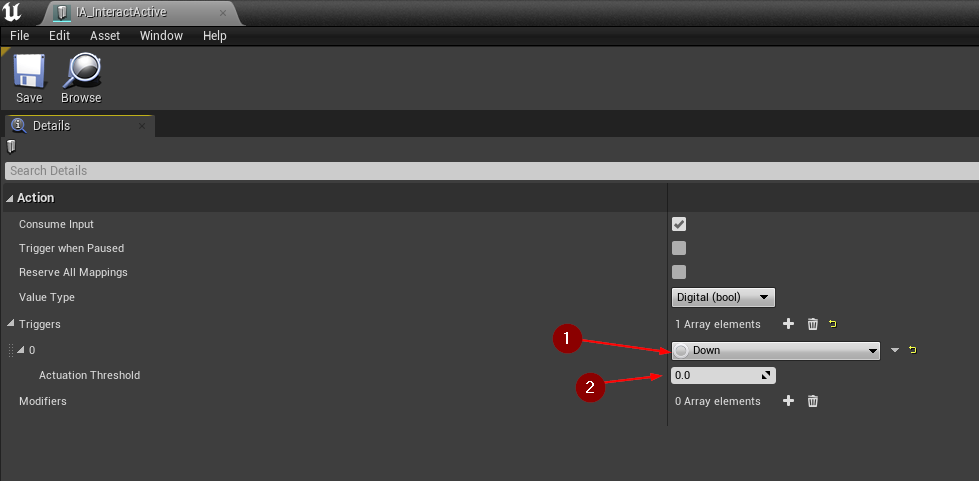
Open the Input Action you created earlier and add a trigger. Set it to Down 1.
Also make sure the Actuation Threshold is equal to zero 2.
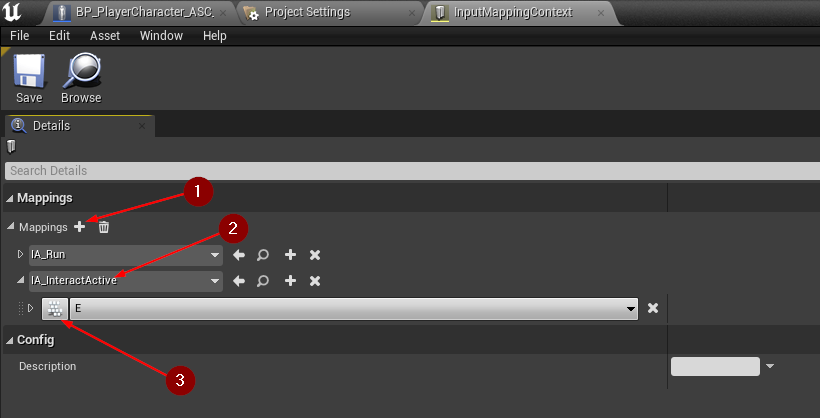
Now, open the Input Mapping Context data asset InputMappingContext you created earlier and add a new action mapping
by clicking on + 1.
Set IA_InteractActive as the Input Action 2 for the new entry.
After that you need to bind the Input Action to a physical input 3, e.g. the E key on your keyboard,
as shown in the image below.
Creating GAS Enhanced Input data asset
Now that we have finished the initial Enhanced Input setup, we need to also prepare one more data asset, a so-called GAS Enhanced Input Mapping, that enables us to connect the Enhanced Input system with Gameplay Abilities from the TwistedBytes Interaction Plugin.
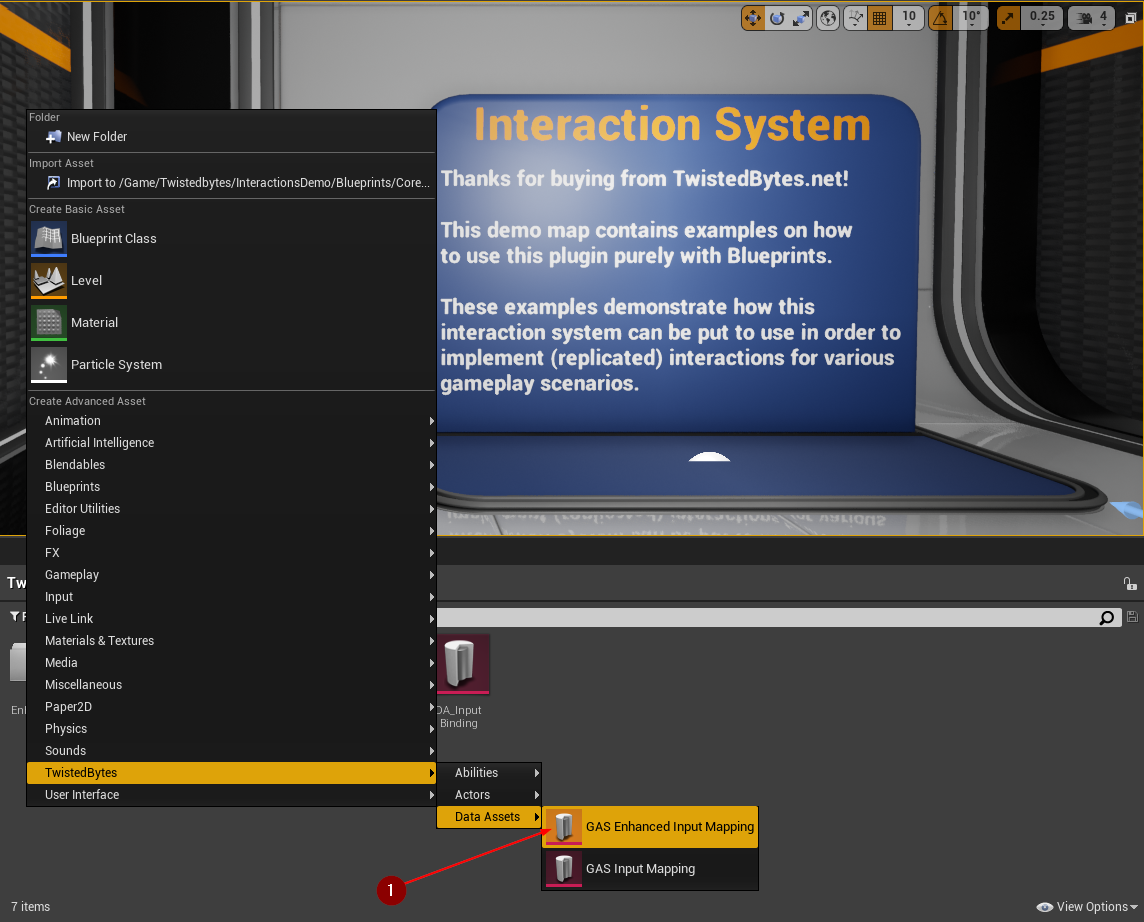
To create a GAS Enhanced Input Mapping, right-click in the Content Browser and
select TwistedBytes | Data Assets | GAS Enhanced Input Mapping 1.
Name this newly created asset GASEnhancedInputMapping.
Setup GAS Enhanced Input data asset
Now, open the GAS Enhanced Input Mapping data asset GASEnhancedInputMapping.
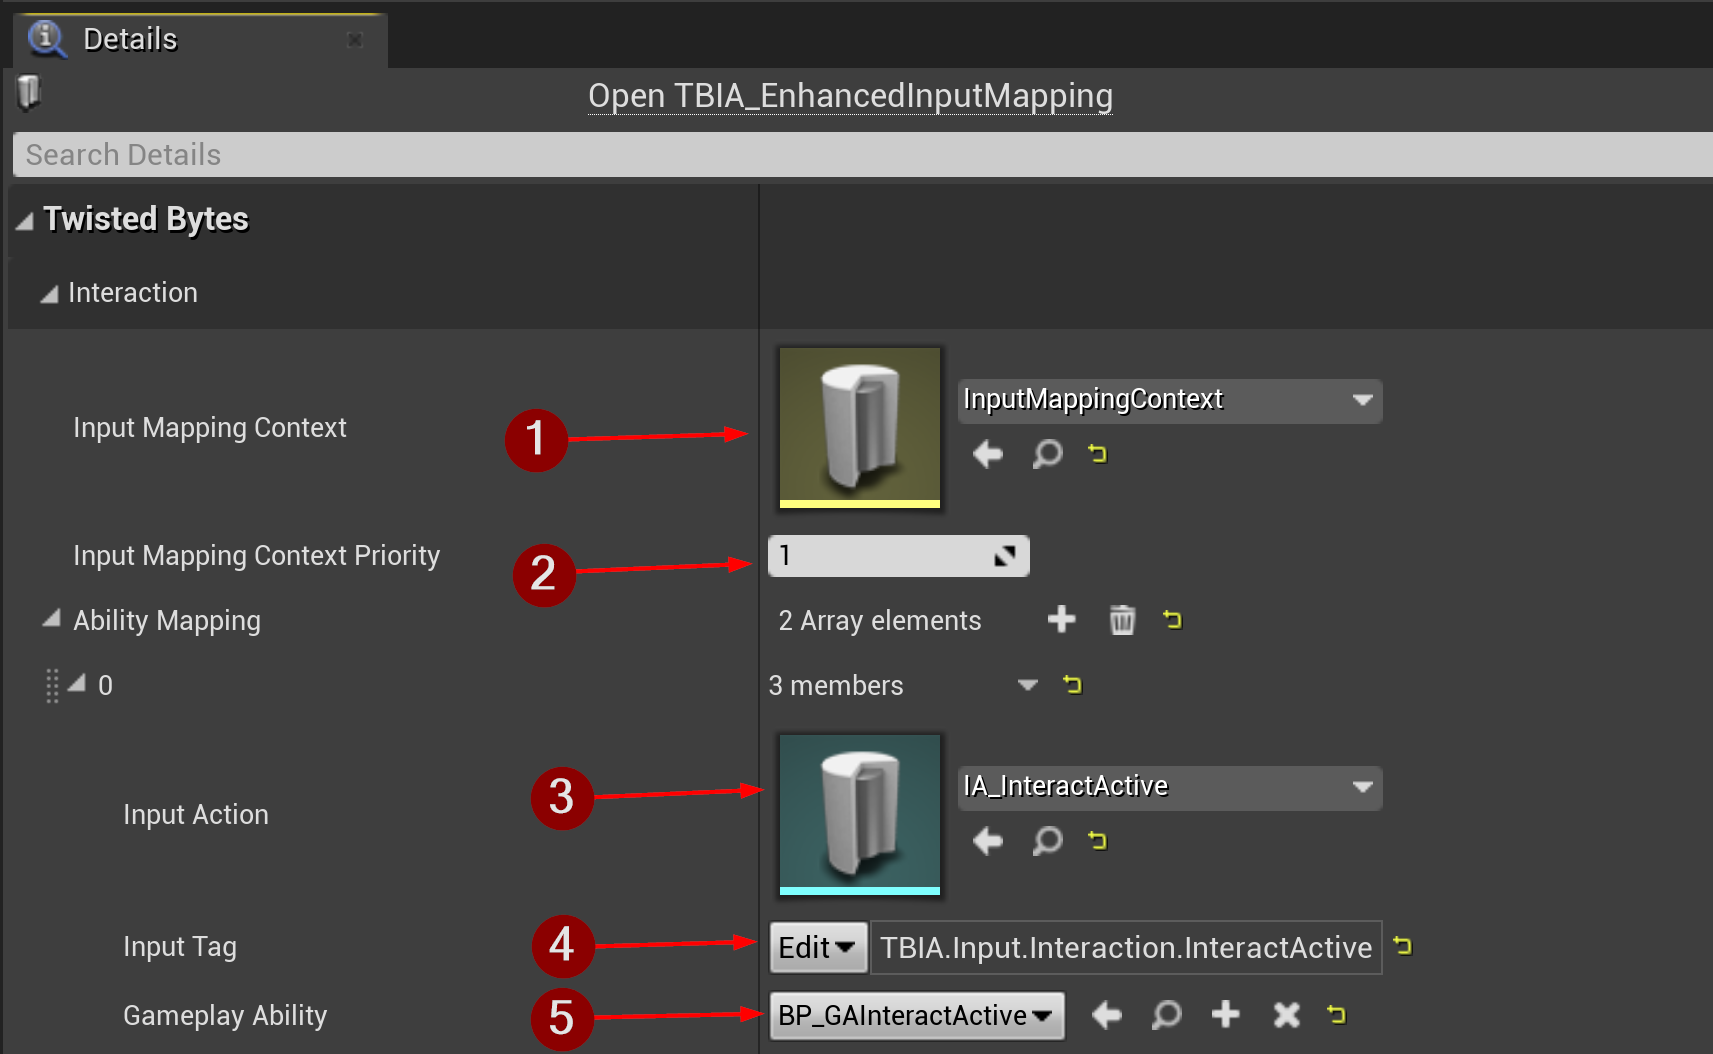
Set the Input Mapping Context to the InputMappingContext data asset 1 that was created earlier.
Optionally, adjust the Input Mapping Context Priority 2 to your needs in case you are using multiple input mappings.
Then, click on + to add a new Ability Mapping entry and set all variables as follows:
- Input Action:
IA_InteractActive3 - Input Tag:
TBIA.Input.Interaction.InteractActive4 (See this if this tag does not exist in your project) - Gameplay Ability:
InteractActive5 (See this if you haven't created it yet)
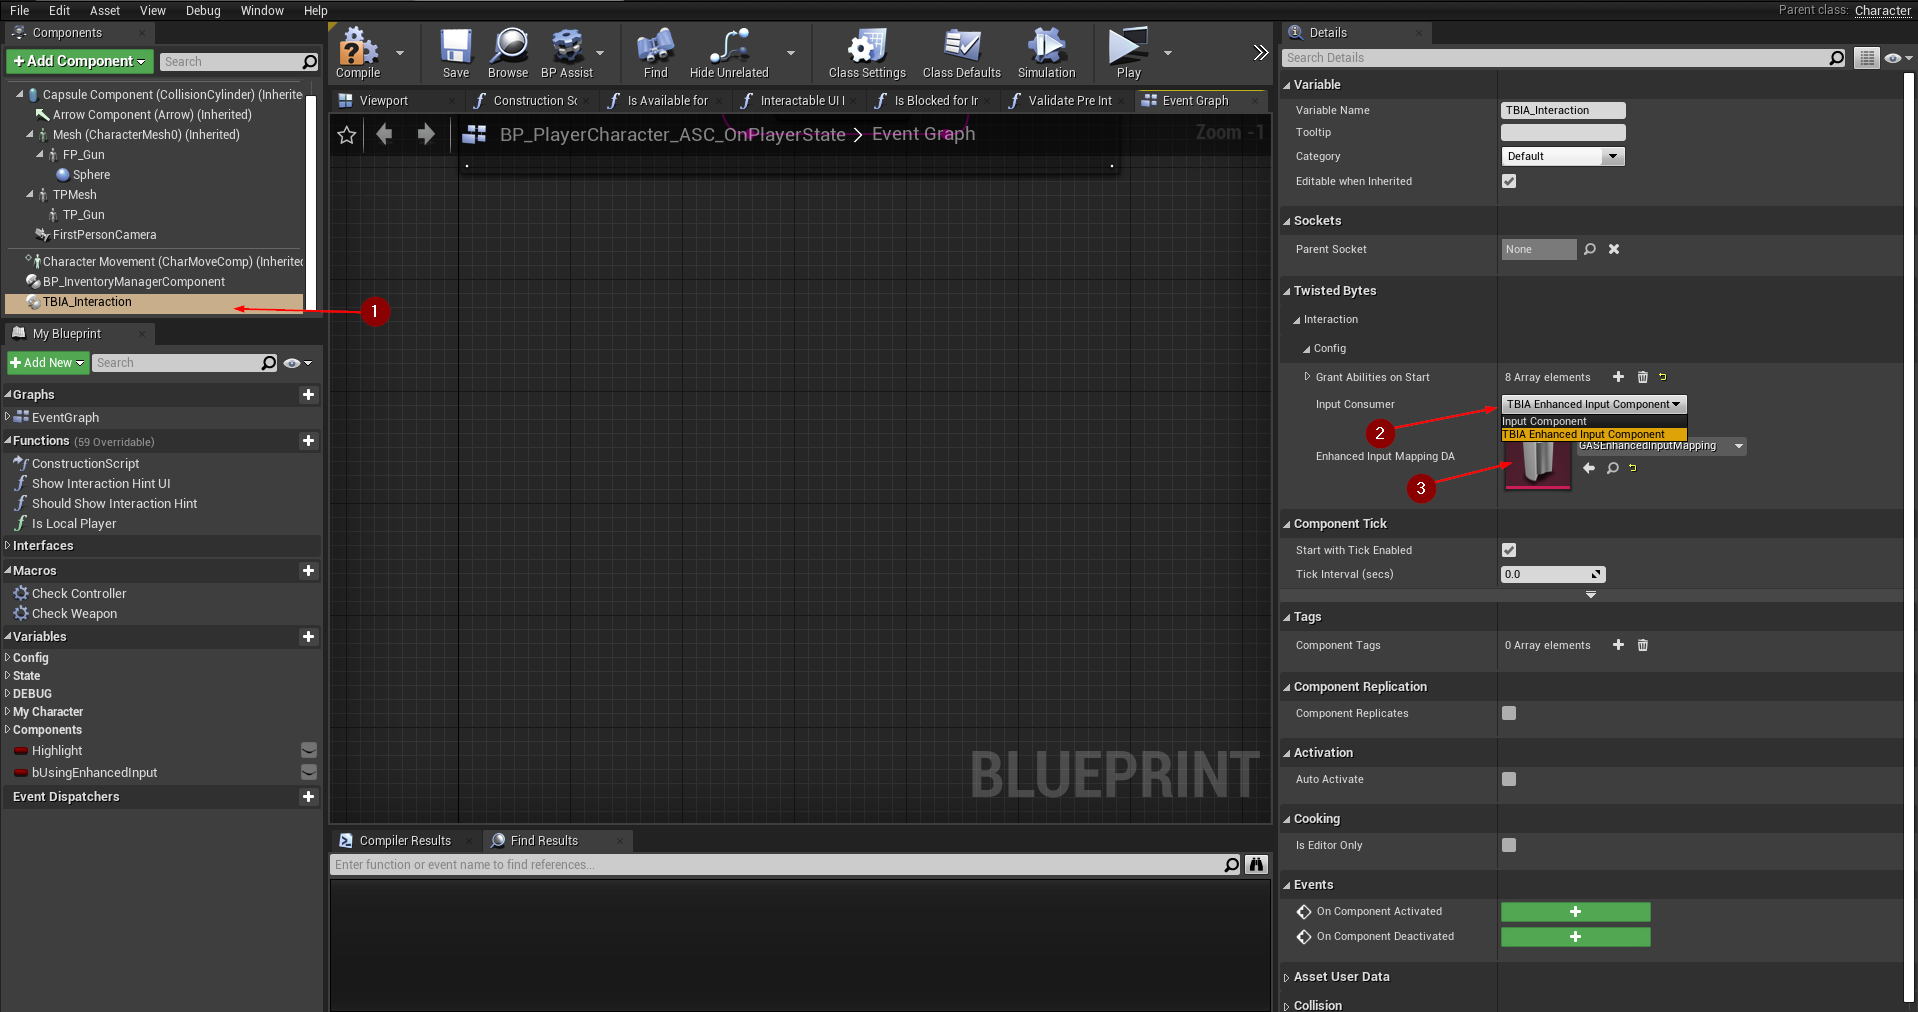
Setup Player Character
Open your Player Character Blueprint (e.g. BP_PlayerCharacter) and select the TBIA_Interaction
component 1 in the Components panel.
In the Details panel under TwistedBytes | Interaction | Config, set the following properties:
- Input Consumer:
TBIA Enhanced Input Component2 - Enhanced Input Mapping DA:
GAS Enhanced Input Mapping3
Custom Implementation
Setup Custom Abilities
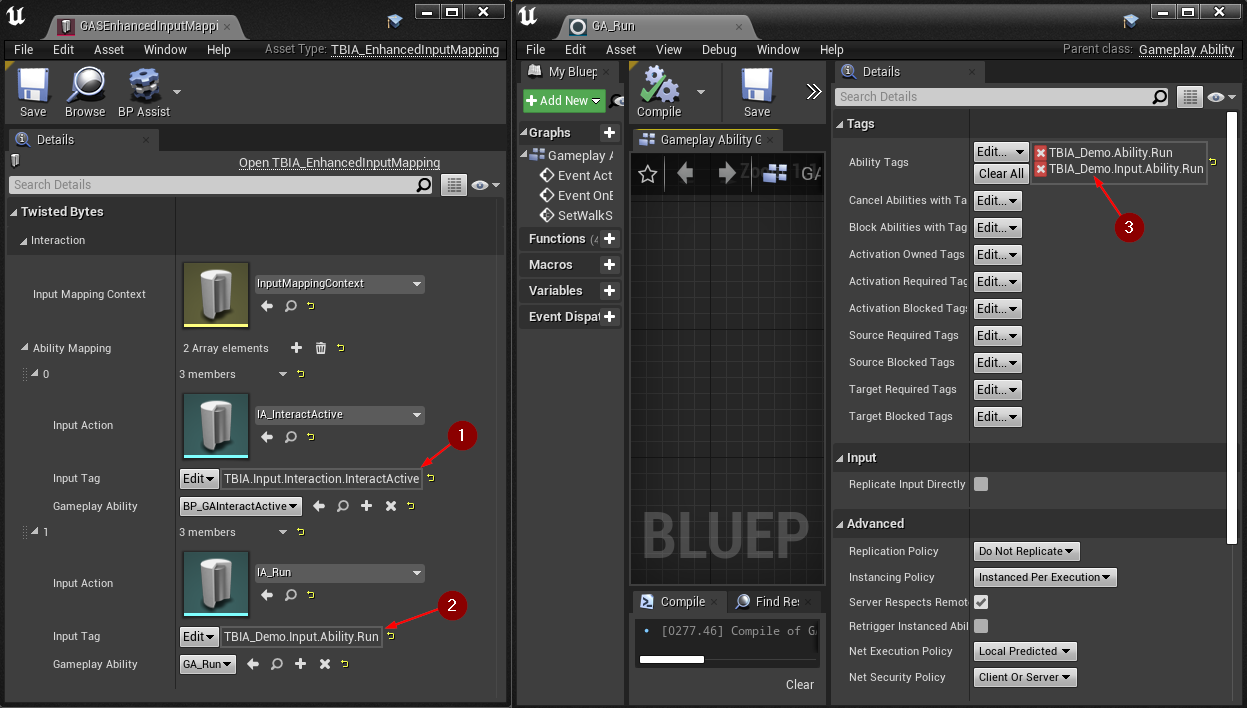
In order to add more Gameplay Abilities, you can simply add additional entries to the GAS Enhanced Input Mapping.
Each new entry requires to specify its own Input Action (e.g. IA_Run), a Gameplay Tag, and a
Gameplay Ability (e.g. GA_Run).
note
The InteractActive Gameplay Ability already has the Gameplay Tag TBIA.Input.Interaction.InteractActive added
to its Ability Tags property. This is the same tag we are referring to in the
GAS Enhanced Input Mapping 2.
You want to create a new Gameplay Tag (in this example: TBIA_Demo.Input.Ability.Run) for each ability which then needs to be set in two locations:
- Input Tag in the GAS Enhanced Input Mapping entry 2
- Ability Tags in the Gameplay Ability 3