Using Interact Active
Create Interact Active Ability
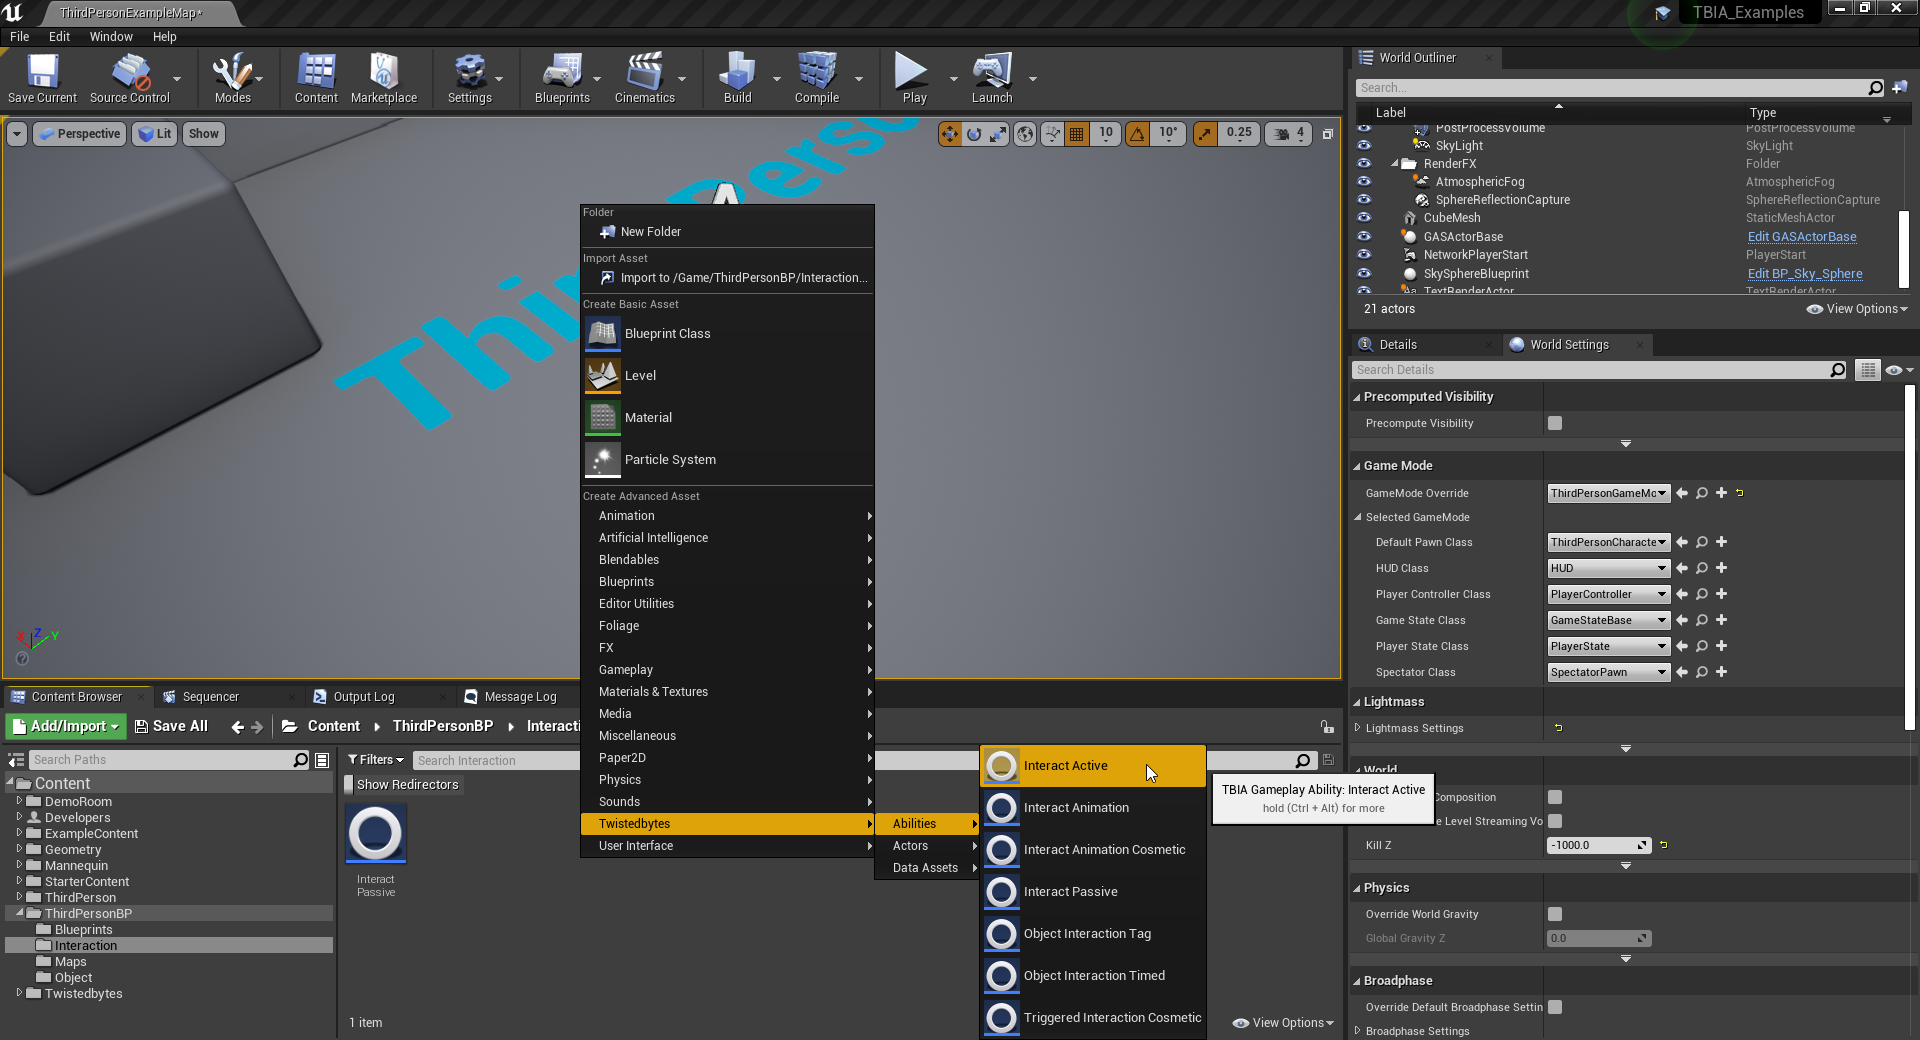
To create an Interact Active ability, simply right-click in the Content Browser
and select TwistedBytes | Abilities | Interact Active as shown in the image below.
Name the newly created asset InteractActive.
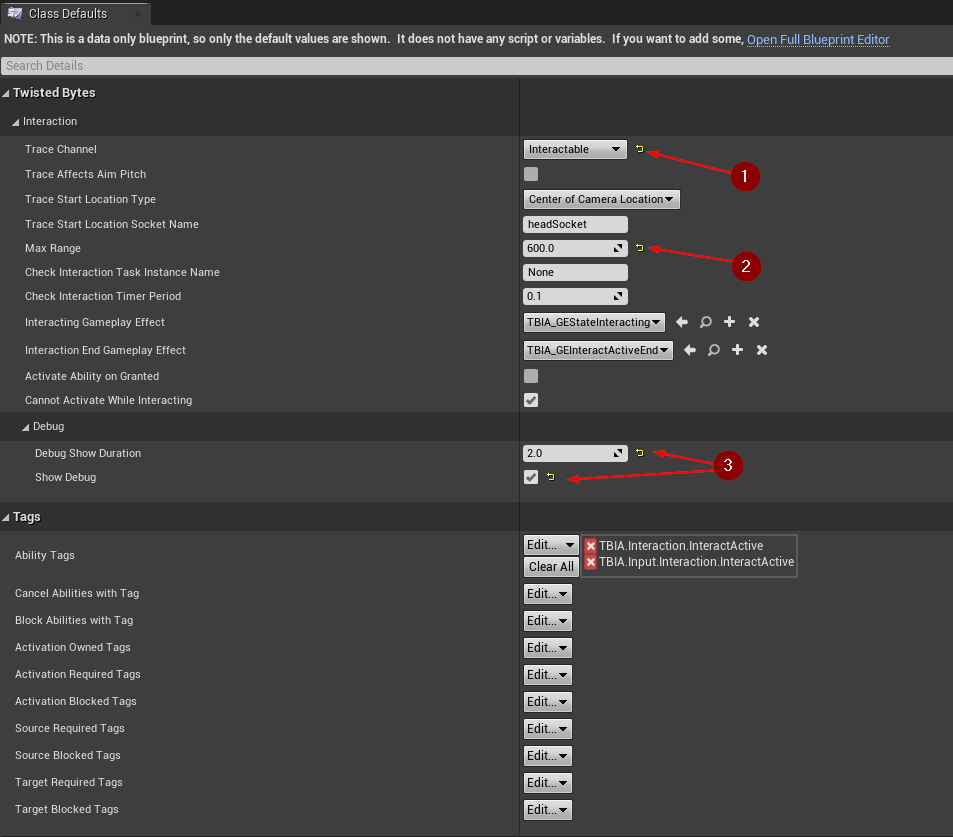
Open the Ability you just created and set the Trace Channel to Interactable 1.
We want the player character to be able to interact with interactable objects that are in front
of the character and within a range of 3 meters. Since the camera's arm length is also set to 3 meters (but sitting
behind our player character), we need to compensate for the additional 3 meters by setting the Max Range property
to 600 cm 2.
For easier debugging of the Interact Active Ability, enable Show Debug and set Debug Show Duration to
2.0 seconds 3.
info
The property Trace Start Location Type allows you to choose the start location for when executing an interaction line trace:
Center of Camera LocationSocket on Character's MeshCursorCustom TraceNo Trace
Using Socket on Character's Mesh is only useful when you have stabilized head movement, or if you want to make a
socket from root and set its position next to the head bone.
In general, it is preferred to use Center of Camera Location for stable line traces.
Setup input
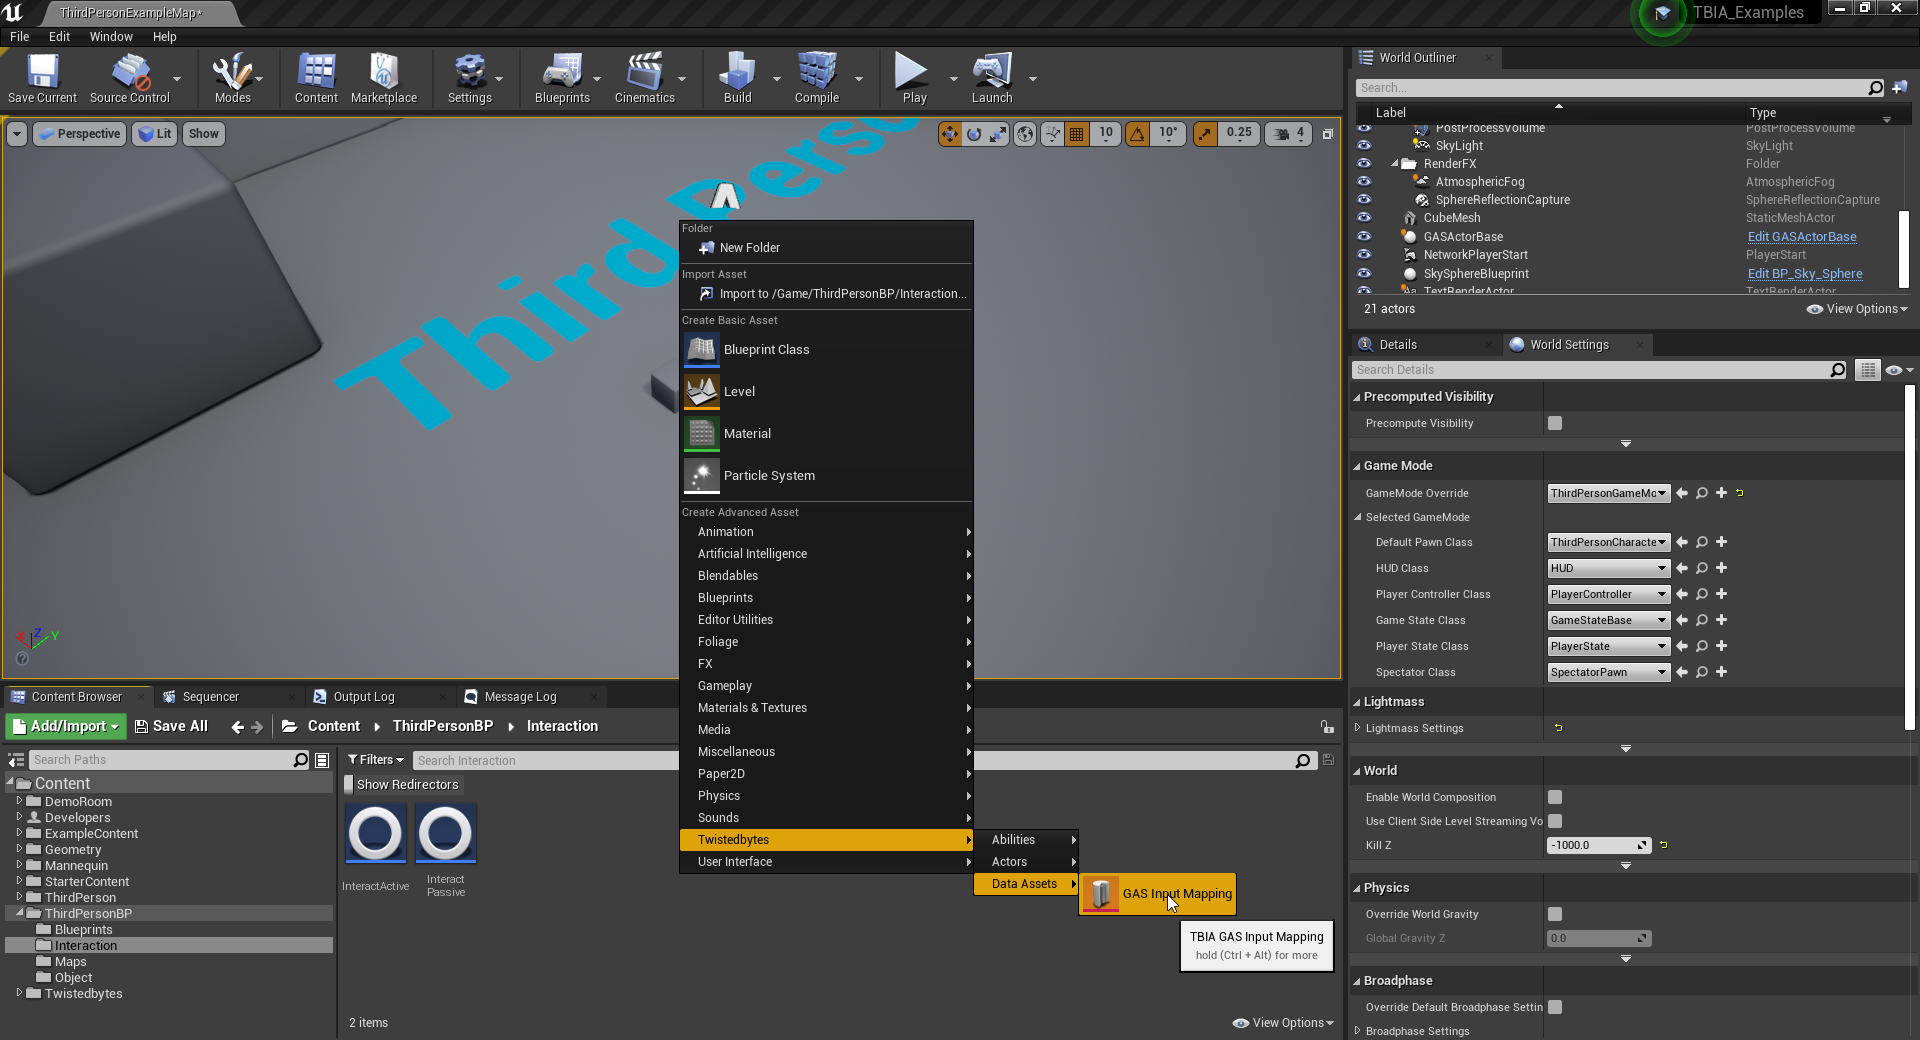
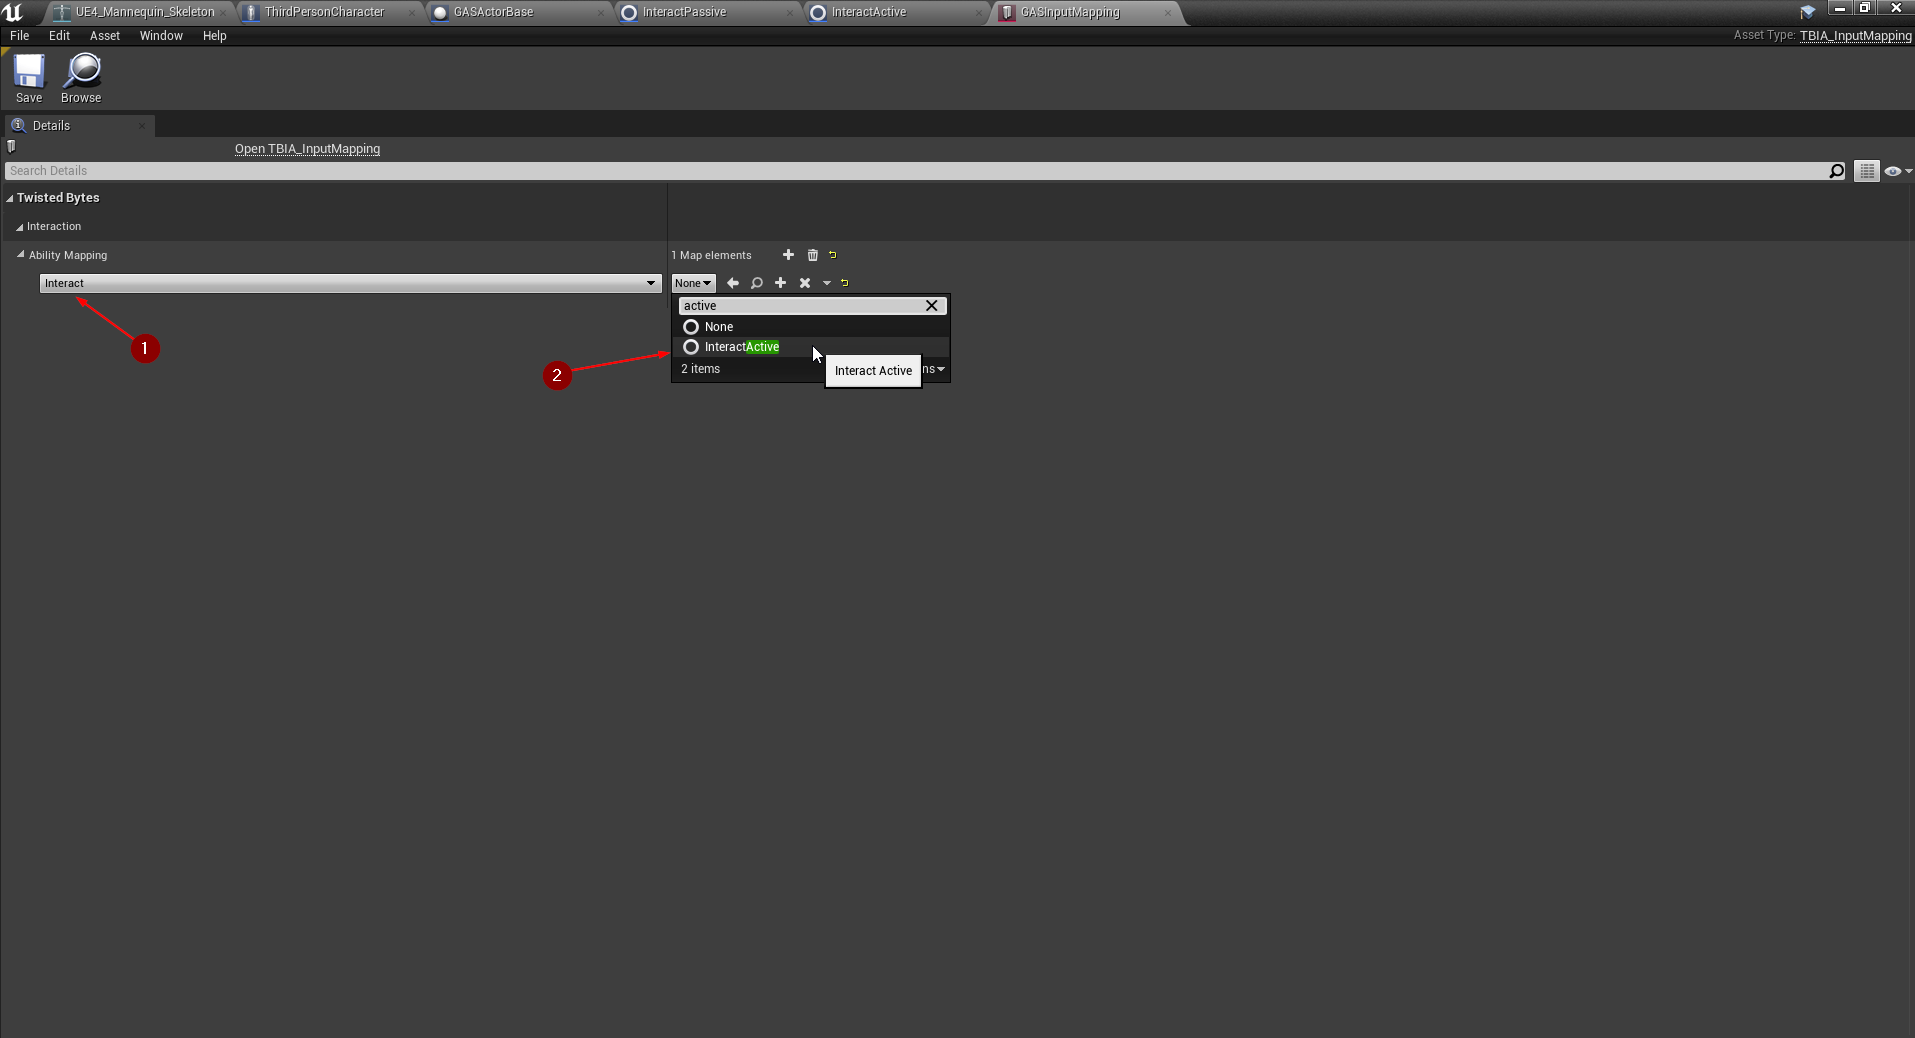
In order to bind the input with Interact Active Ability, right-click in the Content Browser and
select TwistedBytes | Data Assets | GAS Input Mapping as shown in the image below.
Open the data asset and add a new Ability Mapping. Select Interact 1 and set the
Interact Active 2 that we created as a value for the Interact key.
Now, select Edit | Project Settings .... In the Input section under Engine, create a new Action Mapping.
The name needs to be exactly written as TBIA_Interact. Lastly, specify any number of inputs (keys, buttons) that
you want to use to trigger interactions in your game like, for example, the E key on a keyboard.

Setup Player Character
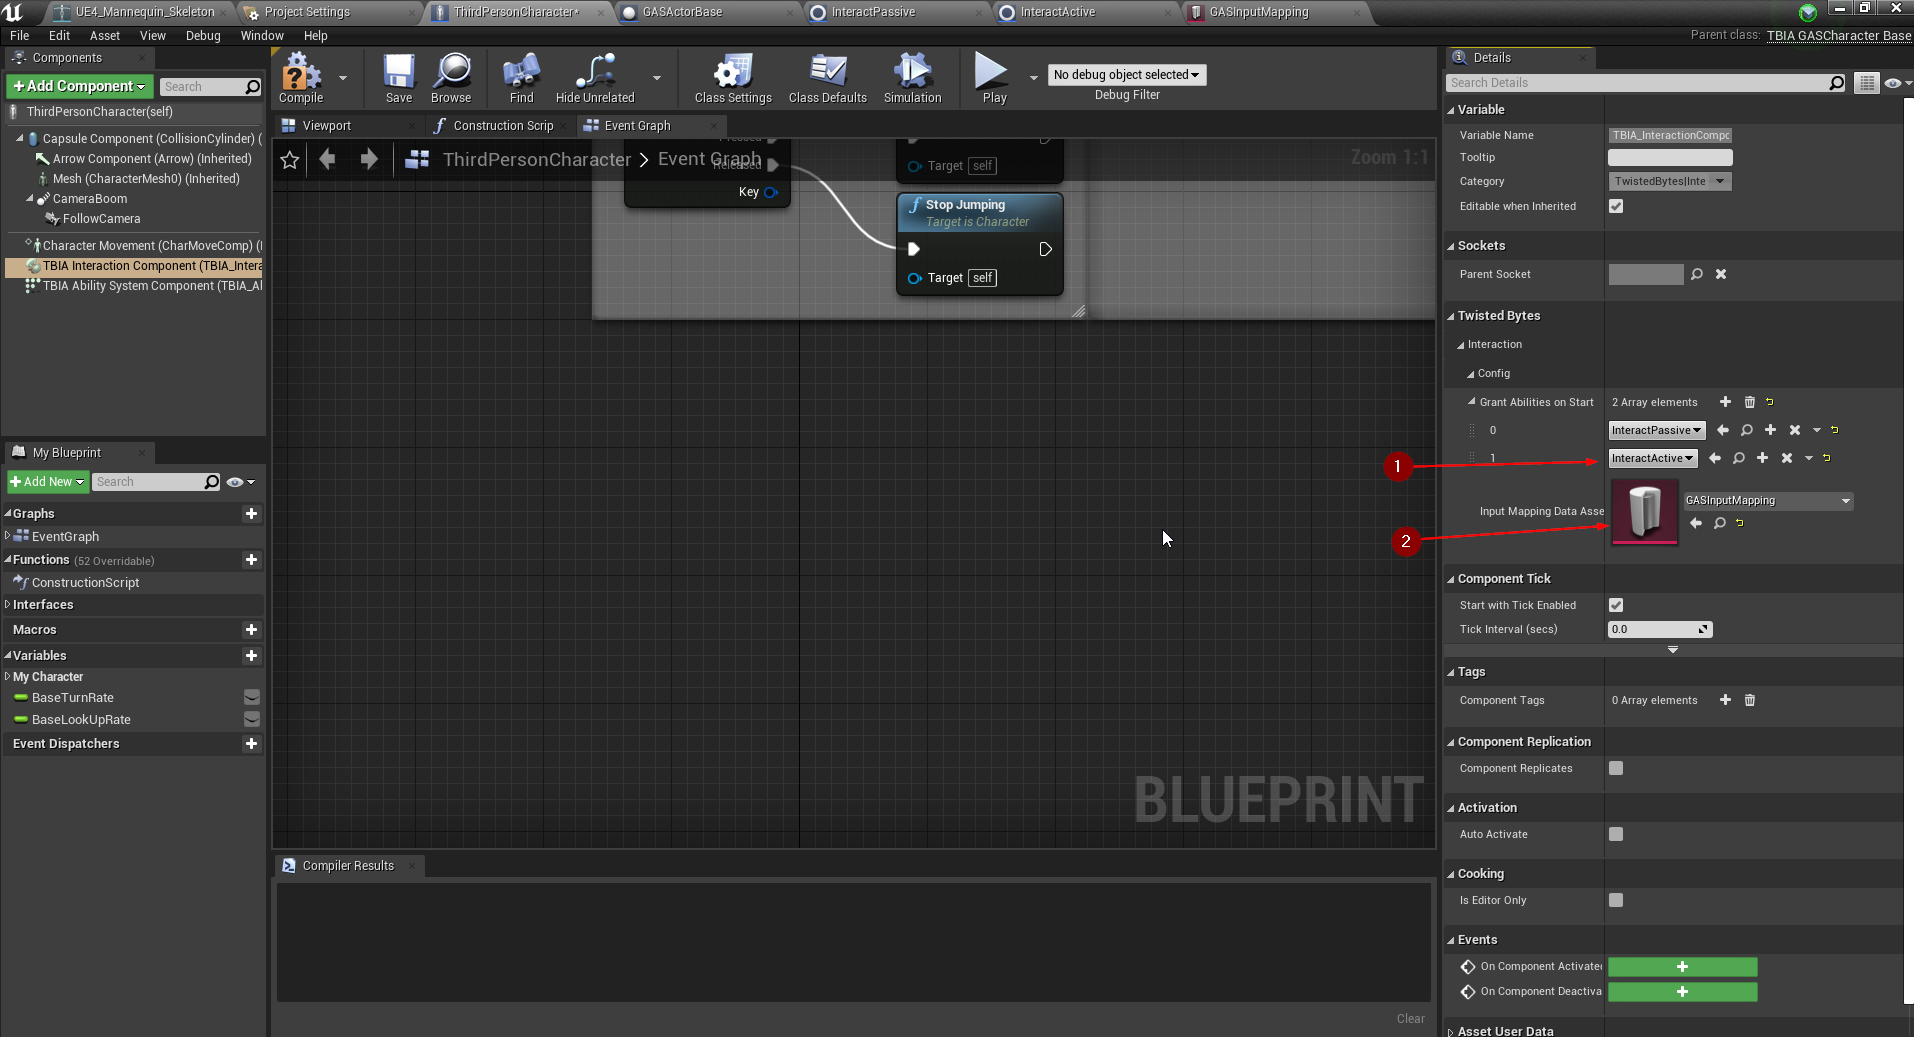
Open the ThirdPersonCharacter Blueprint and select TBIA Interaction Component in the Components tab.
In the Details tab, add your Interact Active ability to the Granted Abilities property 1.
Next, set the input mapping data asset you created earlier 2 as shown in the image below.
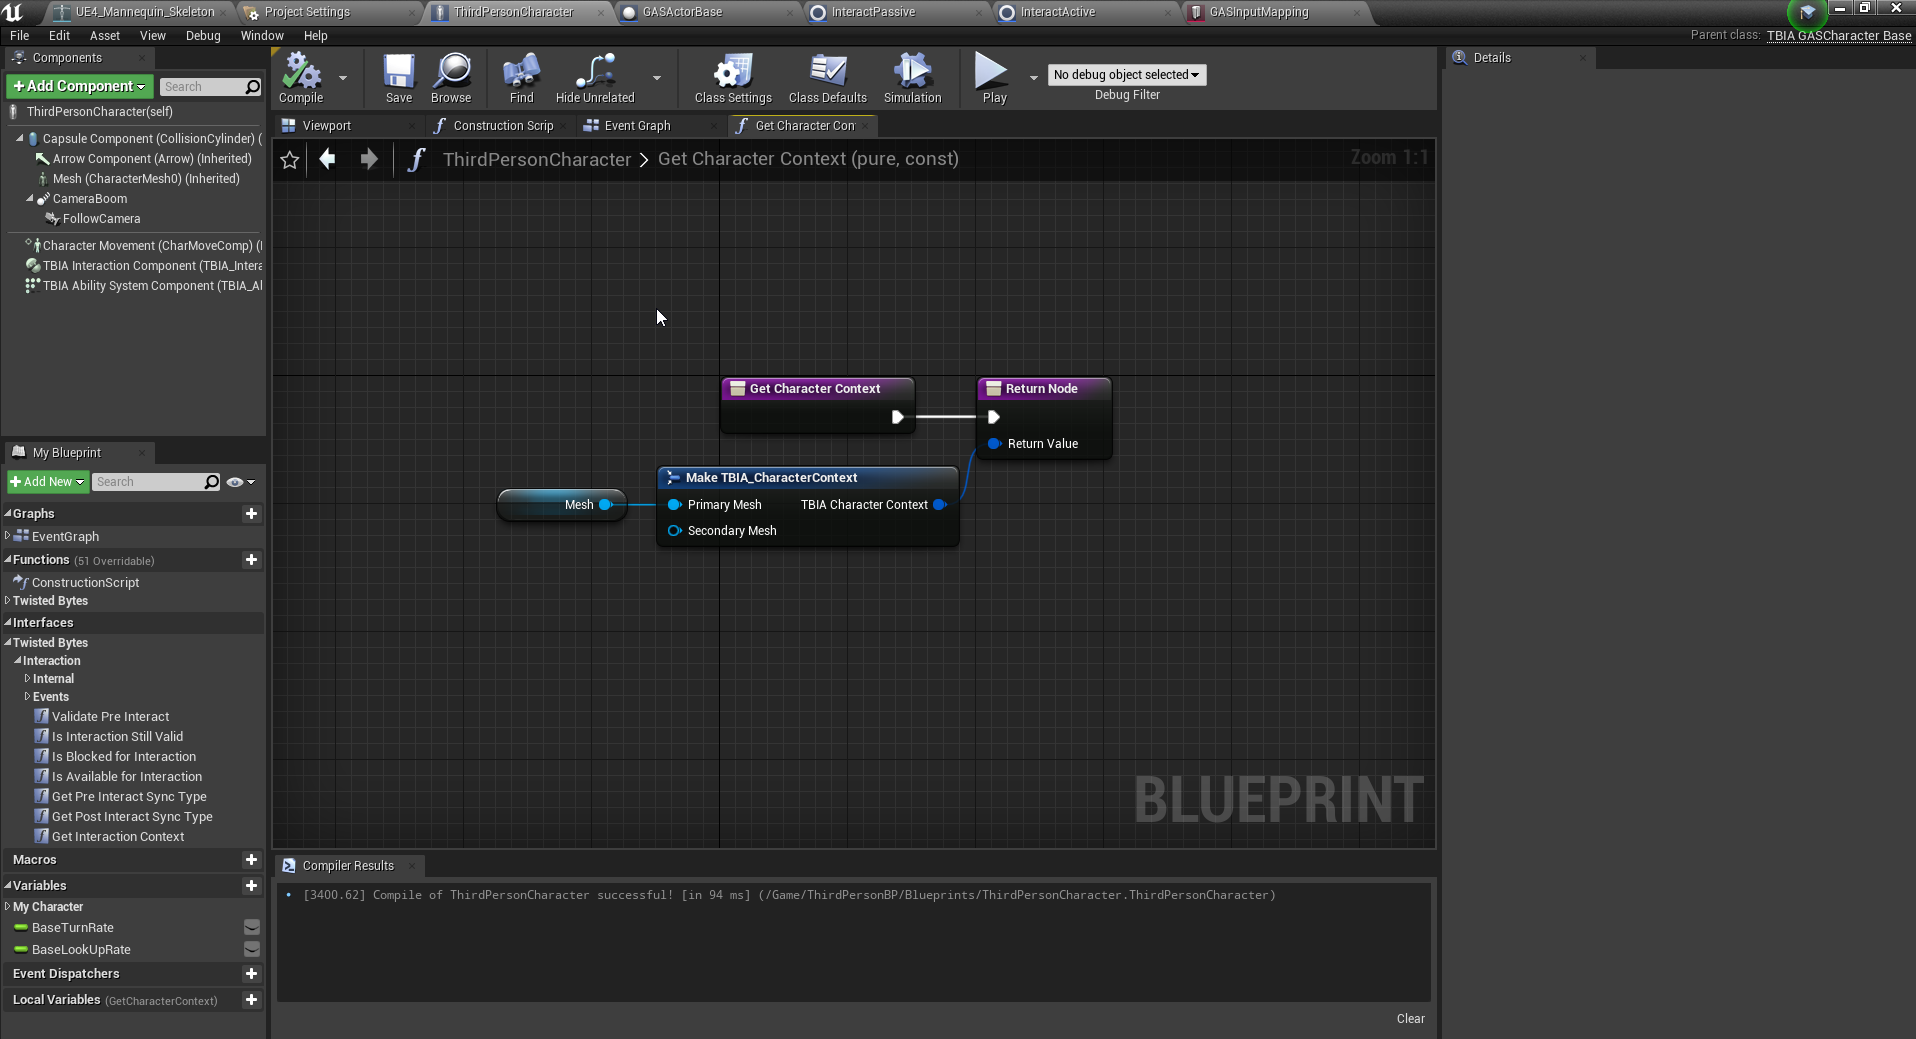
Finally, override the Get Character Context interface function. Click and drag the Return Value pin of the Return
node and select Make TBIA_CharacterContext. Then, set the reference of the third-person skeletal mesh component (Mesh) as Primary Mesh
in the struct that is going to be returned.
Interactable Actor
Open the GASActorBase Blueprint and override On Pre Interact, On Post Interact, On Cancel Interact
and print their results to see them in action.
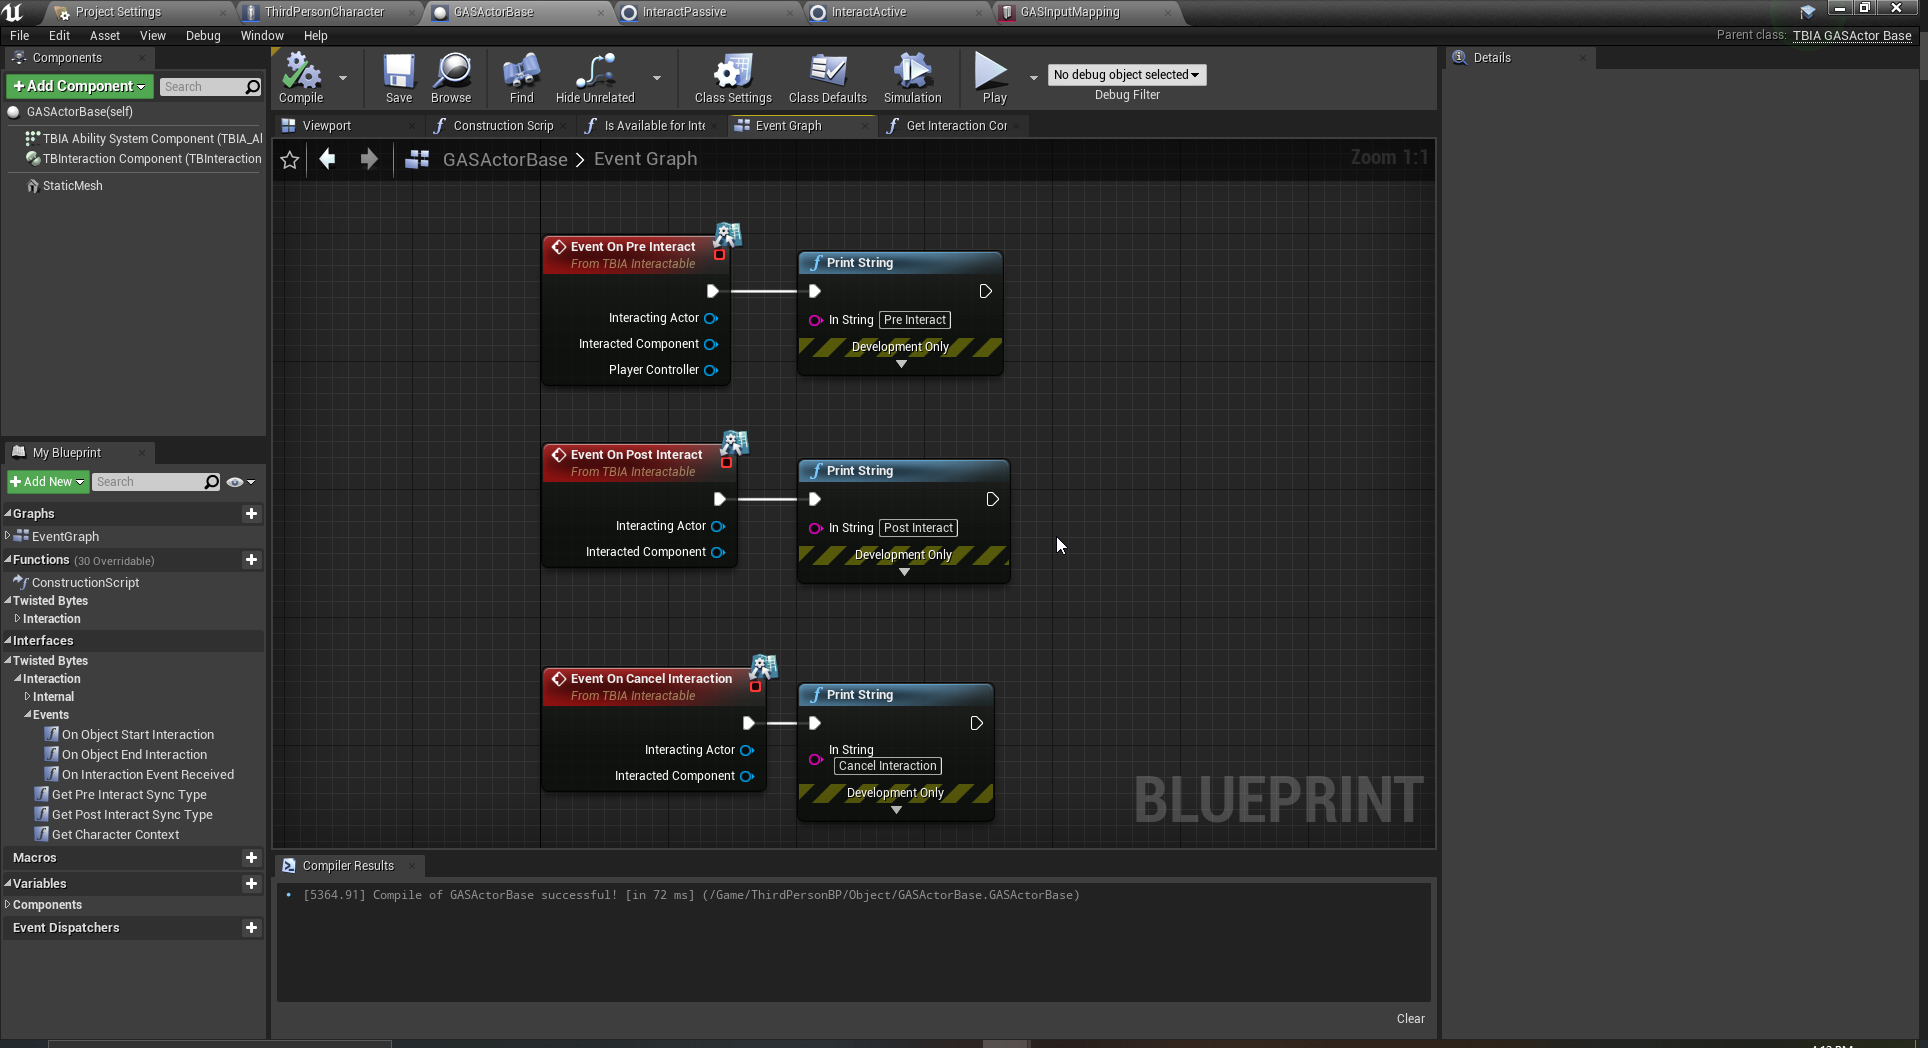
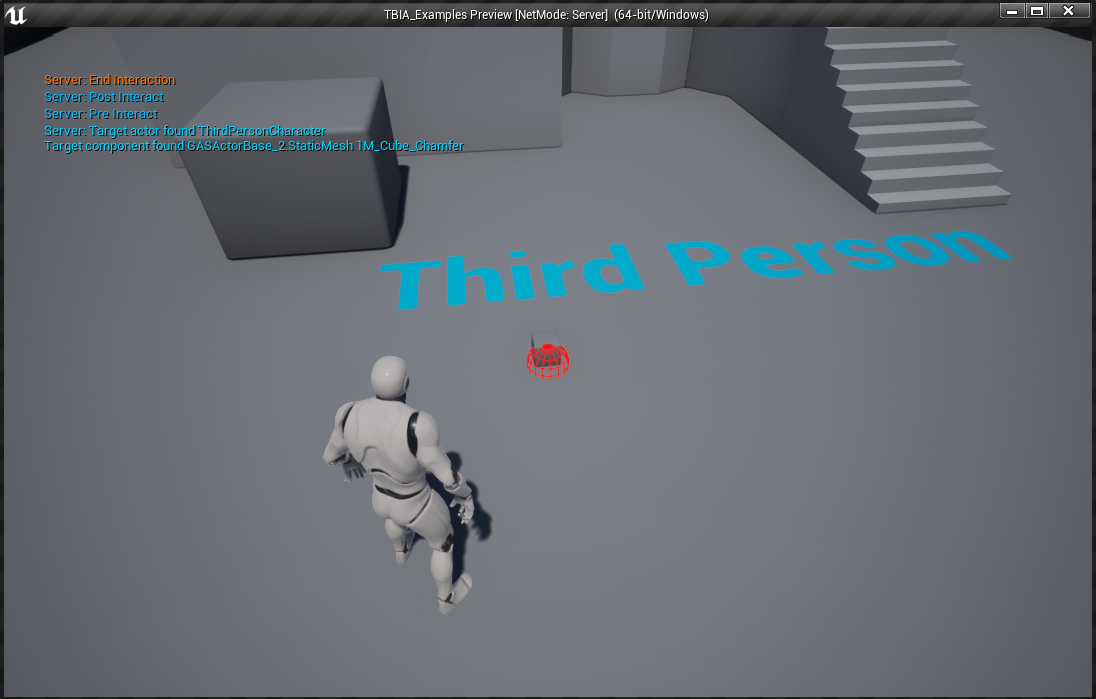
Press Play in the Unreal Editor, look at the cube and press the interaction button you have configured.
In our example case we set it to the E key. You should now see the same debug messages as shown in the image below.