Using Object Interaction Tag
Creating the Object Interaction Tag Ability
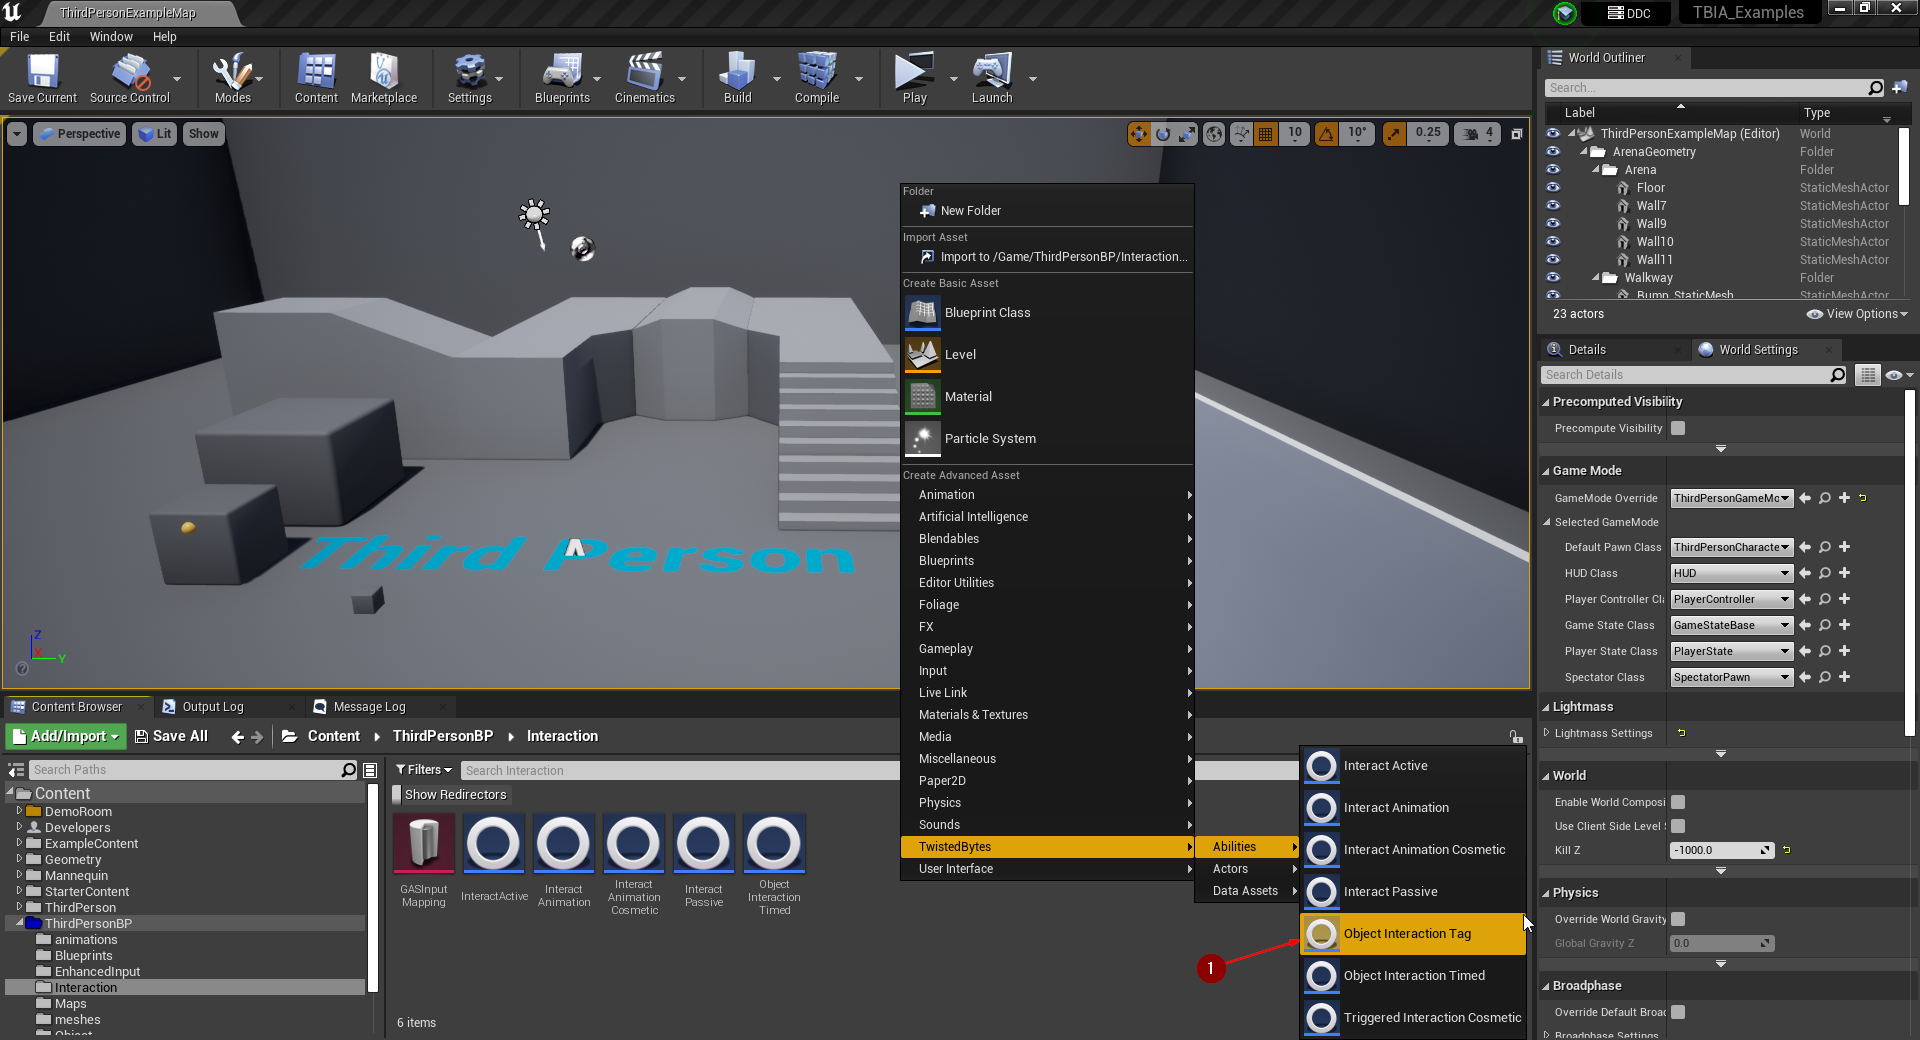
To create an Object Interaction Tag ability, right-click in the Content Browser
and select TwistedBytes | Abilities | Object Interaction Tag 1 as shown in the image below.
Name the newly created asset ObjectInteractionTag.
Creating the Interactable Actor
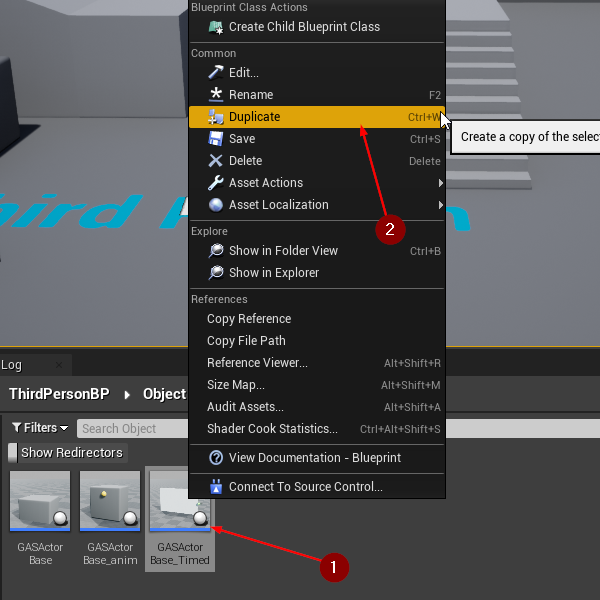
For an easier implementation, we are going to duplicate the GASActorBase_Timed that we created earlier
here to make use of what we setup before.
note
We are going to create a door that opens when a Player Character overlaps with a box collision that we will add in the next steps.
To do that, navigate to GASActorBase_Timed 1 and right-click then click on
Duplicate 2.
Name this newly created asset GASActorBase_Tag.
Setting up the Interactable Actor
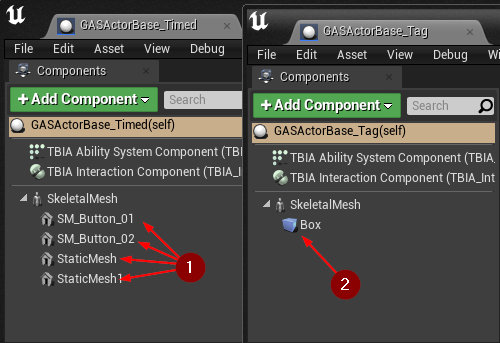
Open GASActorBase_Tag and delete the static meshes 1 that we added before in GASActorBase_Timed
which were serving as buttons for the Door.
Then click on Add Component, add a Box Collision component 2 and name it Box.
Now we need to grant the ObjectInteractionTag Gameplay Ability to this actor. We can do this by clicking on
TBIA Interaction Component 1. Then navigate to Details panel and under
TwistedBytes | Interaction | Config add ObjectInteractionTag 2 to the array
named Grant Abilities on Start.
note
We can use the default settings of ObjectInteractionTag Gameplay Ability so there is no need to modify it.
The setup is the same as we did in Using Object Interaction Timed.
Then you can scale the Box 3 and place it to let the character easily overlap with it at the front
and back side of the door mesh.

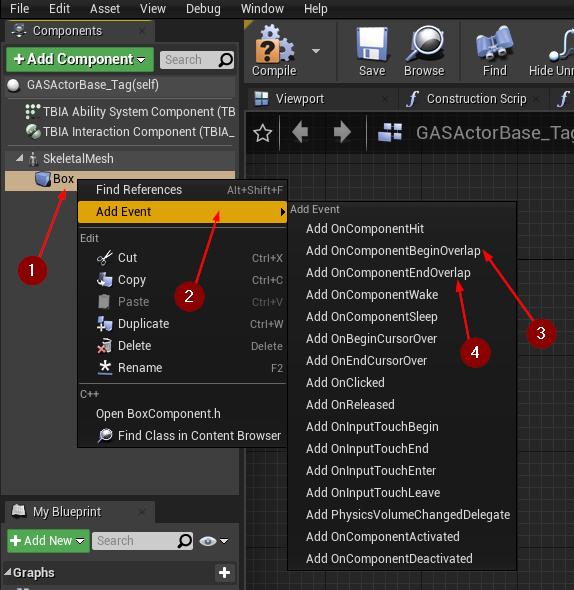
In the Components panel, right-click on the Box component 1 and select Add Event 2.
Then, select OnComponentBeginOverlap 3 and OnComponentEndOverlap 4 to add these event
handlers to the Event Graph.
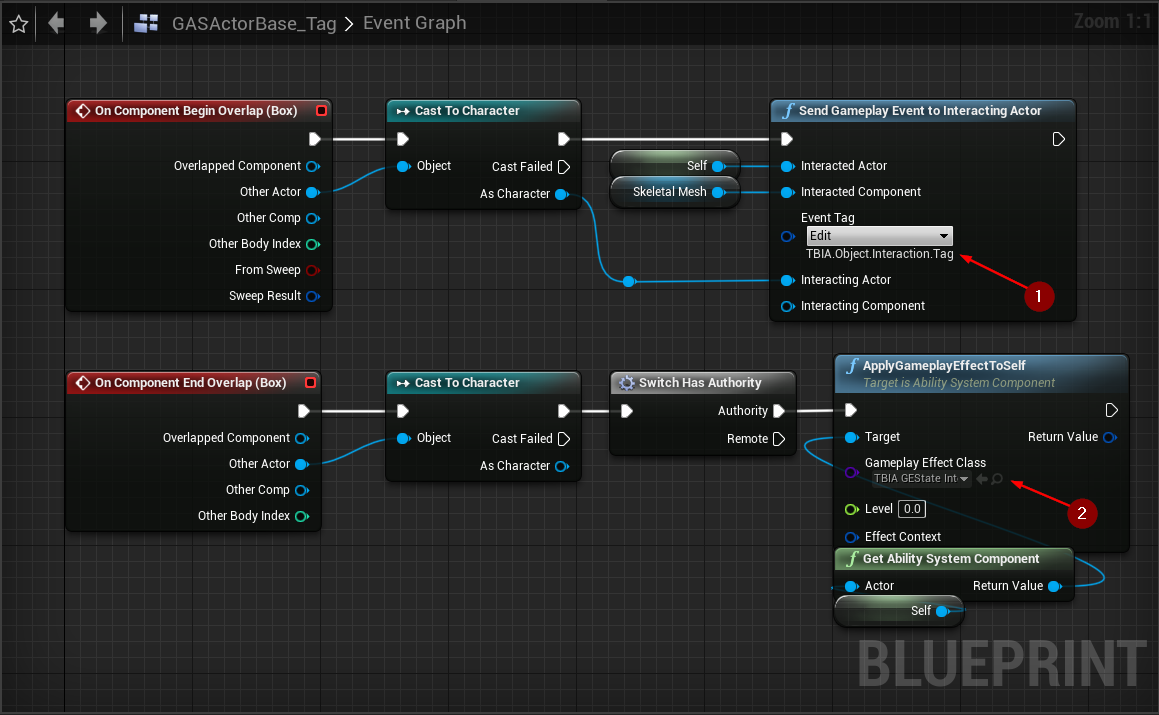
First on execution of OnComponentBeginOverlap we need to cast the Other Actor to Character to make sure that the
actor that overlapped with the Box is a valid instance of a Character.
If the cast is successful we then want to call a function named Send Gameplay Event to Interacting Actor.
We pass to this function the following arguments:
Interacted Actor: BlueprintSelfreferenceInteracted Component:Skeletal Mesh(this is the Door Skeletal Mesh)Event Tag:TBIA.Object.Interaction.Tag1
Lastly, we pass the Character reference from the previous cast-function as Interacting Actor argument.
note
This function will activate the ability ObjectInteractionTag which has the Gameplay Tag
TBIA.Object.Interaction.Tag and it will play the montage specified in the Interaction Context on the
Skeletal Mesh that is passed as Interacted Component.
The activated ability will have a reference to a Gameplay Effect which the ability will wait for to be applied in order cancel itself.
What is still left to do is to make the door close again when the Character exits the collision box.
On execution of OnComponentEndOverlap we cast OtherActor to Character to check if the actor which ended this
overlap is actually a valid instance of a Character.
If true, we use the Switch Has Authority Macro to make sure this code is only run on the server.
So, on Authority, we call ApplyGameplayEffectToSelf function and pass AbilitySystemComponent from Blueprint
Self reference to the Target argument.
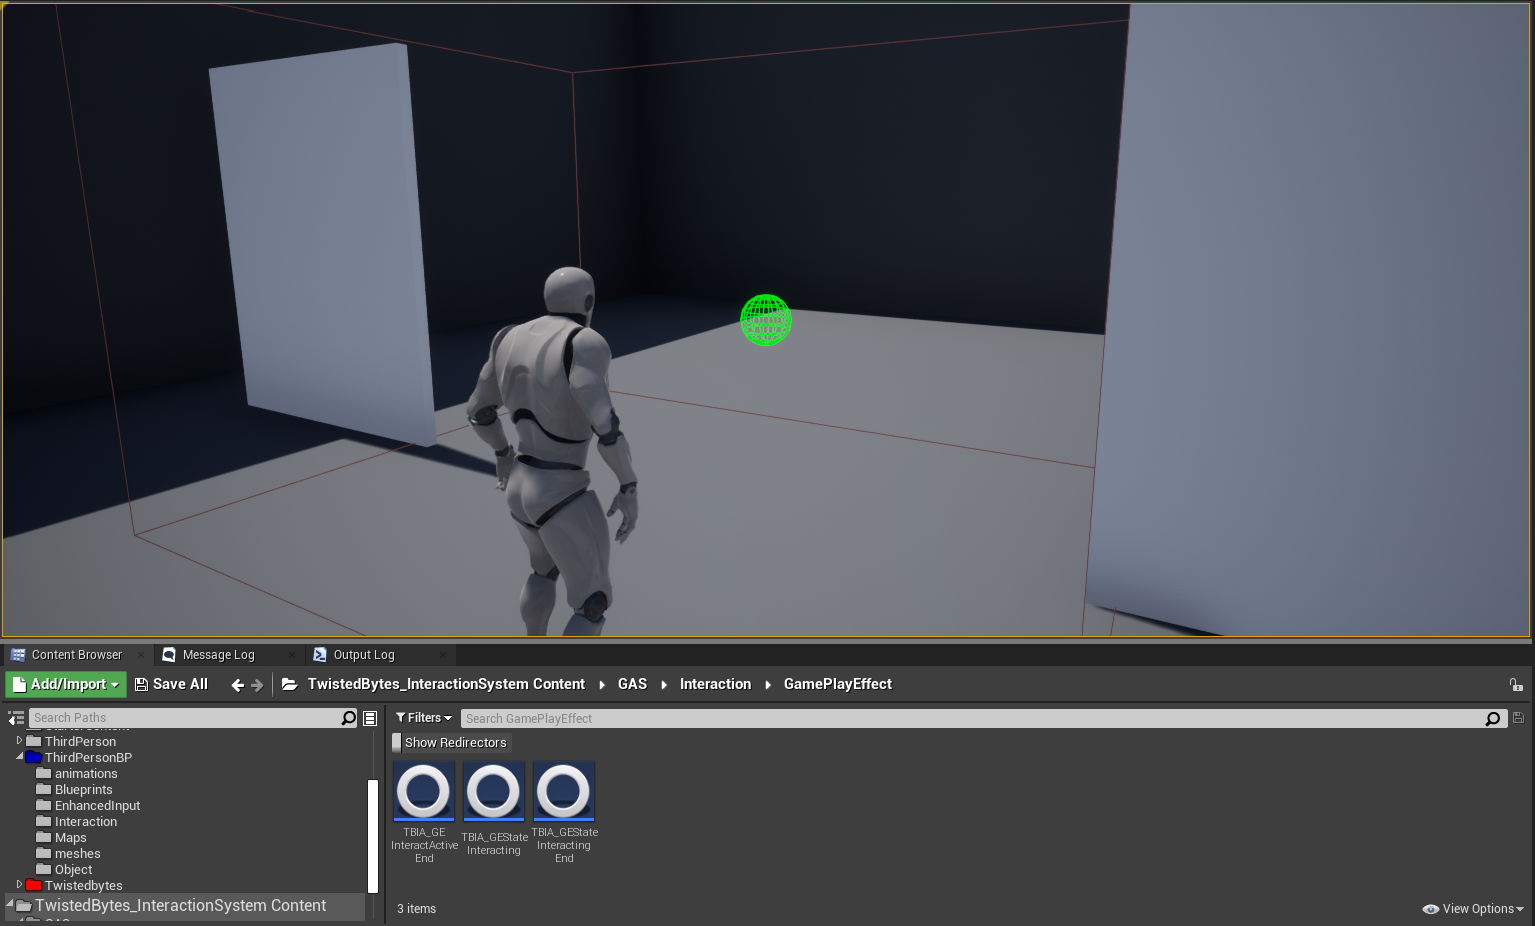
Then in we pass the class TBIA_GEStateInteractingEnd as argument for Gameplay Effect Class 2
that you can find in the plugin content TwistedBytes_InteractionSystem Content/GAS/Interaction/GamePlayEffect.
Testing the Interactable Actor
Press play and walk up to the door actor. The moment you overlap with the *Box Collision` component, the interaction will be triggered and result in opening the door.